KIA Niro: Front Bumper Cover, Front Bumper Beam Assembly
Kia Niro - First generation - (DE) (2017-2022) - Service and Repair Manual / Body (Interior And Exterior) / Front Bumper / Front Bumper Cover, Front Bumper Beam Assembly
Front Bumper / Components And Components Location
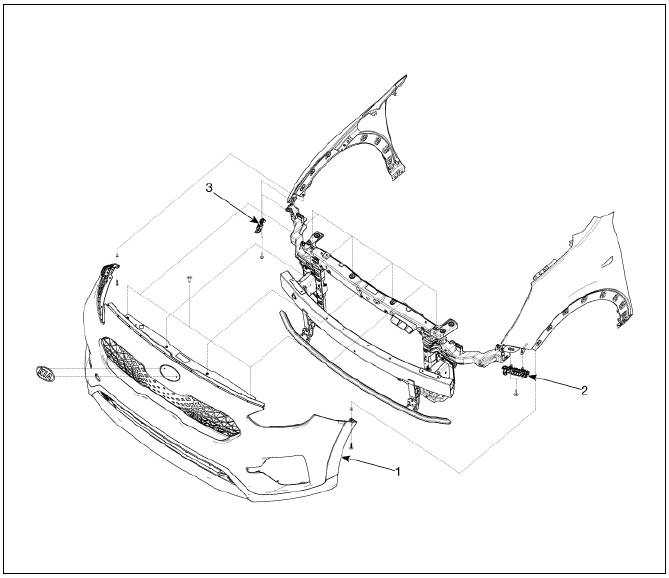
- Front bumper cover
- Front bumper side bracket (LH)
- Front bumper side bracket (RH)
Front Bumper Cover Components and components location
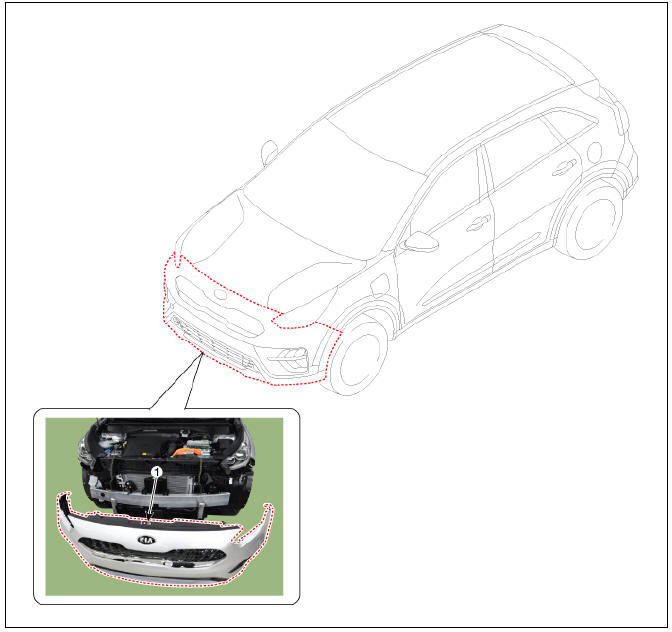
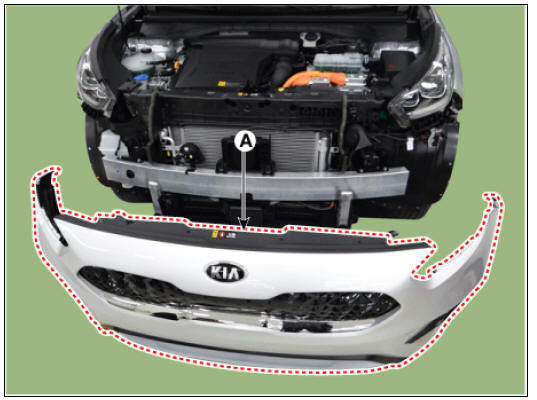
- Front bumper assembly
Front Bumper Cover Repair procedures
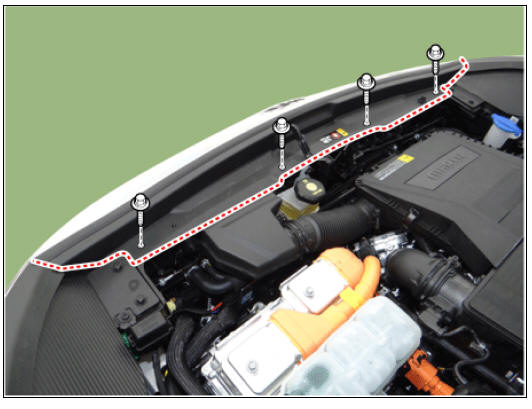
- Loosen the front bumper upper mounting bolts.
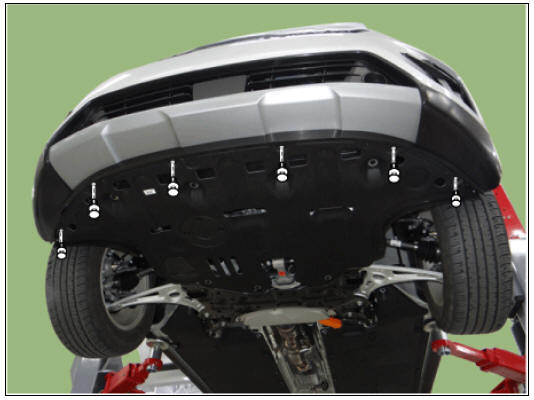
- Loosen the front bumper lower mounting clips.
- After loosening the clips and screw on the side of front bumper assembly (A), detach the side part of front bumper assembly.
Warning
When you pull out the front bumper assembly, the side part of the front bumper assembly could be damaged by the projection.

- Press the lock pin and separate the front bumper main connector (A).
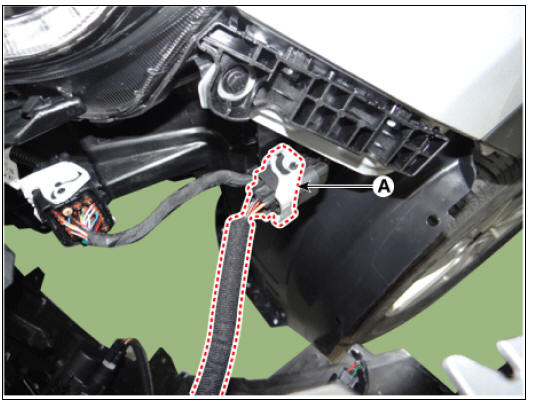
- Remove the front bumper assembly (A).
- To install, reverse the removal procedure.
Warning
- Replace any damaged clips (or pin-type retainers).
- Make sure the connector are connected in properly
Front Bumper Beam Assembly
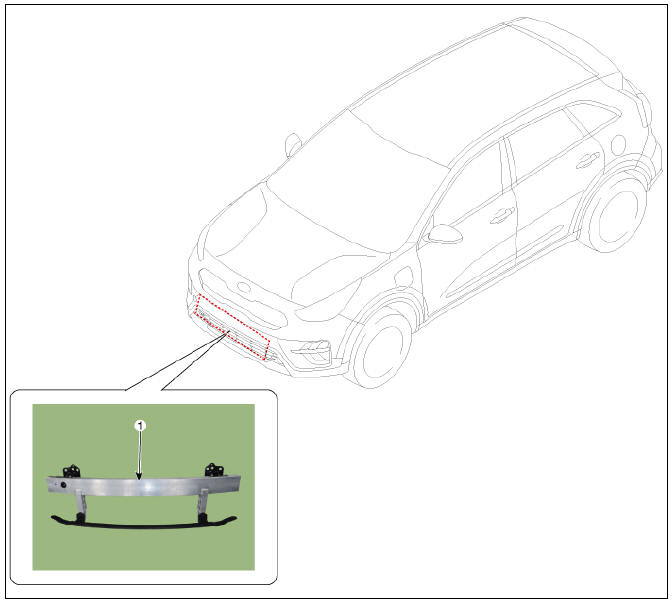
- Front bumper beam assembly
Replacement
- Remove the front bumper assembly.
(Refer to Front bumper - "Front Bumper Assembly")
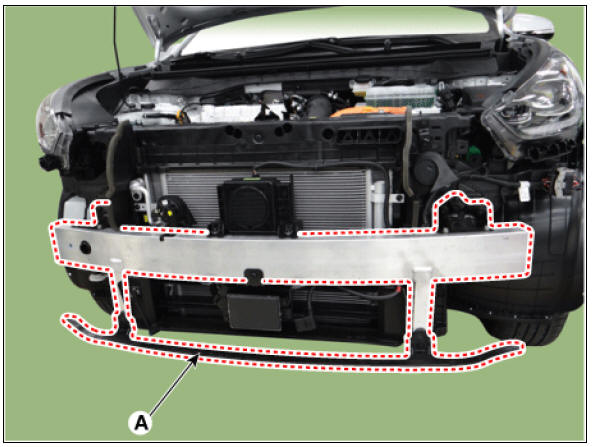
- Loosen the mounting bolts and nuts, remove the front bumper beam assembly (A).
Tightening torque
Bolts : 21.6 - 26.5 N*m (2.2 - 2.7 Kgf*m, 15.9 - 19.5 lb*ft)
Nuts : 3.9 - 5.9 N*m (0.4 - 0.6 Kgf*m, 2.9 - 4.3 lb*ft)
- Remove the horn.
(Refer to Body Electrical System - "horn")
- Remove the FCA Radar.
(Refer to Advancde Driver Assistance System (ADAS) - "Front Radar Unit")
- Remove the VESS speaker.
(Refer to Body Electrical System - "Virtual Engine Sound Speaker")
- To install, reverse the removal procedure.
Warning
Replace any damaged clips (or pin-type retainers).
READ NEXT:
 Radiator Grille
Radiator Grille
Replacement
Remove the front bumper assembly.
(Refer to Front Bumper - "Front Bumper Assembly")
Remove the front bumper wiring (A).
Remove the front bumper energy absorber (A).
After loo
SEE MORE:
Driver Airbag (DAB) Module and Clock Spring
Driver Airbag (DAB) Module and Clock Spring Description and operation
Description
Driver Airbag (DAB) is installed in the steering wheel and electrically
connected to SRSCM via the
clock spring.
It protects the driver by deploying the airbag
Piston, rings
Clean piston.
(1) Using a gasket scraper, remove the carbon from the piston top.
(2) Using a groove cleaning tool or broken ring, clean the piston ring grooves.
(3) Using solvent and a brush, thoroughly clean the piston.
Warning
Do not
Categories
- Home
- KIA Niro EV, Hybrid - Second generation - (SG2) (2021-2024) - Owner's manual
- Kia Niro - First generation - (DE) (2017-2022) - Service and Repair Manual
- Contact Us