
KIA Niro: Rear Seat Assembly | Rear Seat Back Cover
Kia Niro - First generation - (DE) (2017-2022) - Service and Repair Manual / Body (Interior And Exterior) / Rear Seat / Rear Seat Assembly | Rear Seat Back Cover
Rear seat back assembly
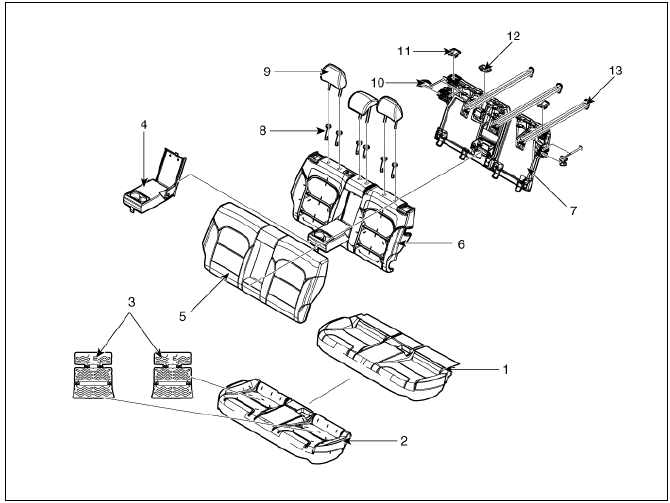
- Rear seat cushion covering
- Rear seat cushion pad
- Rear seat cushion heater
- Rear seat armrest
- Rear seat back covering
- Rear seat back pad
- Rear seat back frame
- Rear seat headrest guide
- Rear seat headrest
- Rear seat back latch cover
- Rear seat back bezel
- Rear seat back webbing cover
- Rear seat back tether anchor cover
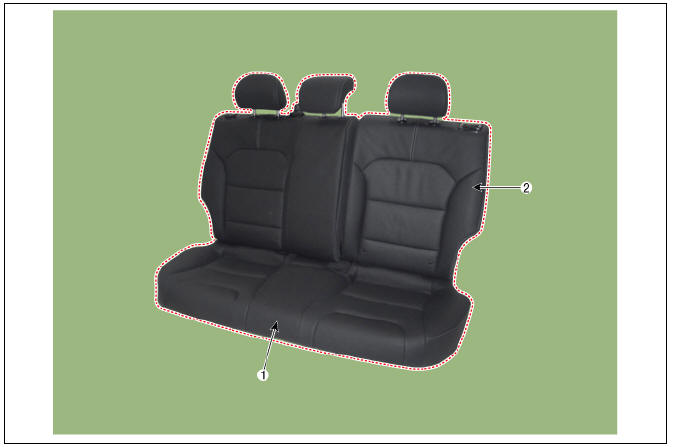
- Rear seat cushion assembly
- Rear seat back assembly
Rear seat cushion assembly
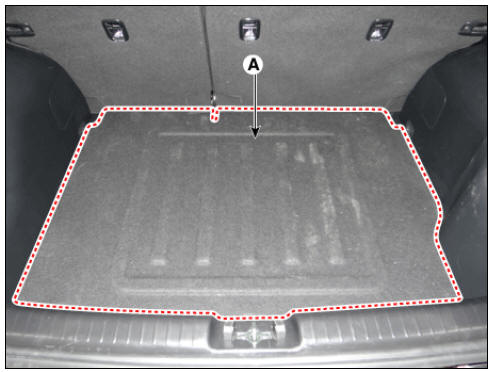
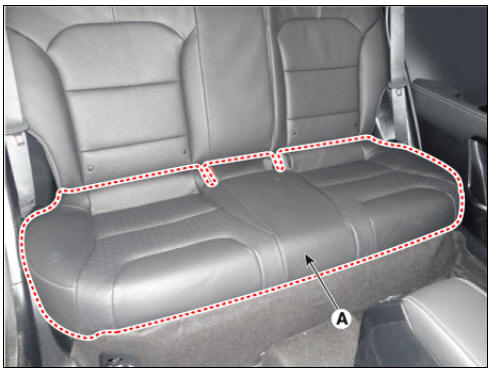
- Remove the luggage board (A).
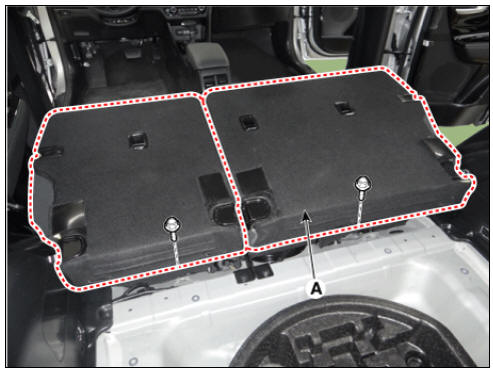
- Remove the rear seat cushion (A) after loosening the mounting bolts.
Tightening torque : 16.8 - 25.5 N*m (1.7 - 2.6 kgf*m, 12.3 - 18.8 lb*ft)
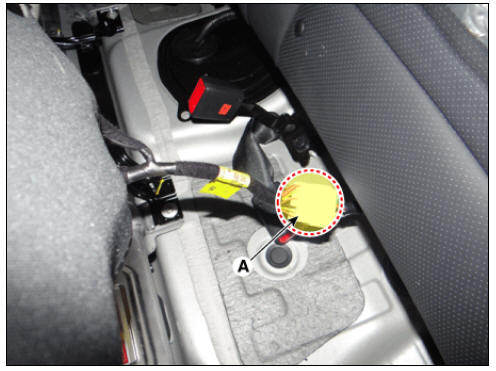
- Disconnect the rear seat main wiring connector (A).
- Install in the reverse order of removal.
Warning
Make sure the connector is connected properly.
Rear seat back assembly
- Remove the rear seat cushion assembly.
(Refer to Rear Seat - "Rear Seat Assembly")
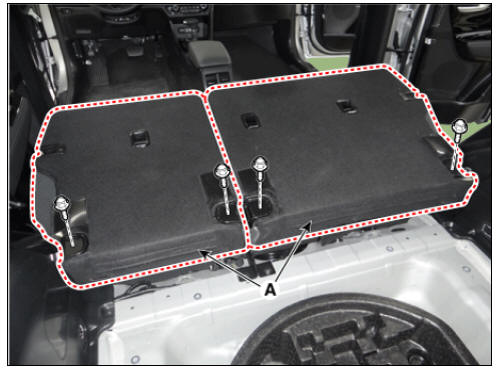
- Remove the rear seat back (A) after loosening the mounting bolts.
Tightening torque : 16.8 - 25.5 N*m (1.7 - 2.6 kgf*m, 12.3 - 18.8 lb*ft)
- Install in the reverse order of removal.
Rear Seat Back Cover
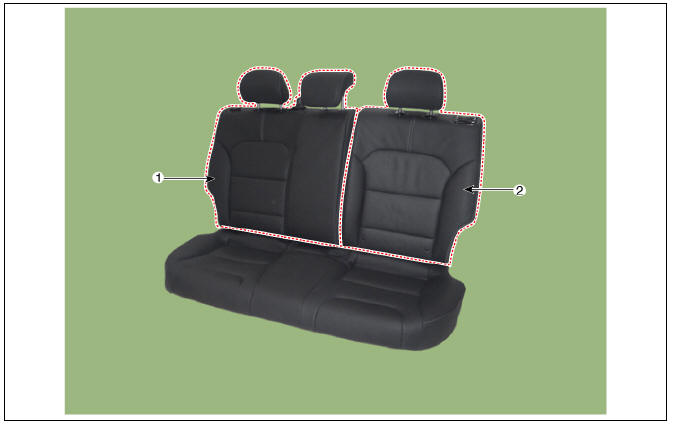
- Rear seat back cover (RH)
- Rear seat back cover (LH)
Replacement
LH
- Remove the rear seat back assembly (LH).
(Refer to Rear Seat - "Rear Seat Assembly")
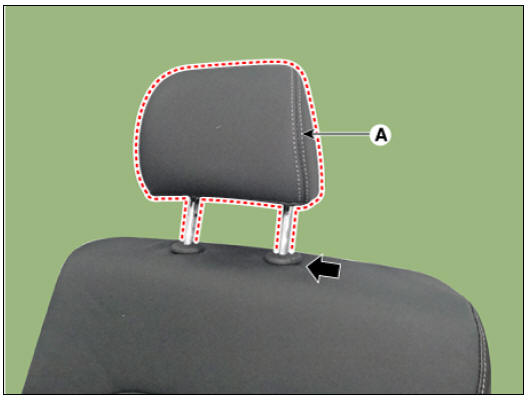
- Push the lock pin and remove the rear seat headrest (A).
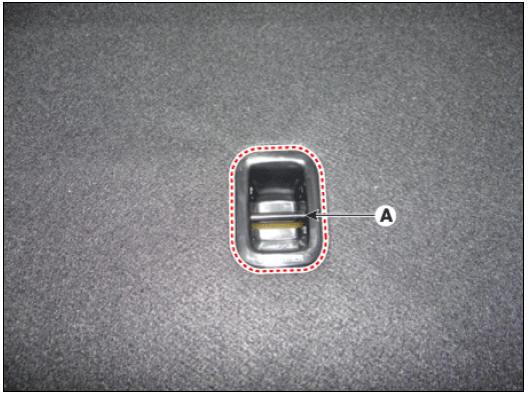
- Remove the child anchor cover (A) by using a remover
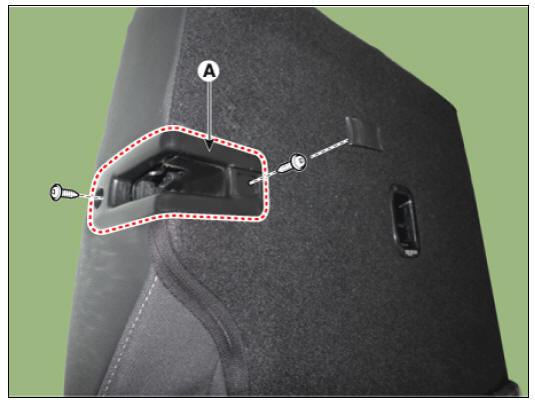
- Remove the rear seat latch cover (A) after loosening the cap & screws.
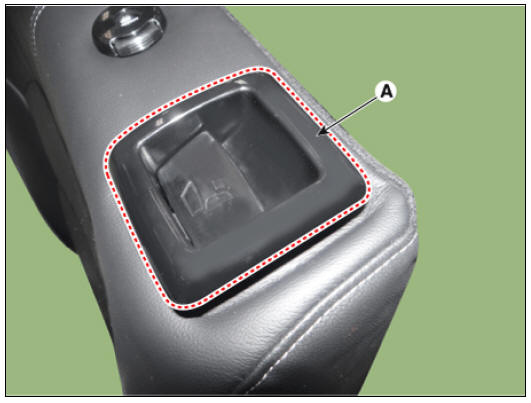
- Remove the bezel upper cover (A) by using a remover.
- Remove the rear seat back dust cover (A).
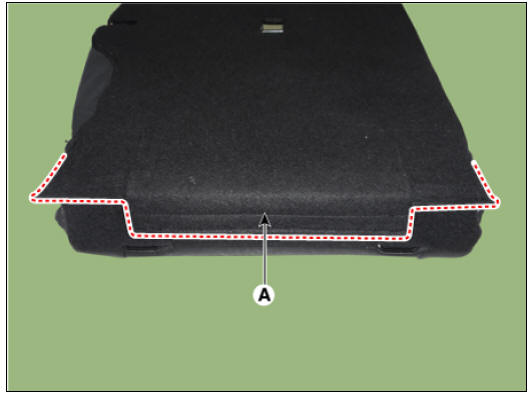
- Separate the seat back lower protector (A).
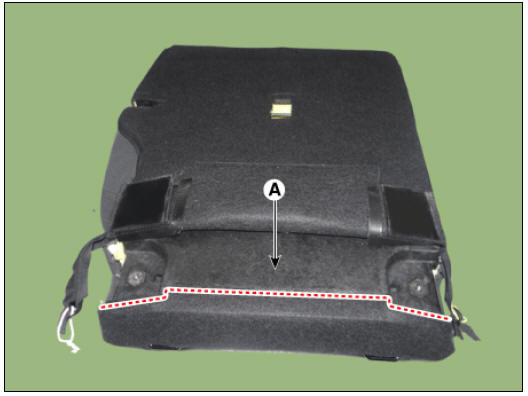
- Open the seat back side zipper (A).
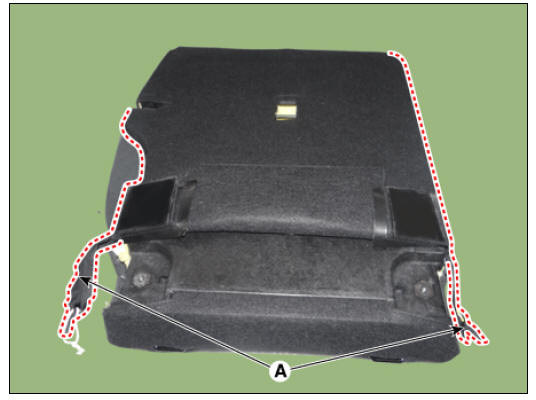
- Pull out the rear seat headrest guides (A) while pinching both sides of the lower part of the guides, and remove them.
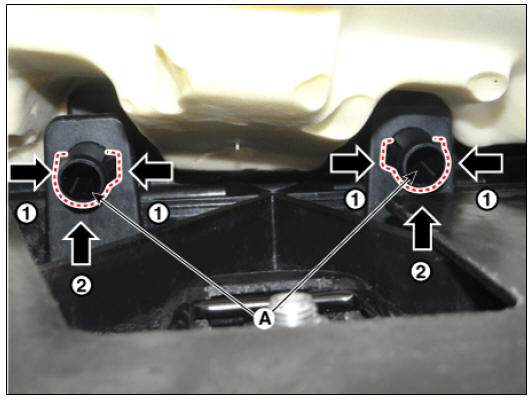
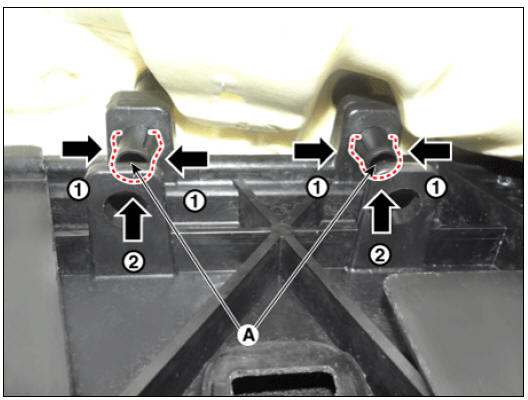
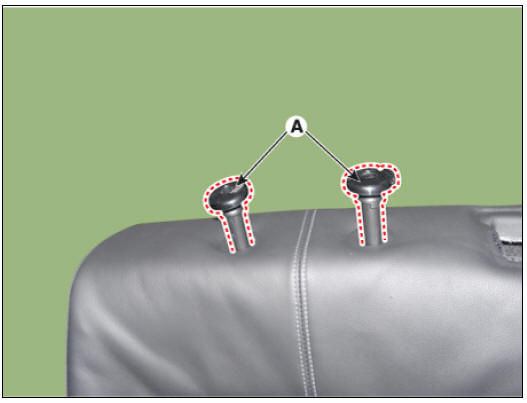
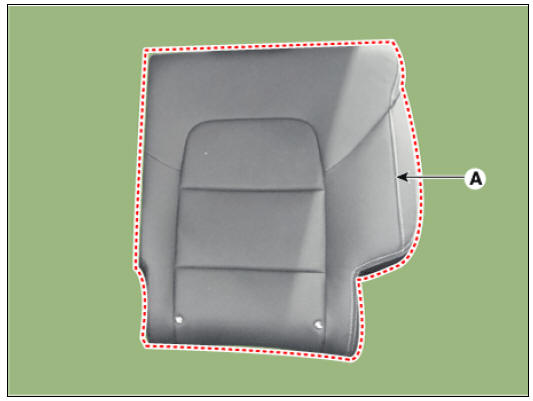
- Remove the rear seat back cover (A) from the rear seat back frame.
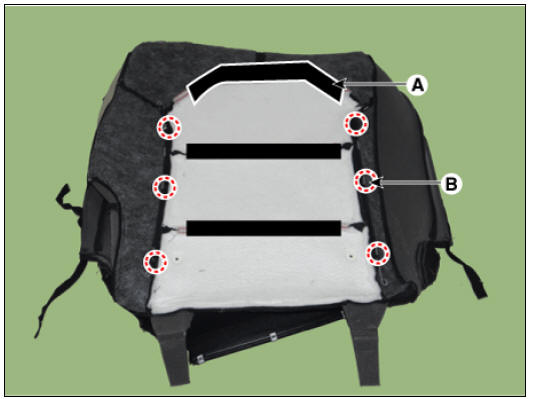
- Remove the seat cushion cover after removing the Velcro tape (A) and hog-ring clips (B) inside the rear seat cushion cover.
- Install in the reverse order of removal.
Warning
- Make sure that the connectors are plugged in properly.
- Replace any damaged clips.
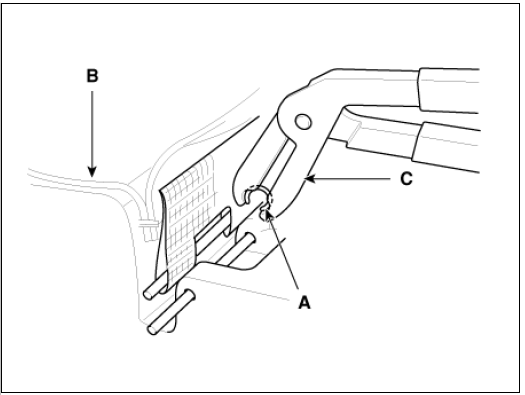
- To prevent wrinkles, make sure that the material is stretched evenly over the cover (B) before securing the hog-ring clips (A).
- Replace the hog-ring clips with new ones using special tool (C) (09880-4F000).
RH
- Remove the rear seat back assembly (RH).
(Refer to Rear Seat - "Rear Seat Assembly")
- Remove the rear seat back armrest.
(Refer to Rear Seat - "Rear Back Armrest")
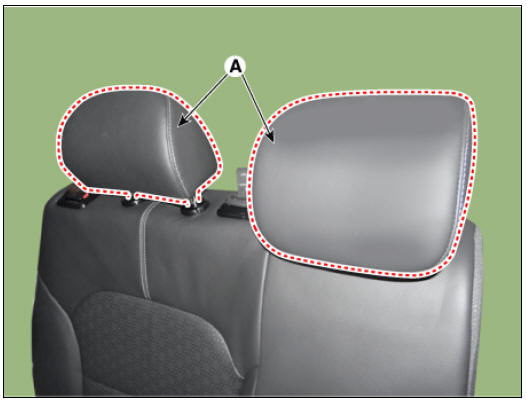
- Push the lock pin, and remove the rear seat headrest (A).
- Remove the child anchor cover (A) by using a remover.
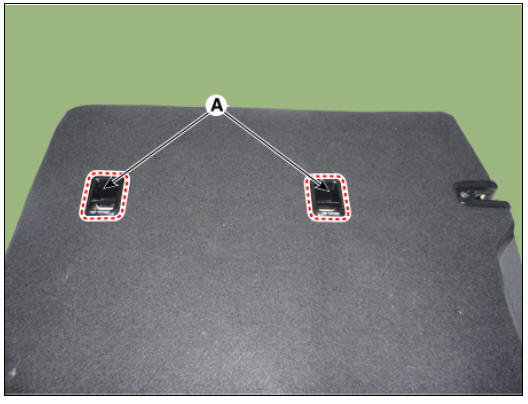
- Remove the rear seat latch cover (A) after loosening the cap & screws.
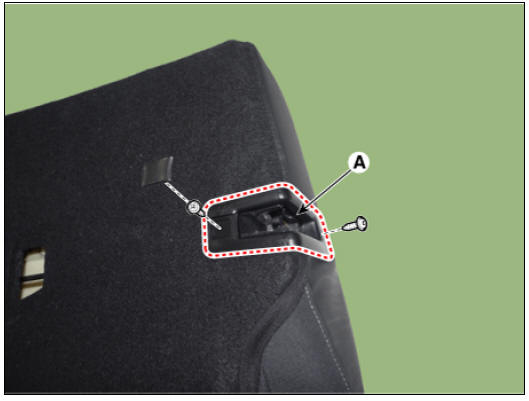
- Remove the bezel upper cover (A) by using a remover.
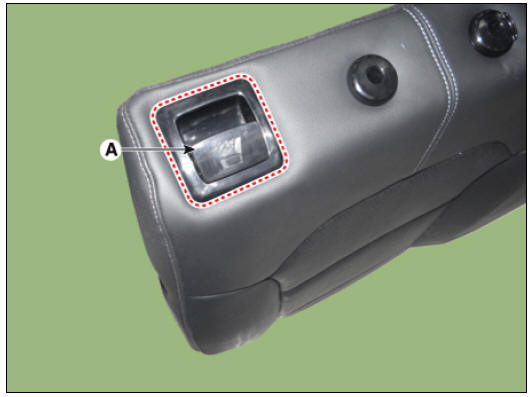
- Remove the rear seat back webbing guide (A) by using a remover.
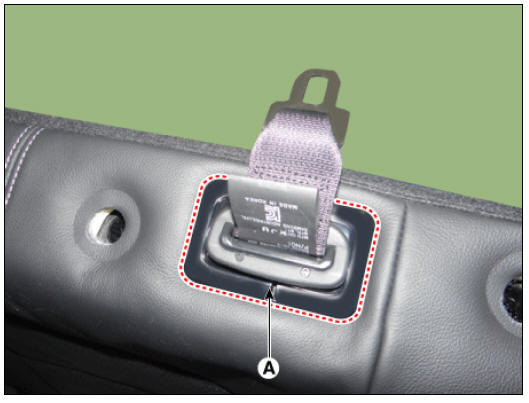
- Remove the rear seat back dust cover (A)..
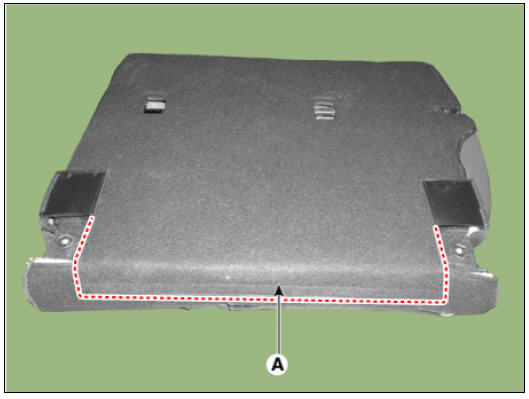
- Separate the seat back lower protector (A).
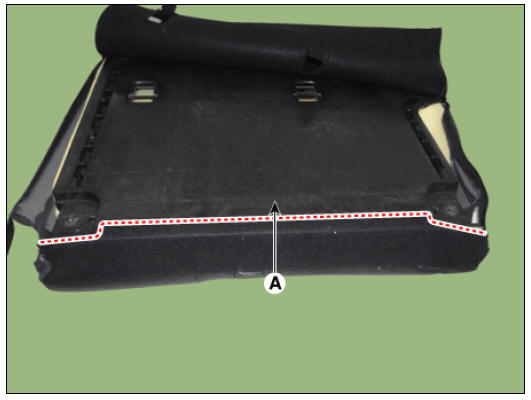
- Open the seat back side zipper (A).
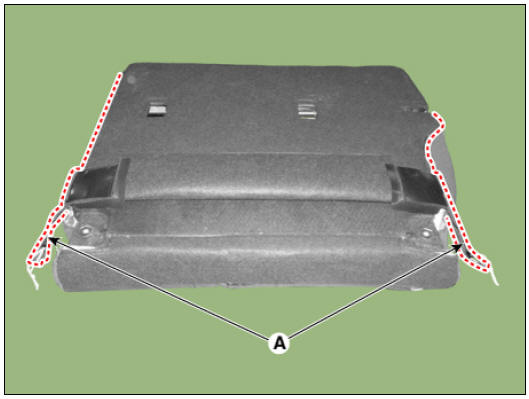
- Pull out the rear seat headrest guides (A) while pinching both sides of the lower part of the guides, and remove them.
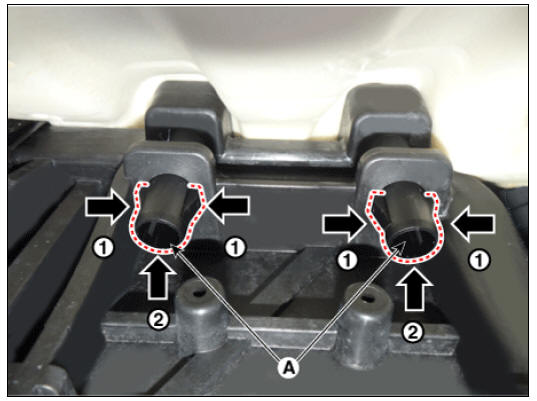
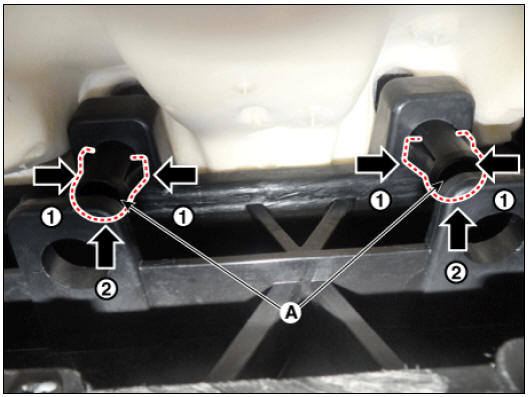
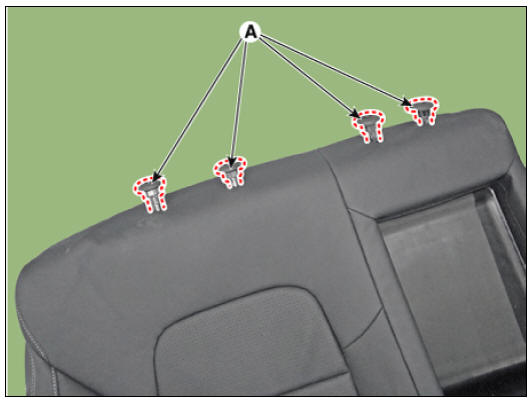
- Remove the front seat back covering (C) after removing the velcro tape (A) and hog-ring clip (B).
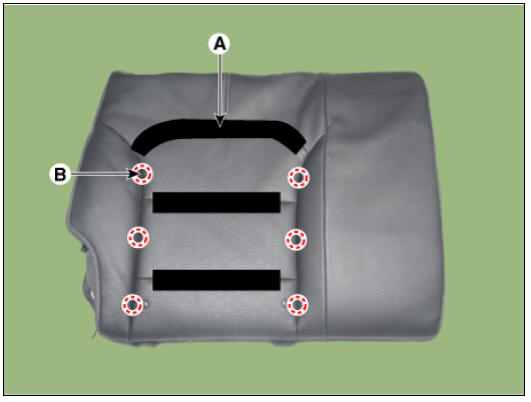
- Install in the reverse order of removal.
Warning
- Make sure that the connectors are plugged in properly.
- Replace any damaged clips.
- To prevent wrinkles, make sure that the material is stretched evenly over the cover (B) before securing the hog-ring clips (A).
- Replace the hog-ring clips with new ones using special tool (C) (09880-4F000).
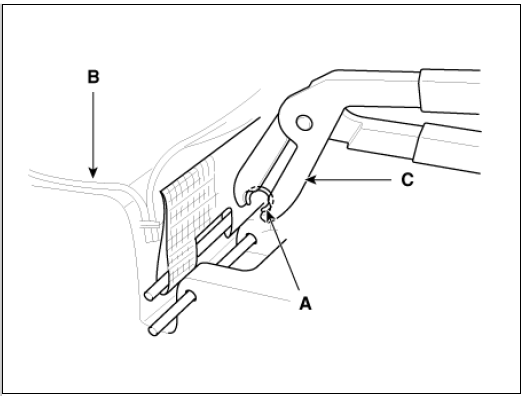
READ NEXT:
 Rear Seat Cushion Cover | Rear Back Armrest
Rear seat cushion cover
Replacement
Remove the seat assembly.
(Refer to Rear Seat - "Rear Seat Assembly")
Remove the rear seat cushion cover (A) after removing the hog-ring clips on the rear of seat cushi
SEE MORE:
Manual Speed Limit Assist (MSLA)
Speed Limit indicator
Set speed
You can set the speed limit when you do
not want to drive over a specific speed.
If you drive over the preset speed limit,
Manual Speed Limit Assist operates (set
speed limit will blink and chime will
LCD display
messages
Ready to drive
A: Ready to start driving
This message is displayed when the
vehicle is ready to be driven.
Check regenerative brakes
A: Check regenerative brakes
This message is displayed when the
brake performance is low or the regene
Categories
- Home
- KIA Niro EV, Hybrid - Second generation - (SG2) (2021-2024) - Owner's manual
- Kia Niro - First generation - (DE) (2017-2022) - Service and Repair Manual
- Contact Us
