KIA Niro: Rear transverse trim | Luggage Side Trim Repair procedures
Kia Niro - First generation - (DE) (2017-2022) - Service and Repair Manual / Body (Interior And Exterior) / Interior Trim / Rear transverse trim | Luggage Side Trim Repair procedures
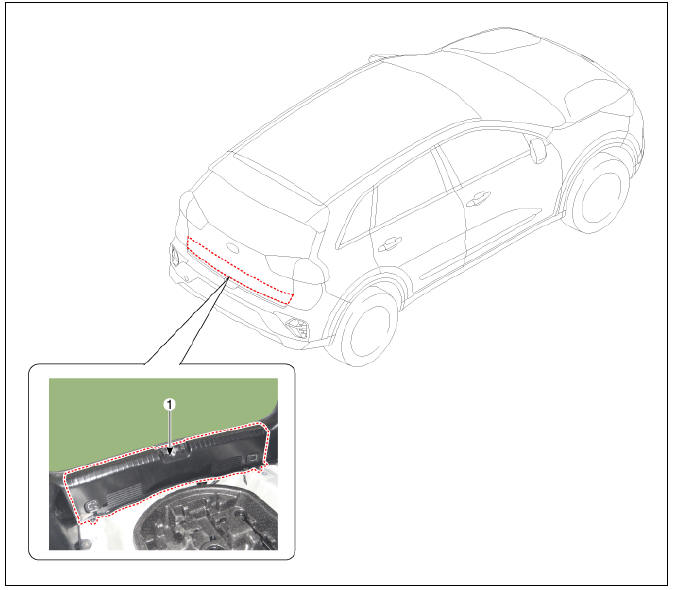
- Rear transverse trim
Replacement
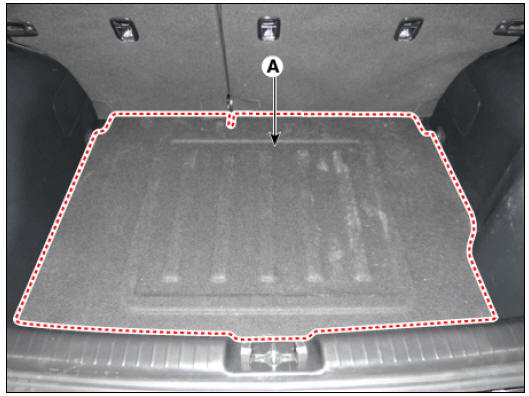
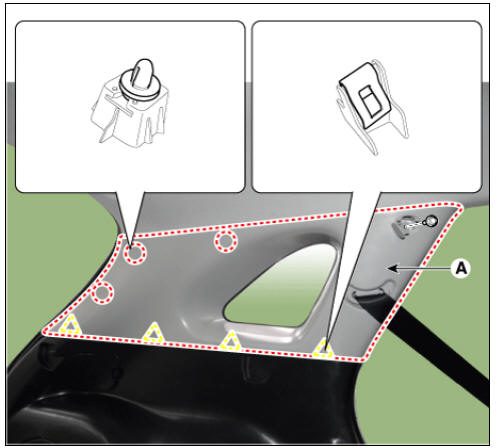
- Remove the luggage board (A).
- Disconnect the tailgate weatherstrip.
- Remove the rear transverse trim (A).
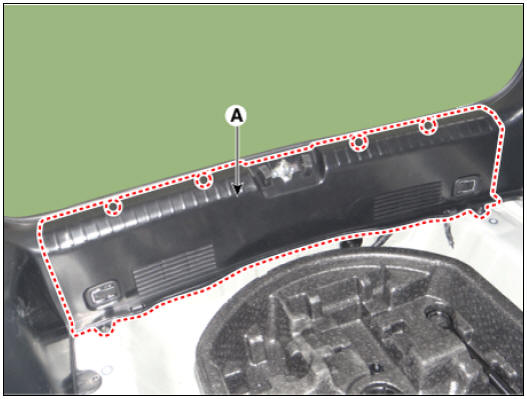
- Install in the reverse order of removal.
Warning
Make sure that the connector is plugged in properly.
Luggage Side Trim Repair procedures
Luggage Side Trim Components and components location
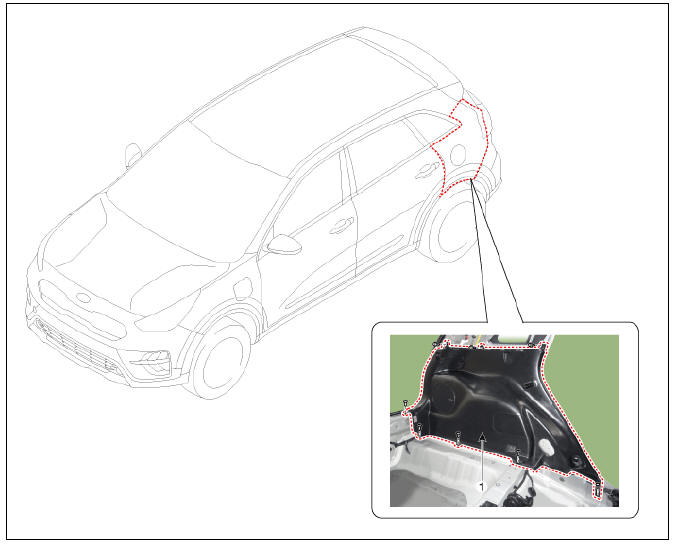
- Luggage side trim
Replacement
Warning
Put on gloves to protect your hands.
Warning
- Use a plastic panel removal tool to remove interior trim pieces without marring the surface.
- Be careful not to bend or scratch the trim and panels.
- Remove the rear seat assembly.
(Refer to Rear Seat - "Rear Seat Assembly")
- Remove the rear door scuff trim.
(Refer to Interior Trim - "Door Scuff Trim")
- Remove the rear transverse trim.
(Refer to Interior Trim - "Rear Transverse Trim")
- Carefully remove the rear door body side weatherstrip and tailgate weatherstrip.
- Separate the rear seat belt lower anchor (A) after loosening the mounting bolt.
Tightening torque : 39.2 - 53.9 N*m (4.0 - 5.5 kgf*m, 28.8 - 39.8 lb*ft)

- Remove the rear pillar trim (A) after loosening the bolt.
- Remove the rear seat folding bracket (A) after loosening the bolts.

- Remove the luggage side trim (A) after loosening the mounting screws.
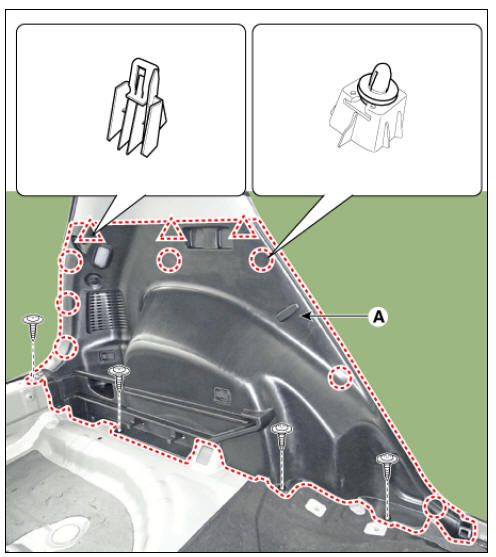
- Install in the reverse order of removal.
Warning
Replace any damaged clips.
READ NEXT:
 Rear pillar trim
Component Location
Rear pillar trim
Replacement
Separate the rear seat belt lower anchor (A) after loosening the bolt.
Remove the rear pillar trim (A) after loosening the mounting bolts.
Install in the reverse order
SEE MORE:
Engine Mechanical System
Specifications
Liquid Gasket
Tightening Torques
Warning
Torque - to - yield cylinder head, connecting rod cap and crankshaft
main bearing cap bolts must
be replaced once removed because the bolts are
Cluster Fascia Panel | Center Fascia Panel
Cluster Fascia Panel Components and components location
Cluster fascia panel assembly
Cluster Fascia Panel Repair procedures
Replacement
Warning
Put on gloves to protect your hands.
Warning
Use a plastic panel removal tool to r
Categories
- Home
- KIA Niro EV, Hybrid - Second generation - (SG2) (2021-2024) - Owner's manual
- Kia Niro - First generation - (DE) (2017-2022) - Service and Repair Manual
- Contact Us