KIA Niro: Door Scuff Trim | Cowl Side Trim
Kia Niro - First generation - (DE) (2017-2022) - Service and Repair Manual / Body (Interior And Exterior) / Interior Trim / Door Scuff Trim | Cowl Side Trim
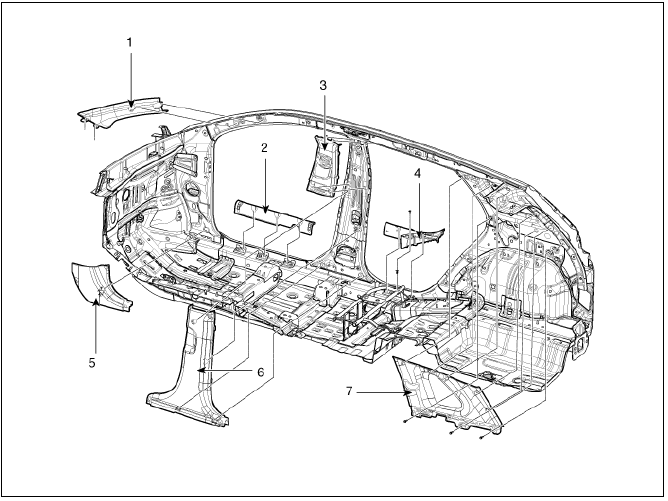
- Front pillar trim
- Front door scuff trim
- Center pillar upper trim
- Rear door scuff trim
- Cowl side trim
- Center pillar lower trim
- Rear pillar trim
Door Scuff Trim
Component Location
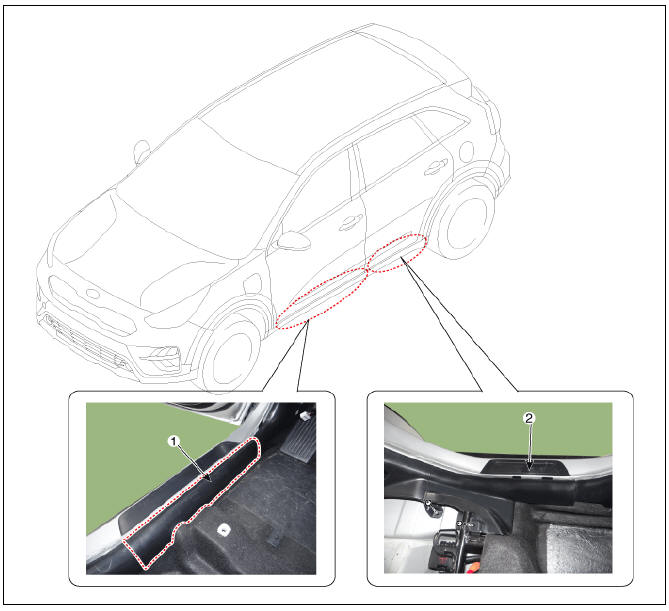
- Front door scuff trim
- Rear door scuff trim
Door Scuff Trim Repair procedures
Replacement
Front Door Scuff Trim
- Using a remover, remove the front door scuff tirm (A).
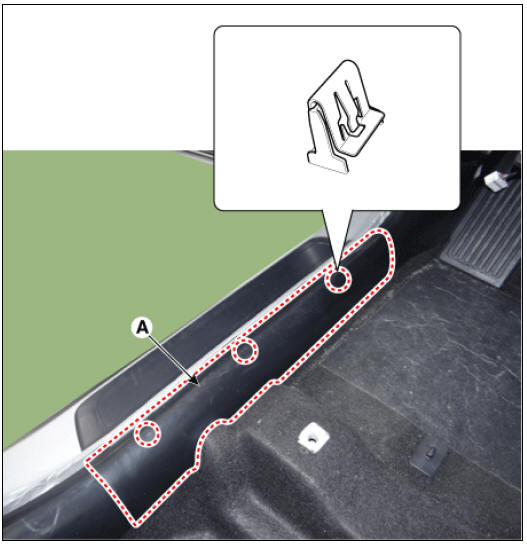
- Install in the reverse order of removal.
Warning
Replace any damaged clips.
Rear Door Scuff Trim
- Remove the rear door scuff trim (A) after loosening the screws.
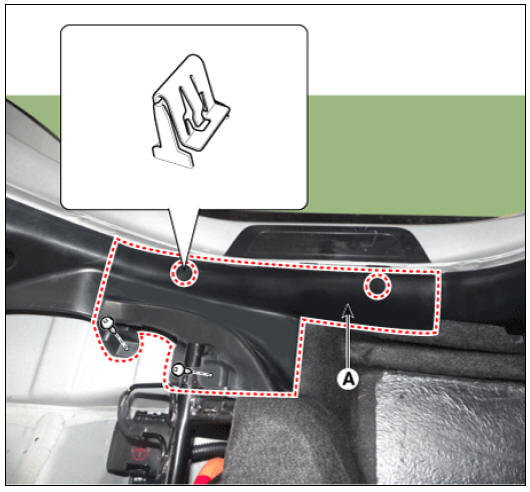
- Install in the reverse order of removal.
Warning
Replace any damaged clips.
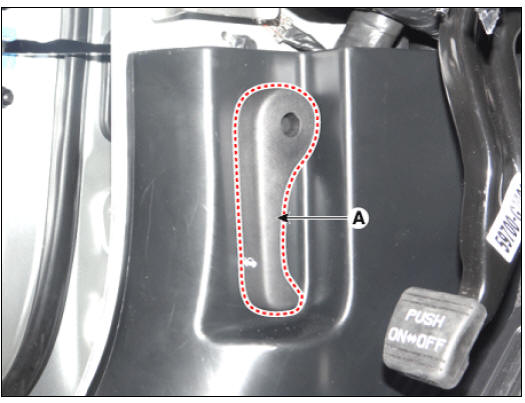
Cowl Side Trim
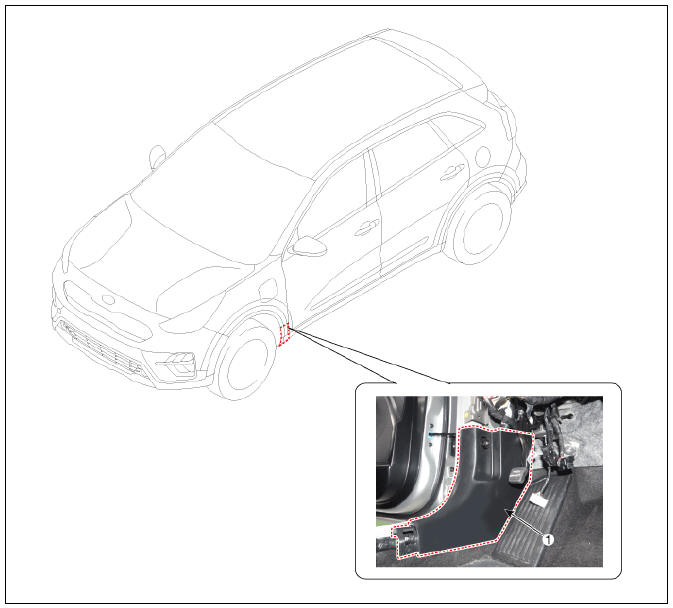
- Cowl side trim
Replacement
Warning
Put on gloves to protect your hands.
Warning
- Use a plastic panel removal tool to remove interior trim pieces without marring the surface.
- Be careful not to bend or scratch the trim and panels.
- Remove the front door scuff trim.
(Refer to Interior Trim - "Door Scuff Trim")
- Remove the hood latch release handle (A).
- Carefully remove the front door body side weatherstrip.
- Using a remover, remove the cowl side trim (A).
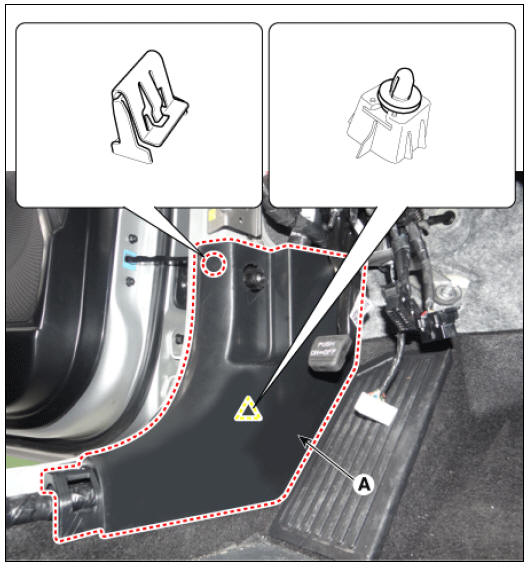
- Install in the reverse order of removal.
Warning
Replace any damaged clips.
READ NEXT:
 Front pillar trim
Front pillar trim
Replacement
Warning
Put on gloves to protect your hands.
Warning
Use a plastic panel removal tool to remove interior trim pieces without marring the surface.
Be careful not to bend or scratch the trim and
SEE MORE:
Wheel alignment and tire
balance
The wheels on your vehicle were aligned
and balanced carefully at the factory to
give you the longest tire life and best
overall performance.
If you notice your vehicle vibrating when
driving on a smooth road, your wheels
may need to be rebal
Normal maintenance schedule - for Australia and New Zealand
The following maintenance services must be performed to ensure good emission
control and performance. Keep
receipts for all vehicle emission services to protect your warranty. Where both
mileage and time are shown, the frequency
of service is d
Categories
- Home
- KIA Niro EV, Hybrid - Second generation - (SG2) (2021-2024) - Owner's manual
- Kia Niro - First generation - (DE) (2017-2022) - Service and Repair Manual
- Contact Us