KIA Niro: Fuel Filler Door / Repair Procedures | Charge Port Door Housing Assembly
Kia Niro - First generation - (DE) (2017-2022) - Service and Repair Manual / Body (Interior And Exterior) / Fuel Filler Door / Fuel Filler Door / Repair Procedures | Charge Port Door Housing Assembly
Components and components location
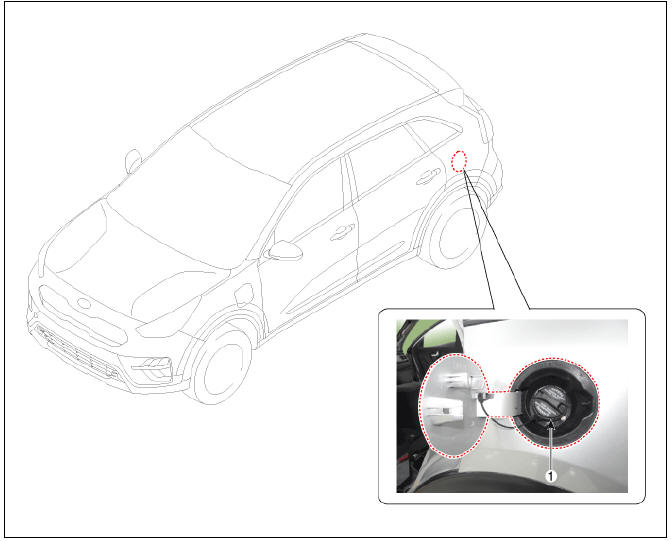
- Fuel filler door
Fuel Filler Door / Repair Procedures
Replacement
Warning
Use a plastic panel removal tool to remove interior trim pieces without marring the surface.
- Open the fuel filler door and then filler door cap.
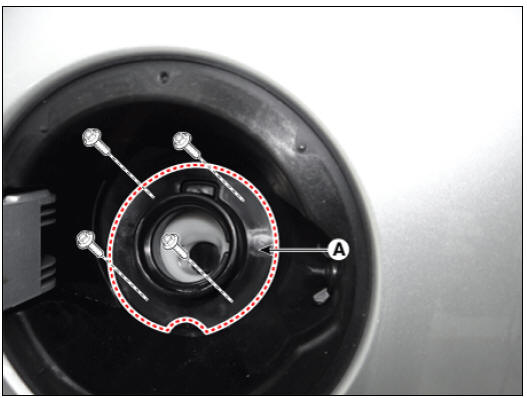
- Remove the fuel filler door packing (A) after loosening the mounting bolts.
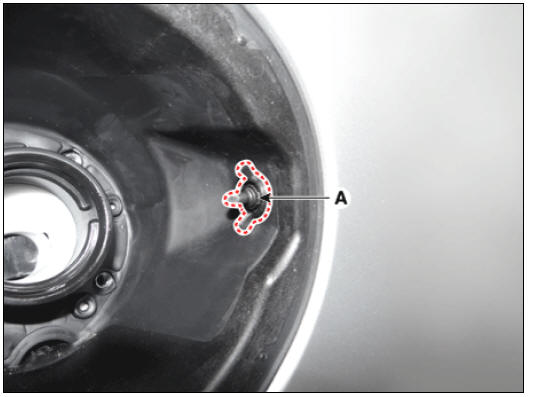
- Remove the fuel filler door release actuator fixed pin (A).
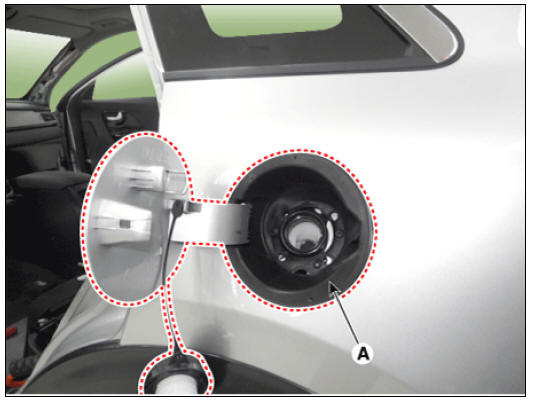
- Remove the fuel filler door housing (A).
- Install in the reverse order of removal.
Warning
- Make sure the fuel filler door locks/unlocks and opens/closes properly.
- Replace any damaged clips.
Charge Port Door Housing Assembly
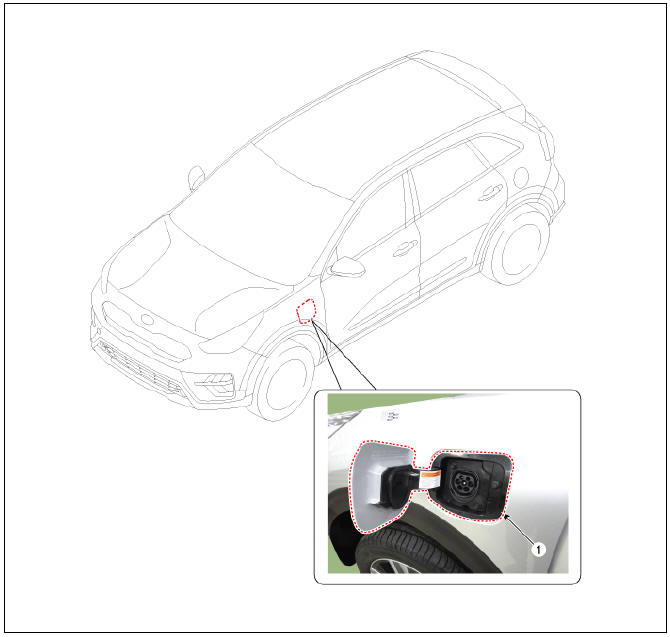
- Charge port door housing assembly
Replacement
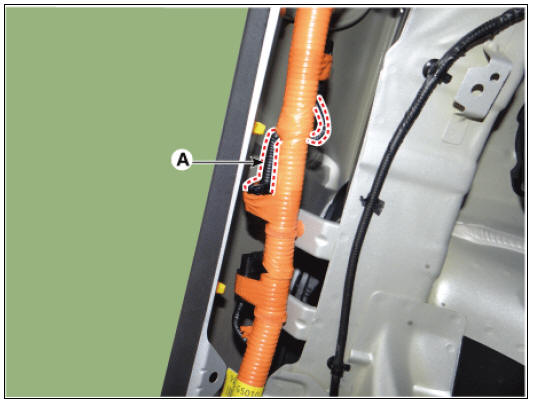
- Remove the front wheel guard (LH).
(Refer to Body Side Molding - "Fronf Wheel Guard")
- Disconnect the charge port door connector (A).
- After loosening the mounting bolts, remove the charge port door housing assembly (A).
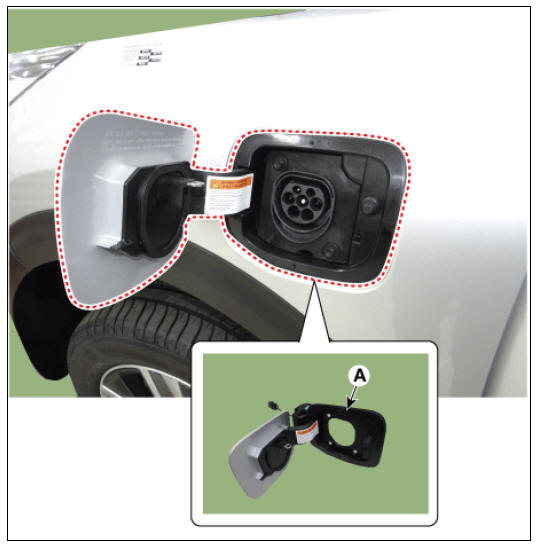
- To install, reverse the removal procedure.
Warning
- Make sure the charge port door housing assembly locks/unlocks and opens/closes properly.
- Replace any damaged clips (or pin-type retainers).
READ NEXT:
 Front Seat
Front Seat / Components And Components Location
Front seat back covering
Front seat back heater
Front seat back pad
Front seat inner shield cover
Front seat headrest
Front seat headrest guide
Front seat back board
Front seat bac
Front Seat Assembly | Front Seat Shield Outer Cover
Front seat assembly
Front Seat Assembly Repair procedures
Replacement
Loosen the front seat mounting bolts (A).
Tightening torque : 49.0 - 58.8 N*m (5.0 - 6.0 kgf*m, 36.2 - 43.4 lb*ft)
Front
Rear
Disconnect the airb
SEE MORE:
Engine Control System
Components
Location
Engine Control Module (ECM)
Manifold Absolute Pressure Sensor (MAPS)
Mass Air Flow Sensor (MAFS)
Intake Air Temperature Sensor (IATS)
Engine Coolant Temperature Sensor (ECTS) (Water Temperature Control
Assem
Normal Maintenance Schedule - For Gasoline Engine
The following maintenance services must be performed to ensure good emission
control and
performance. Keep receipts for all vehicle emission services to protect your
warranty.Where both
mileage and time are shown, the frequency of service is de
Categories
- Home
- KIA Niro EV, Hybrid - Second generation - (SG2) (2021-2024) - Owner's manual
- Kia Niro - First generation - (DE) (2017-2022) - Service and Repair Manual
- Contact Us