KIA Niro: Outside Rear View Mirror
Kia Niro - First generation - (DE) (2017-2022) - Service and Repair Manual / Body (Interior And Exterior) / Mirror / Outside Rear View Mirror
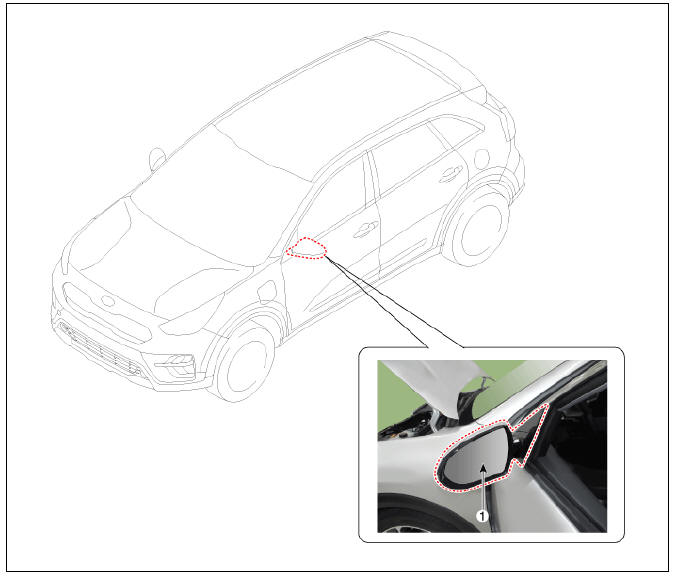
- Outside rear view mirror
Outside Rear View Mirror Repair procedures
Replacement
Warning
Put on gloves to protect your hands.
Warning
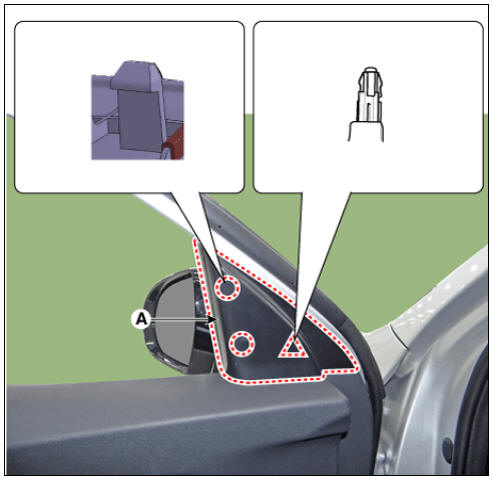
- Use a plastic panel removal tool to remove interior trim pieces without marring the surface.
- Be careful not to bend or scratch the trim and panels.
- Using a remover, remove the front door quadrant inner cover (A).
- Disconnect the outside rear view mirror connector (A) and loosen the mounting bolts.
Tightening torque : 6.9 - 10.8 N*m (0.7 - 1.1 kgf*m, 5.1 - 8.0 lb*ft)
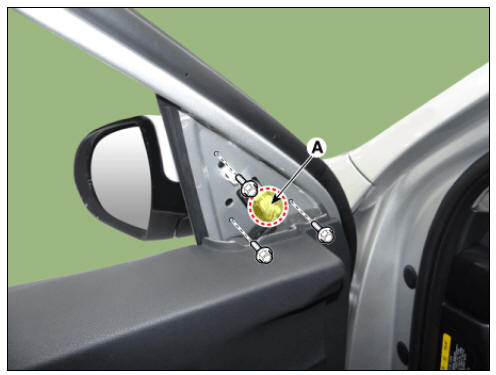
- Remove the outside rear view mirror (A).
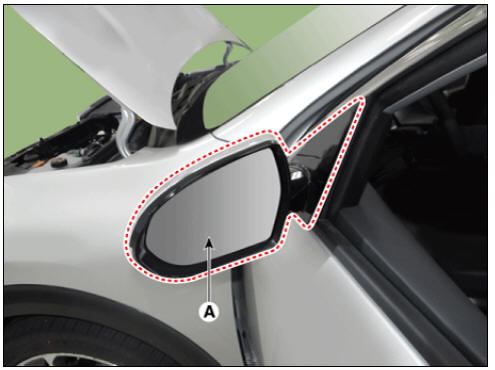
- Install in the reverse order of removal.
Warning
- Make sure the connector is connected properly.
- Replace any damaged clips.
Disassembly
Housing cover
Warning
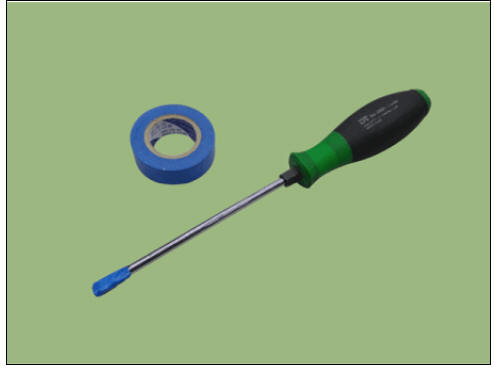
- When removing with a flat-tip screwdriver or remover, wrap protective tape around the tools to prevent damage to components.
- Put on gloves to prevent hand injuries.
- Remove outside rear view mirror assembly.
(Refer to Body - "Outside View Mirror")
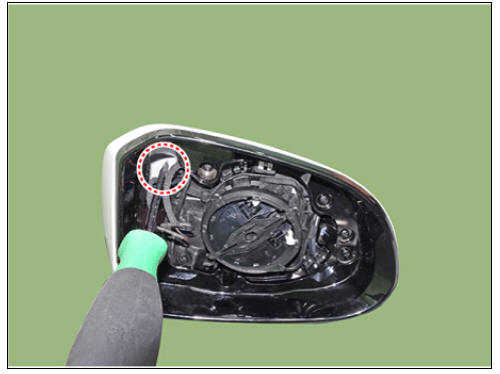
- After inserting the flat-bladed screwdriver as shown in the illustration below, remove the mirror (A) by applying a momentary force.
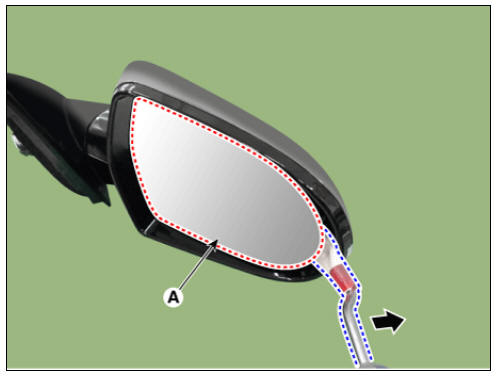
Warning
- Wrap the tool with protective tape or cloth to prevent damage to the parts.
- Do not insert the tool too deeply.
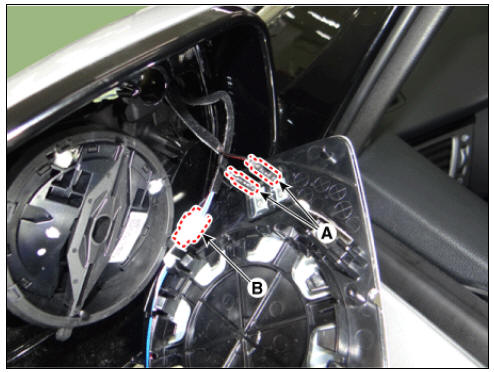
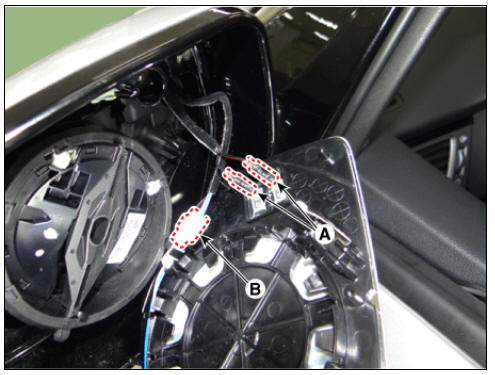
- Disconnect the heater connectors (A) and rear corner radar indicator connector (B).
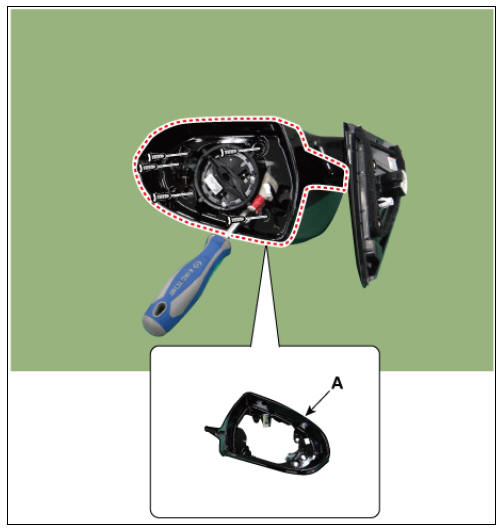
- Remove the housing cover mounting screw.
- Using a remover and remove the housing cover (A).
- Reassemble in the reverse order of disassembly.
Scalp
Warning
- When removing with a flat-tip screwdriver or remover, wrap protective tape around the tools to prevent damage to components.
- Put on gloves to prevent hand injuries.
- Remove outside rear view mirror assembly.
(Refer to Body - "Outside View Mirror")
- After inserting the flat-bladed screwdriver as shown in the illustration below, remove the mirror (A) by applying a momentary force.

Warning
- Wrap the tool with protective tape or cloth to prevent damage to the parts.
- Do not insert the tool too deeply.
- Disconnect the heater connectors (A) and rear corner radar indicator connector (B).
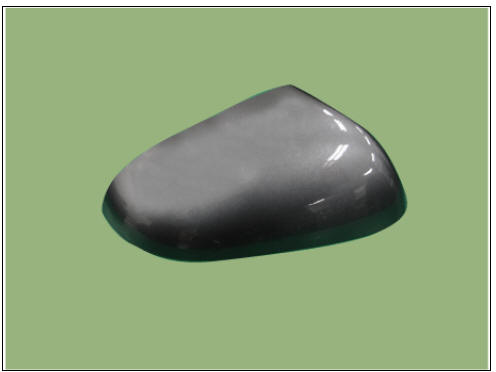
- Remove the scalp.
(1) Attach protection tape at the end of the screw driver.
(2) Insert screw driver in where you can see the back of scalp.
Warning
When inserting screw driver, avoid to touch internal wires in the mirror housing.
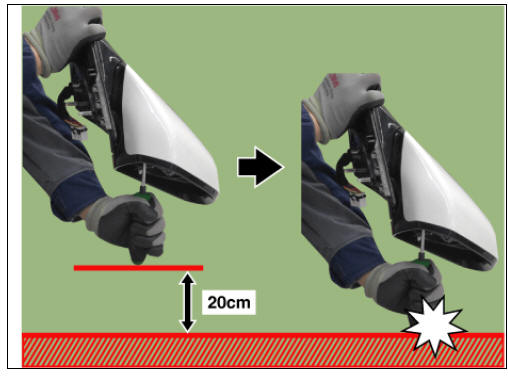
(3) Hold the mirror assembly with one hand and hold the screwdriver with the other hand and strike it vertically as shown illustration below.
Warning
- It is the way that screw driver strikes inner side of scalp cover to remove.
- Lift screw driver and door mirror assembly about 20cm height from floor then smash them vertically.
- Scalp is thrown and removed because screw driver push the back of scalp cover to remove.
- After removing the scalp, make sure that the clip and hook on the back of the scalp are not damaged.
- If clips and hooks are damaged, replace the scalp with a new
one as noise may occur in driving.
- Reassemble in the reverse order of disassembly.
(Refer to Body - "Outside View Mirror")
READ NEXT:
 Inside Rear View Mirror
Inside rear view mirror
Replacement
Manual Mirror
Remove the inside rear view mirror (A) after loosening the screw.
Install in the reverse order of removal.
ECM Mirror
Remove the ECM mirror cover (A).
Remove th
Sunroof / Repair Procedures
Adjustment
Inspect Glass Alignment
Inspect the step height between the roof panel (A) and the glass
weatherstrip (B) and then adjust it if
necessary.
Alignment adjustment
Standard value (mm(in.))
(1) Front edge : 0 mm (0 in.)
(2) Rear
SEE MORE:
High Voltage (HV) battery (lithium-ion polymer)
On-Board Charger (OBC): Transforms
(inverts) AC power charge
power, to DC power, to charge the
high voltage battery
Inverter: Transforms direct current
into alternating current to supply
power to the motor, and transforms
alternating
Wipers (Kia Niro EV)
Controlling the wipers
Type A
Type B
Type C
Operation
A: Front wiper speed control
MIST (1x): Single wipe
OFF (0): Off
INT (---): Intermittent control wipe
AUTO*: Auto control wipe
LO (1): Low wiper speed
HI (2): High
Categories
- Home
- KIA Niro EV, Hybrid - Second generation - (SG2) (2021-2024) - Owner's manual
- Kia Niro - First generation - (DE) (2017-2022) - Service and Repair Manual
- Contact Us