KIA Niro: Tailgate Assembly
Tailgate / Repair Procedures
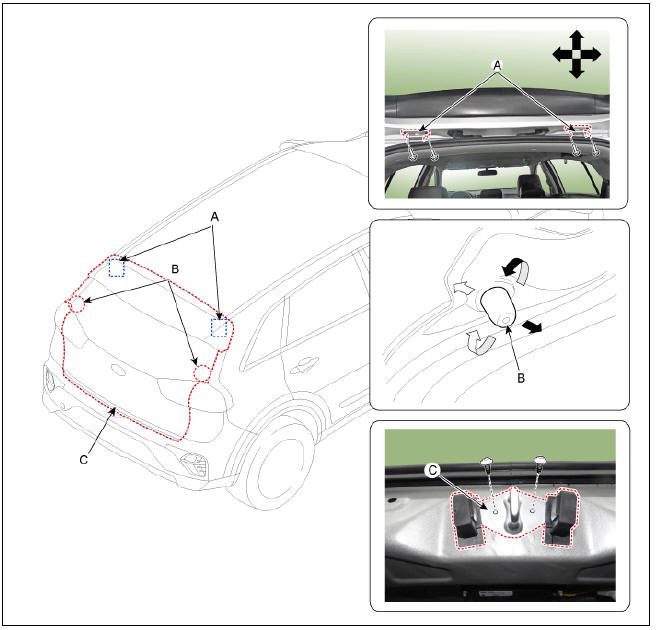
Adjustment
- After loosening the tailgate hinge (A) mounting bolts, adjust the tailgate by moving it up and down, or right and left.
- Adjust the tailgate height by turning the tailgate overslam bumpers (B).
- After loosening the tailgate striker (C) mounting bolts, adjust the tailgate striker by moving it up and down, or right and left.
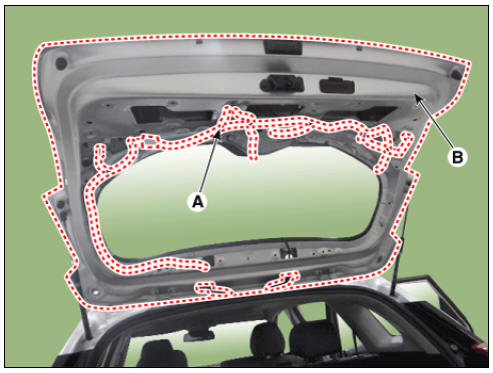
Tailgate assembly
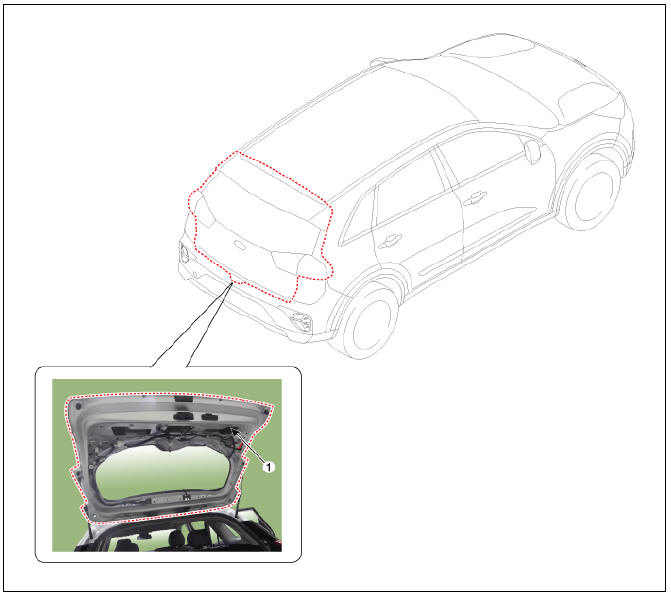
- Tailgate assembly
Replacement
Warning
Wear gloves to protect hands from injury.
Warning
Work in a group of two when removing and installing the tailgate.
- Remove the tailgate trim (A).
(Refer to Tailgate - "Tailgate Trim")
- Remove the rear spoiler.
(Refer to Body Side Molding - "Rear Spoiler")
- Disconnect the washer nozzle hose (A) and high mounted stop lamp connector (B).
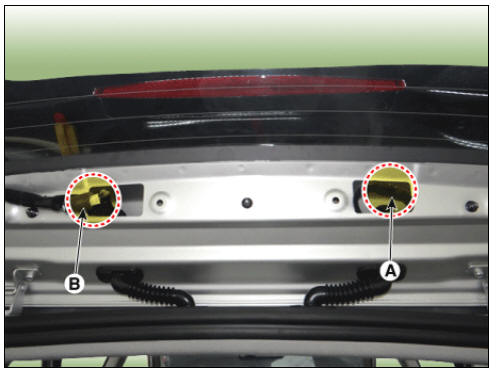
- Using a screwdriver, lift the socket clips (A) up slightly on both ends of the tailgate lifter (B).
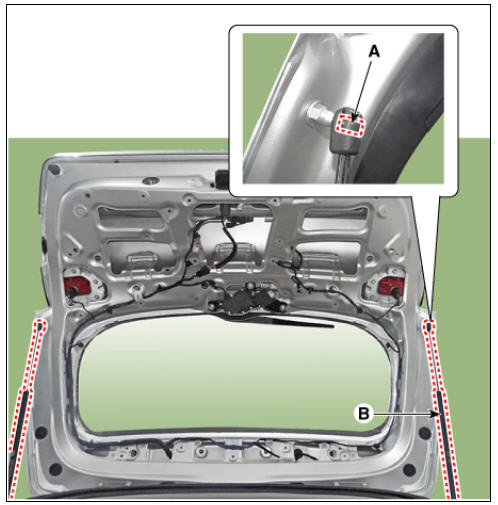
- Disconnect the connectors and tailgate wiring harness (A).
- Remove the tailgate assembly (B) after loosening the mounting bolts.
Tightening torque : 21.6 - 26.5 N*m (2.2 - 2.7 kgf*m, 15.9 - 19.5 lb*ft)
- Install in the reverse order of removal.
Warning
- Make sure that the tailgate locks/unlocks and opens/closes properly.
- Adjust the tailgate alignment.
- Make sure the connectors are connected in properly.
- Replace any damaged clips.
READ NEXT:
 Tailgate Trim | Tailgate Latch Assembly
Tailgate trim
Replacement
Warning
Put on gloves to protect your hands.
Warning
Use a plastic panel removal tool to remove interior trim pieces without marring the surface.
Be careful not to bend or scratch the trim and p
SEE MORE:
Parking on hills
Generally, if you have a trailer attached
to your vehicle, you should not park your
vehicle on a hill. People can be seriously
or fatally injured, and both your vehicle
and the trailer can be damaged if unexpectedly
roll down hill.
However, i
Pressure Source Unit Repair procedures
Pressure Source Unit Components and components location
Components
Warning
PSU (Presser Source Unit) must not be disassembled.
Pressure Source Unit (PSU)
Pressure Source Unit (PSU) connector
Motor
Filler adapter
Bracket
Accumulat
Categories
- Home
- KIA Niro EV, Hybrid - Second generation - (SG2) (2021-2024) - Owner's manual
- Kia Niro - First generation - (DE) (2017-2022) - Service and Repair Manual
- Contact Us