KIA Niro: Water pump Repair procedures
Removal
Warning
- Be sure to read and follow the "General Safety Information and Caution" before doing any work related with the high voltage system. Failure to follow the safety instructions may result in serious electrical injuries.
- Be sure to shut off the high voltage circuit according to the "High Voltage Shut-off Procedures" before doing any work related with the high voltage system to avoid serious electrical injuries.
- Shut off the high voltage circuit.
(Refer to Engine Mechanical System - "High Voltage Shut off Procedure")
- Remove the engine room under cover.
(Refer to Engine and Transaxle Assembly - "Engine Room Under Cover")
- Drain the coolant.
(Refer to Cooling System - "Coolant")
- Remove the drive belt.
(Refer to Drive Belt System - "Drive belt")
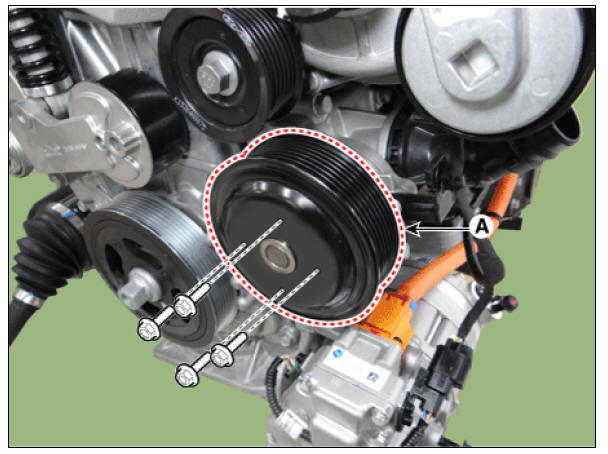
- Separate the water pump pulley (A).
Tightening torque : 9.8 - 11.8 N*m (1.0 - 1.2 kgf*m, 7.2 - 8.7 lb*ft)
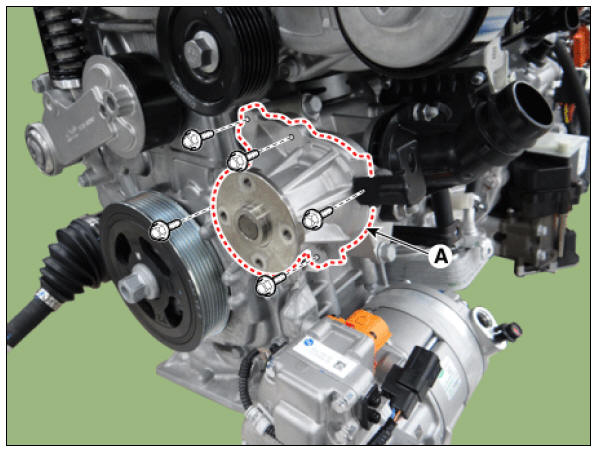
- Remove the water pump (A) with water pump pulley.
Tightening torque : 7.8 - 11.8 N*m (0.8 - 1.2 kgf*m, 5.8 - 8.7 lb*ft)
- Remove the water pump gasket (A).

- Install in the reverse order of removal.
Warning
Install a new water pump gasket.
- Fill the engine coolant.
(Refer to Cooling System - "Coolant")
- Start the engine and check for leaks.
- Recheck the coolant level.
Water Pump Cover
- Remove the engine room under cover.
(Refer to Engine and Transaxle Assembly - "Engine Room Under Cover")
- Drain the coolant.
(Refer to Cooling System - "Coolant")
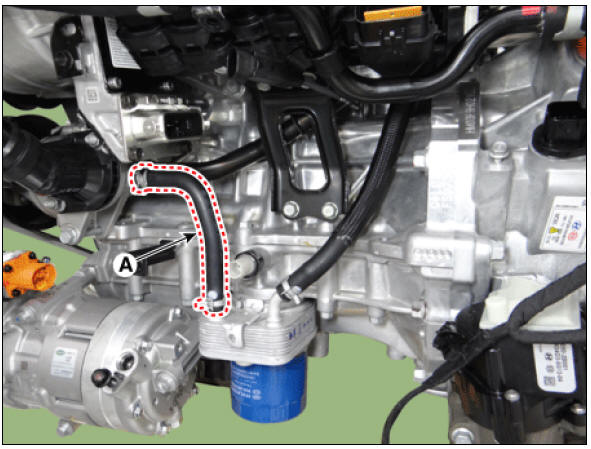
- Disconnect the coolant hose (A).
- Remove the thermostat.
(Refer to Cooling System - "Thermostat")
- Remove the heater pipe.
(Refer to Cooling System - "Water Temperature Control Assembly")
- Remove the water pump.
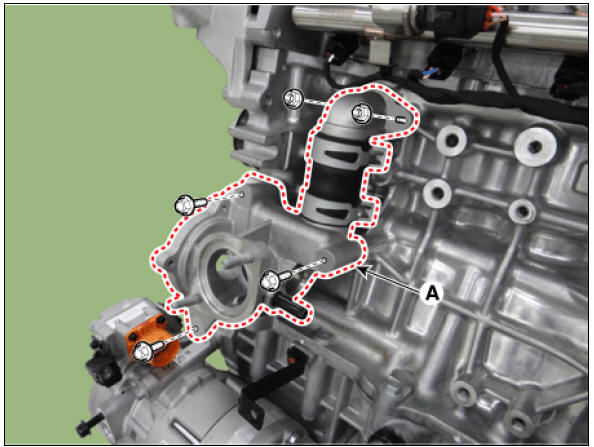
- Remove the water pump cover (A).
Tightening torque : 18.6 - 23.5 N*m (1.9 - 2.4 kgf*m, 13.7 - 17.4 lb*ft)
- Install in the reverse order of removal.
- Fill the engine coolant.
(Refer to Cooling System - "Coolant")
- Start the engine and check for leaks.
Inspection
- Check each part for cracks, damage or wear, and replace the coolant pump assembly if necessary.
- Check the bearing for damage, abnormal noise and sluggish rotation, and replace the coolant pump assembly if necessary.
- Check for coolant leakage. If coolant leaks from hole, the seal is defective. Replace the coolant pump assembly.
Warning
A small amount of "weeping" from the bleed hole is normal.
READ NEXT:
 Thermostat Repair procedures
Removal and
Installation
Warning
Disassembly of the thermostat may have an adverse effect, causing
deteriorated cooling efficiency. Do not
remove the thermostat, even if the engine tends to overheat.
Remove the engine room under cover.
(R
Water Temperature Control Assembly
Removal and Installation
Water Temperature Control Assembly
Disconnect the battery negative terminal.
Loosen the drain plug, and drain the engine coolant. Remove the
reservoir cap to help drain the coolant
faster.
(Refer to Cool
Heater Pipe | Active Air Flap (AAF) Repair procedure
Disconnect the battery negative terminal.
Loosen the drain plug, and drain the engine coolant. Remove the reservoir cap to help drain the coolant faster.
(Refer to Cooling System - "Coolant")
Remove
SEE MORE:
Manual accident reporting
The driver or passenger manually can
make an emergency call in the Public
Safety Answering Point (PSAP), by
pressing SOS button to call the necessary
emergency services.
A call to the emergency services through
the Pan-European e
Charging status indicator lamp for portable charger
Status/Diagnosis/Countermeasure
Charging connector plugged into
vehicle (POWER Green ON)
Plug connected to an electric outlet
(POWER Green ON)
While charging
Charge indicator (POWER Green ON/
CHARGE Blue ON)
Charg
Categories
- Home
- KIA Niro EV, Hybrid - Second generation - (SG2) (2021-2024) - Owner's manual
- Kia Niro - First generation - (DE) (2017-2022) - Service and Repair Manual
- Contact Us