KIA Niro: Water Temperature Control Assembly
Kia Niro - First generation - (DE) (2017-2022) - Service and Repair Manual / Engine Mechanical System / Cooling System / Water Temperature Control Assembly
Removal and Installation
Water Temperature Control Assembly
- Disconnect the battery negative terminal.
- Loosen the drain plug, and drain the engine coolant. Remove the
reservoir cap to help drain the coolant
faster.
(Refer to Cooling System - "Coolant")
- Remove the air cleaner assembly.
(Refer to Intake and Exhaust System - "Air Cleaner")
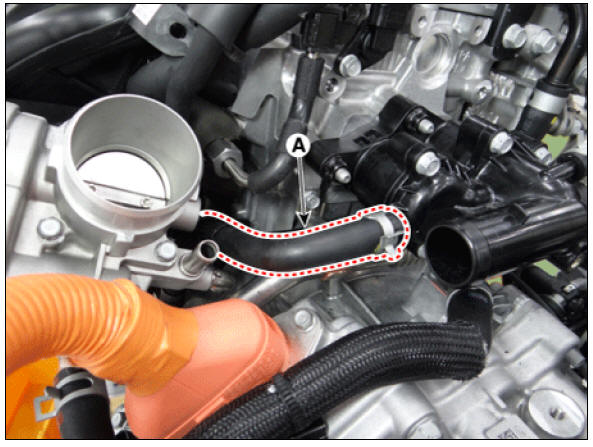
- Disconnect the radiator upper hose (A).
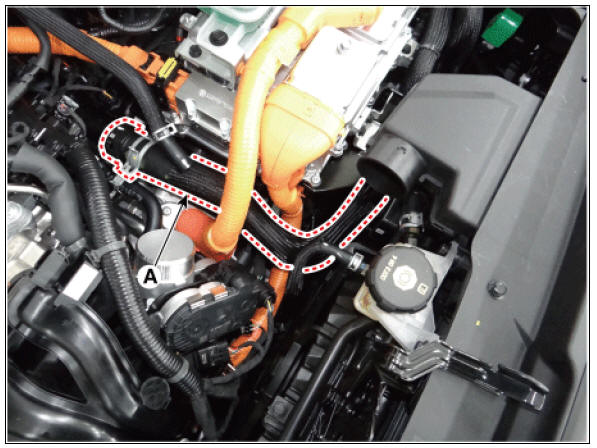
- Disconnect the heater hoses (A).
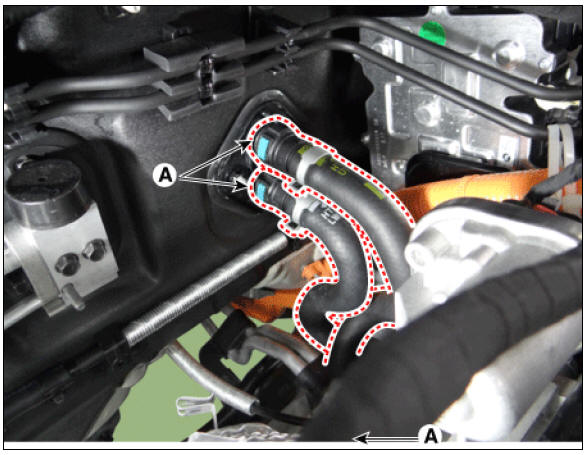
- Disconnect the wiring connectors and harness clamps and remove the connector brackets around the water temperature control assembly.
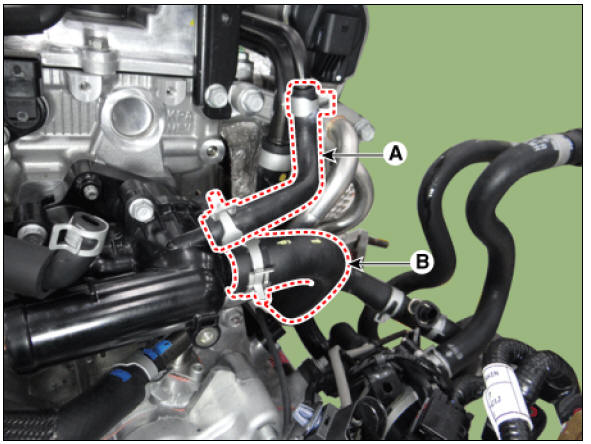
- Disconnect the degassing hose (A) and EGR cooler hose (B).
- Disconnect the oil cooler hose (A).
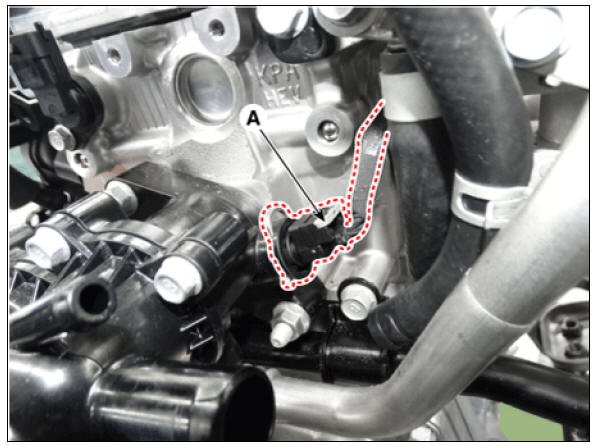
- Disconnect the water temperature sensor connector (A).
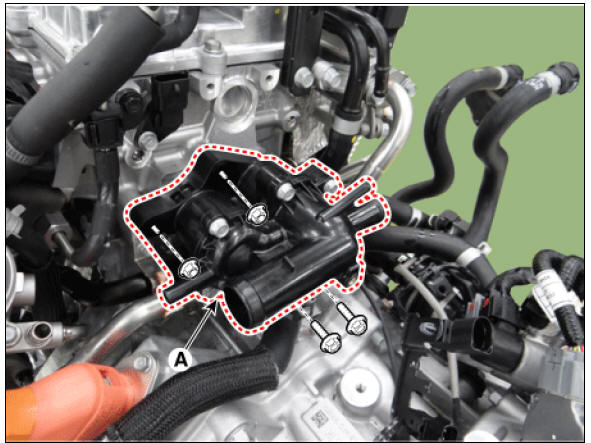
- Remove the water temperature control assembly (A).
Tightening torque : 18.6 - 23.5 N.m (1.9 - 2.4 kgf.m, 13.7 - 17.4 lb-ft)
Warning
- When you use current-carrying bolts and nuts for the coolant temperature control assembly, use the specified bolts and nuts.
- Before mounting the coolant temperature control assembly, clean the contact surface.
- Before mounting the coolant temperature control assembly, make sure that the thermostat for separate cooling is not open or closed stuck due to foreign substance.
- Install in the reverse order of removal.
READ NEXT:
 Heater Pipe | Active Air Flap (AAF) Repair procedure
Disconnect the battery negative terminal.
Loosen the drain plug, and drain the engine coolant. Remove the reservoir cap to help drain the coolant faster.
(Refer to Cooling System - "Coolant")
Remove
SEE MORE:
Head-Up Display (HUD)
The Head-Up Display is a transparent
display that projects an image of certain
information from the instrument cluster
and navigation system on the windshield
glass.
The head up display image on the
HUD screen may be invisible when:
Tilt open/close
Tilt open
Tilt close
Push the sunroof switch upward, the
sunroof glass tilts open.
Push the sunroof switch forward
when the sunroof glass is tilt opened,
the sunroof glass closes.
The sunroof glass tilts open or closes
while t
Categories
- Home
- KIA Niro EV, Hybrid - Second generation - (SG2) (2021-2024) - Owner's manual
- Kia Niro - First generation - (DE) (2017-2022) - Service and Repair Manual
- Contact Us