KIA Niro: Air Cleaner Repair procedures
Kia Niro - First generation - (DE) (2017-2022) - Service and Repair Manual / Engine Mechanical System / Intake And Exhaust System / Air Cleaner Repair procedures
Removal and
Installation
Air Cleaner Assembly
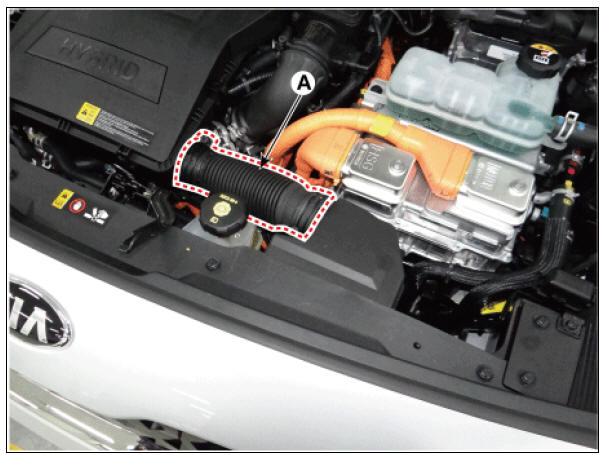
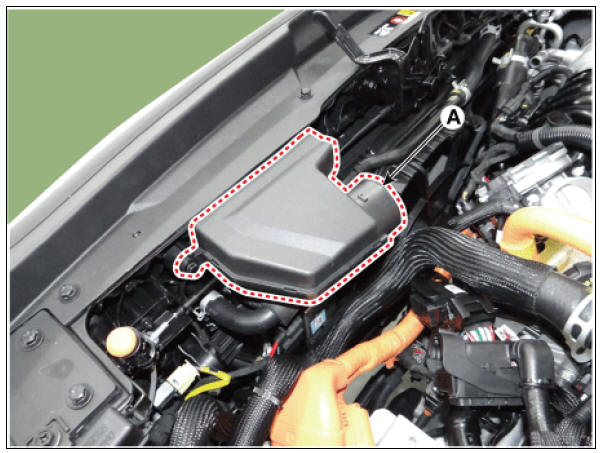
- Disconnect the air duct B (A).
Tightening torque : 2.9 - 4.9 N*m (0.3 - 0.5 kgf*m, 2.2 - 3.6 lb*ft)
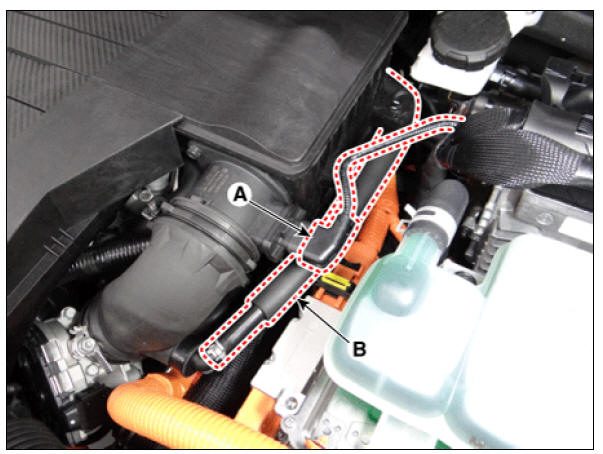
- Disconnect the mass air flow sensor (MAFS) connector (A) and breather hose (B).
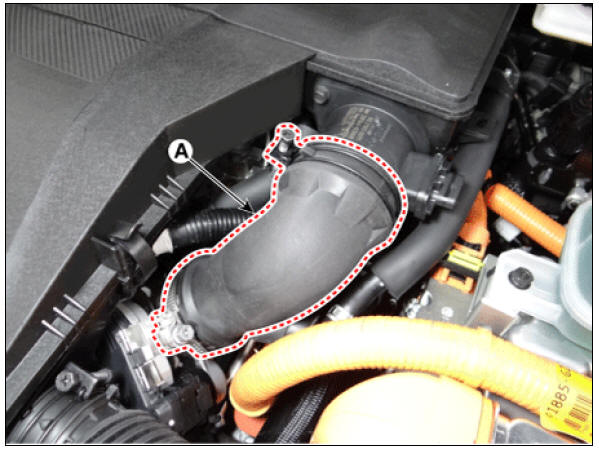
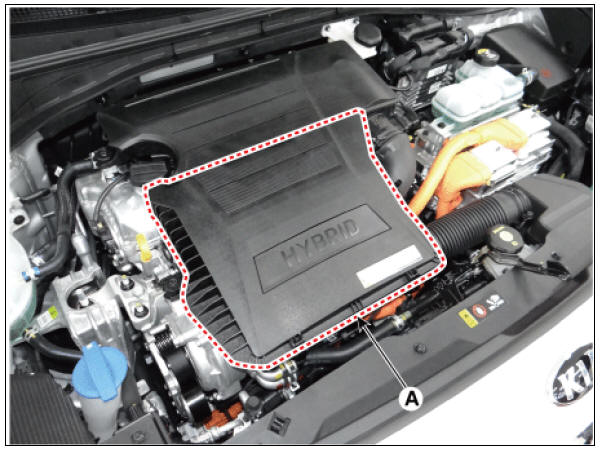
- Disconnect the air intake hose (A).
Tightening torque : 2.9 - 4.9 N*m (0.3 - 0.5 kgf*m, 2.2 - 3.6 lb*ft)
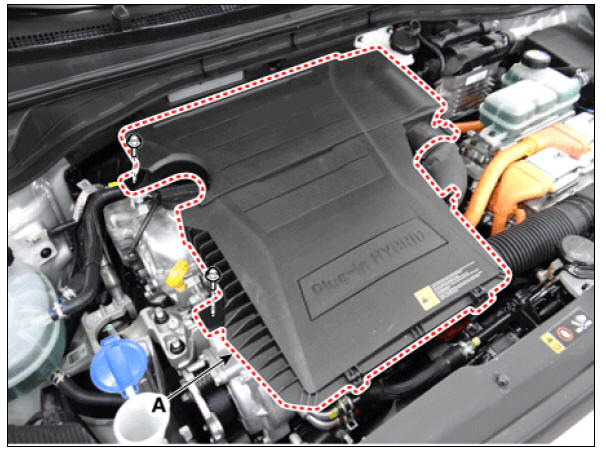
- Remove the air cleaner assembly (A).
Tightening torque : 3.9 - 5.9 N*m (0.4 - 0.6 kgf*m, 2.9 - 4.3 lb*ft)
- Remove the air duct A (A).
Tightening torque : 3.9 - 5.9 N*m (0.4 - 0.6 kgf*m, 2.9 - 4.3 lb*ft)
- Install in the reverse order of removal.
Air Cleaner Element Replacement
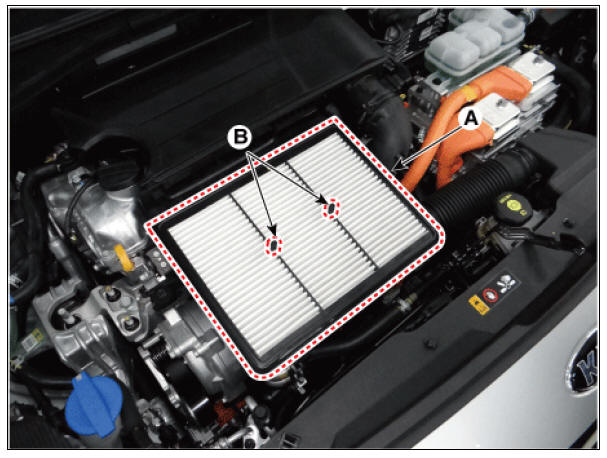
- Open the air cleaner element cover (A) by unlocking the clamp.
- Replace the air cleaner element (A) with a new one.
Warning
Gap the handle (B) then pull out the air cleaner element.
- Close the service cover by hooking the clamp.
Inspection
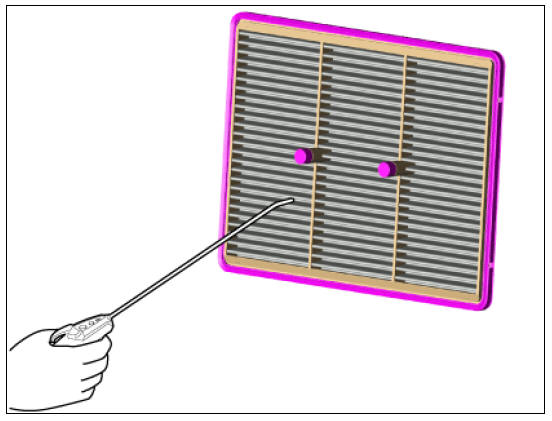
- Remove the air cleaner element.
- Check if the air filter is excessively dirty. If so, replace the air cleaner element.
- If the air cleaner element needs to be cleaned, blow compressed air as shown in the illustration to clean it.
Warning
Be fully aware of the direction of using compressed air on the air cleaner.
- Reinstall the air cleaner element.
READ NEXT:
 EGR Cooler Repair procedures | Intake Manifold Repair procedures
EGR Cooler Components and components location
Components
EGR cooler pipe A
EGR cooler
EGR cooler pipe B
EGR cooler coolant hose
Electric EGR control valve
EGR cooler pipe C
Gasket
Operation
EGR Cooler R
Exhaust Manifold Repair procedures
Exhaust Manifold Components and components location
Components
Exhaust manifold gasket
Exhaust manifold
Exhaust manifold stay
Heat protector
Exhaust Manifold Repair procedures
Removal and
Installation
Remove the engine room un
SEE MORE:
Cluster Fascia Panel | Center Fascia Panel
Cluster Fascia Panel Components and components location
Cluster fascia panel assembly
Cluster Fascia Panel Repair procedures
Replacement
Warning
Put on gloves to protect your hands.
Warning
Use a plastic panel removal tool to r
Normal Maintenance Schedule - For Gasoline Engine
The following maintenance services must be performed to ensure good emission
control and
performance. Keep receipts for all vehicle emission services to protect your
warranty.Where both
mileage and time are shown, the frequency of service is de
Categories
- Home
- KIA Niro EV, Hybrid - Second generation - (SG2) (2021-2024) - Owner's manual
- Kia Niro - First generation - (DE) (2017-2022) - Service and Repair Manual
- Contact Us