KIA Niro: Crash Pad Garmish
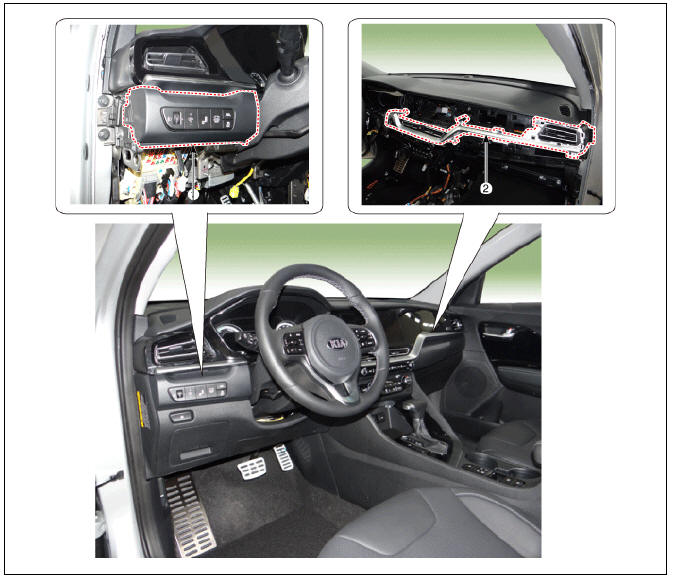
- Crash pad garmish (LH)
- Crash pad garmish (RH)
Replacement
Crash pad garmish LH
Warning
Put on gloves to protect your hands.
Warning
- When removing with a flat-tip screwdriver or remover, wrap protective tape around the tools to prevent damage to components.
- Use a plastic panel removal tool to remove interior trim pieces without marring the surface.
- Take care not to bend or scratch the trim and panels.
- Remove the crash pad lower panel.
(Refer to Crash Pad - "Crash Pad Lower Panel")
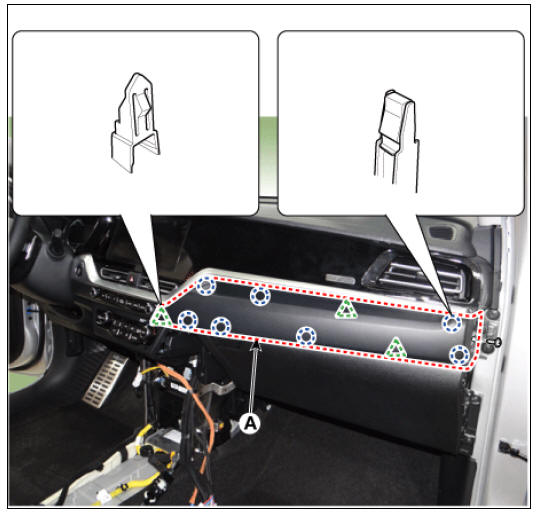
- Loosen the mounting screw, remove the crash pad garnish (LH) (A).
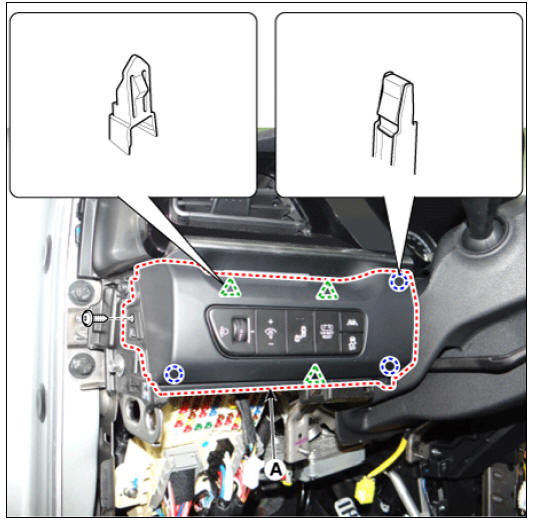
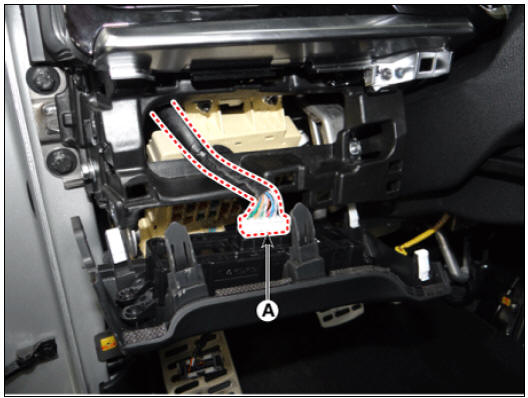
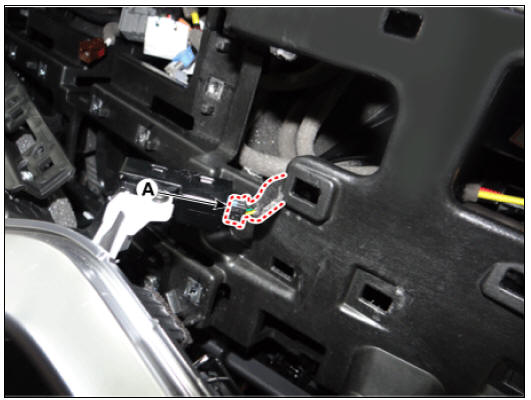
- Disconnect the connector (A).
- To install, reverse the removal procedure.
Warning
- Replace any damaged clips (or pin-type retainers).
- Make sure the connector are connected in properly.
Crash pad garmish RH
Warning
Put on gloves to prevent hand injuries.
Warning
- When removing with a flat-tip screwdriver or remover, wrap protective tape around the tools to prevent damage to components.
- Use a plastic panel removal tool to remove interior trim pieces without marring the surface.
- Take care not to bend or scratch the trim and panels.
- Using a screwdriver or remover, remove the crash pad side cover (RH) (A).

- Loosen the mounting screw, remove the crash pad plate (A).
LH
RH
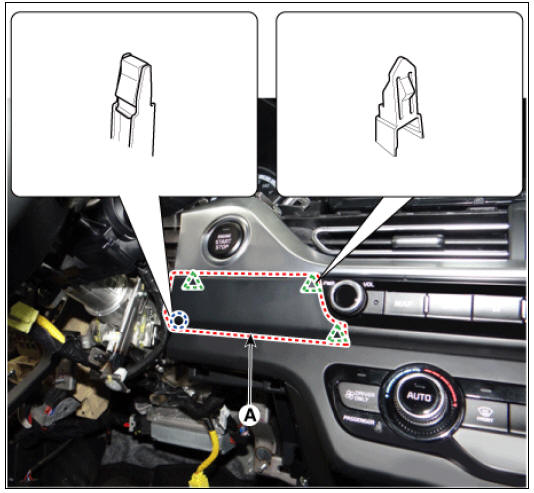
- Remove the cluster fascia panel.
(Refer to Crash Pad - "Cluster Fascia Panel")
- Remove the audio and AVN head unit.
(Refer to Body Electrical System - "Audio Unit")
- Loosen the mounting screws, remove the crash pad garnish (RH) (A).
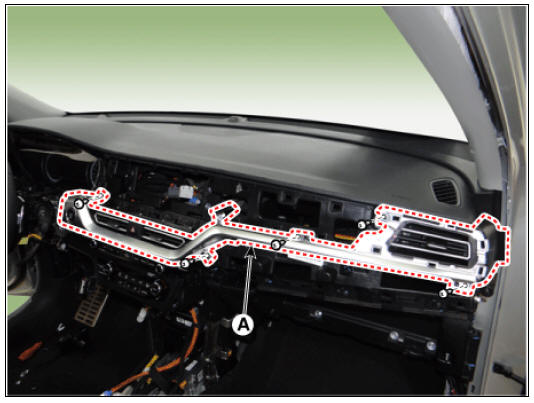
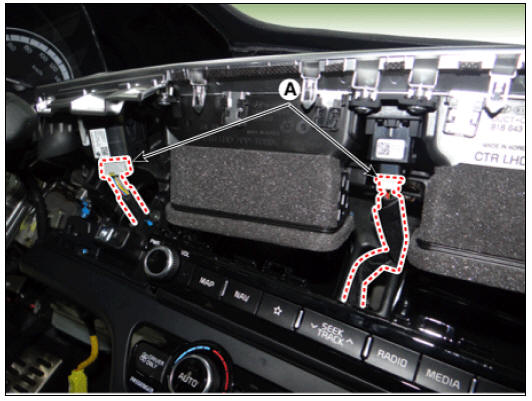
- Disconnect the connectors (A)
- To install, reverse the removal procedure.
Warning
- Replace any damaged clips (or pin-type retainers).
- Make sure the connector are connected in properly.
READ NEXT:
 Crash Pad Lower Panel | Glove Box Housing
Crash pad lower panel
Crash Pad Lower Panel Repair procedures
Replacement
Warning
Put on gloves to protect your hands.
Warning
Use a plastic panel removal tool to remove interior trim pieces without marring the surface.
B
Steering Column Shroud Panel
Steering Column Shroud Panel Components and components
Steering column shroud upper panel
Steering column shroud lower panel
Steering Column Shroud Panel Repair procedures
Replacement
Warning
Put on gloves to protect your hands.
SEE MORE:
Scheduled maintenance service (Kia Niro EV)
Normal maintenance schedule - for Europe
I: Inspect and adjust, correct, clean, or replace if necessary.
R: Replace or change.
* 1: When replacing or adding coolant, we recommend that you visit an
authorized Kia
dealer/service partner.
* 2
AHB(Active Hydraulic Boost) System / Description And Operation
Regeneration Brake System
During deceleration or braking of an electric vehicle or HEV, the drive motor
acts as an alternator and charges the battery by
converting the vehicle's kinetic energy generated during braking into electrical
energy. Re
Categories
- Home
- KIA Niro EV, Hybrid - Second generation - (SG2) (2021-2024) - Owner's manual
- Kia Niro - First generation - (DE) (2017-2022) - Service and Repair Manual
- Contact Us