KIA Niro: Steering Column Shroud Panel
Kia Niro - First generation - (DE) (2017-2022) - Service and Repair Manual / Body (Interior And Exterior) / Crash Pad / Steering Column Shroud Panel
Steering Column Shroud Panel Components and components
- Steering column shroud upper panel
- Steering column shroud lower panel
Steering Column Shroud Panel Repair procedures
Replacement
Warning
- Put on gloves to protect your hands.
Warning
- Use a plastic panel removal tool to remove interior trim pieces without marring the surface.
- Be careful not to bend or scratch the trim and panels.
Steering column shroud upper panel
- Remove the crash pad lower panel.
(Refer to Crash Pad - "Crash Pad Lower Panel")
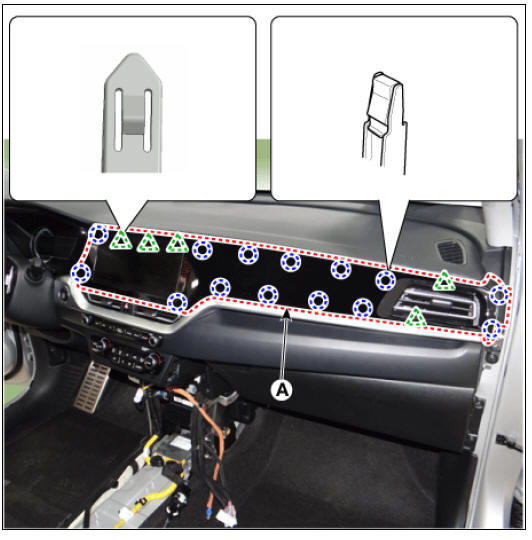
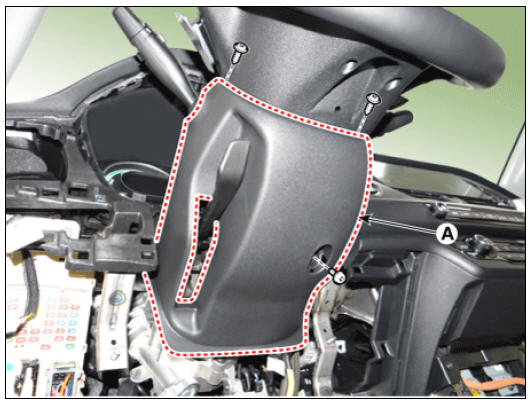
- Using a screwdriver or remover, remove the center fascia panel (A).
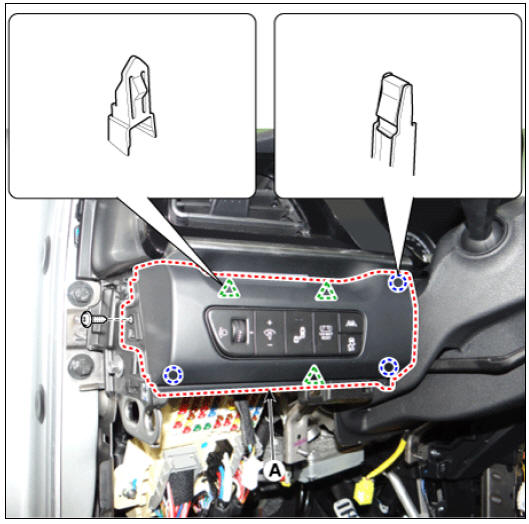
- Loosen the mounting screws, remove the crash pad garnish assembly (LH) (A).
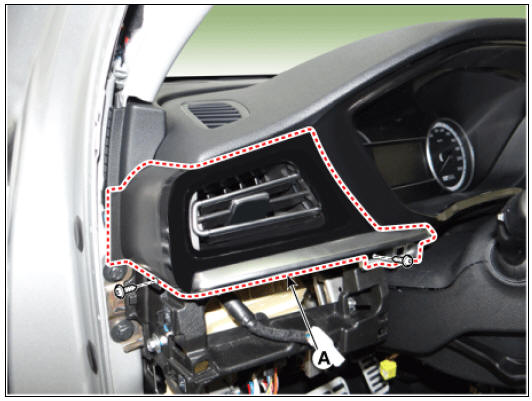
- Loosen the mounting screws, remove the side air vent duct (LH) (A).
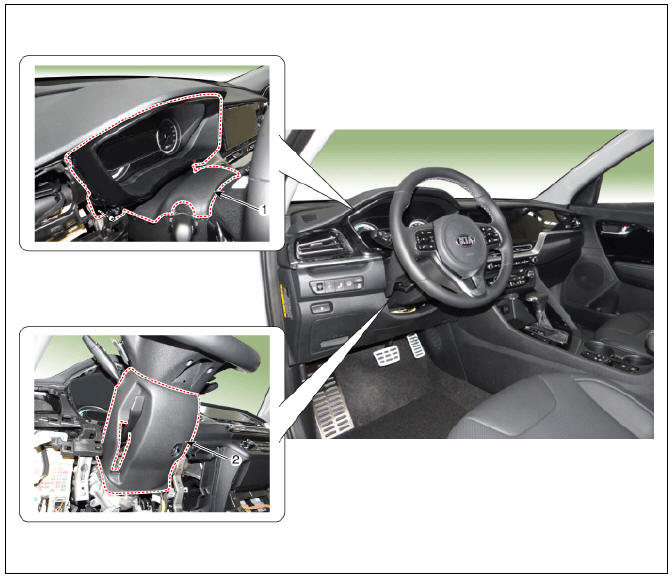
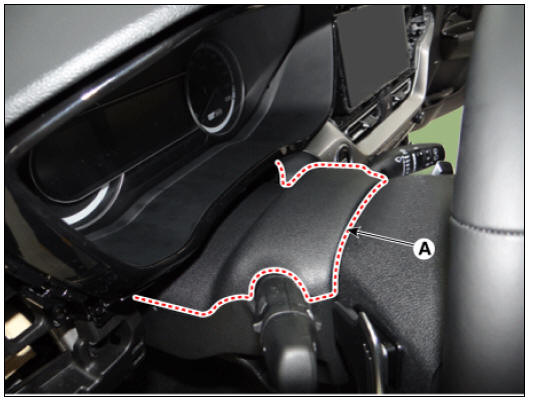
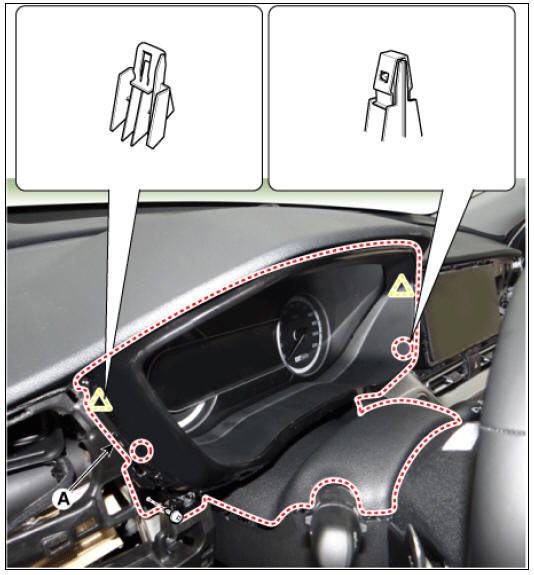
- Using a screwdriver or remover, remove the steering column shroud upper panel (A).
- Loosen the mounting screws, remove the cluster fascia panel (A).
- To install, reverse the removal procedure.
Warning
Replace any damaged clips (or pin-type retainers).
Steering column shroud lower panel
- Remove the crash pad lower panel.
(Refer to Crash Pad - "Crash Pad Lower Panel")
- Using a remover, slightly separate the steering column shroud upper panel (A).
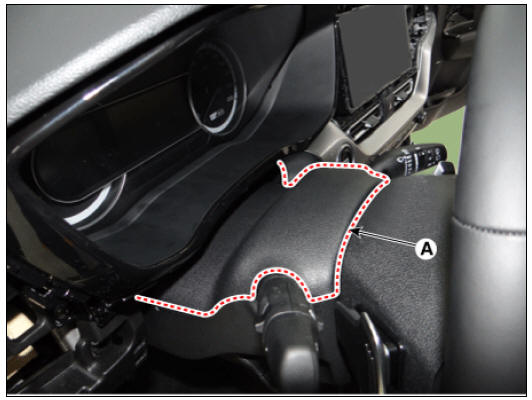
- Loosen the mounting screws by turning the steering wheel to the left and right, and remove the steering column shroud lower panel (A).
- To install, reverse the removal procedure.
Warning
Replace any damaged clips (or pin-type retainers).
READ NEXT:
 Crash Pad Side Cover
Crash Pad Side Cover Components and components location
LH
Crash pad side cover (LH)
RH
Crash pad side cover (RH)
Crash Pad Side Cover Repair procedures
Replacement
Warning
Put on gloves to protect your hands.
Warning
U
Crash Pad Main Lower Panel
Crash pad main lower panel
Replacement
Warning
Put on gloves to protect your hands.
Warning
Use a plastic panel removal tool to remove interior trim pieces
without marring the surface.
Be careful not to bend or scratch the trim
Cowl Cross Bar Assembly
Cowl cross bar assembly
Replacement
Remove the cowl top cover.
(Refer to Cowl Top Cover - "Repair procedures")
Remove the main crash pad assembly.
(Refer to Crash Pad - "Main Crash Pad Assembly")
Remove the c
SEE MORE:
TPMS Receiver Repair procedures
Removal
Disconnect the battery negative cable.
Remove the glove box.
(Refer to Body - "Glove Box Housing")
Disconnect the blower motor connector (A).
Disconnect the body control module (BCM) connector (A).
Loos
Hybrid Drive Motor Assembly Repair procedures
Description
The hybrid motor system is equipped with two electric motors - HSG and
drive motor.
The traction motor operates to move the vehicle, to reduce Noise,
Vibration, and Harshness (NVH) while driving and to
improve fuel efficienc
Categories
- Home
- KIA Niro EV, Hybrid - Second generation - (SG2) (2021-2024) - Owner's manual
- Kia Niro - First generation - (DE) (2017-2022) - Service and Repair Manual
- Contact Us