KIA Niro: Crash Pad Side Cover
Kia Niro - First generation - (DE) (2017-2022) - Service and Repair Manual / Body (Interior And Exterior) / Crash Pad / Crash Pad Side Cover
Crash Pad Side Cover Components and components location
LH
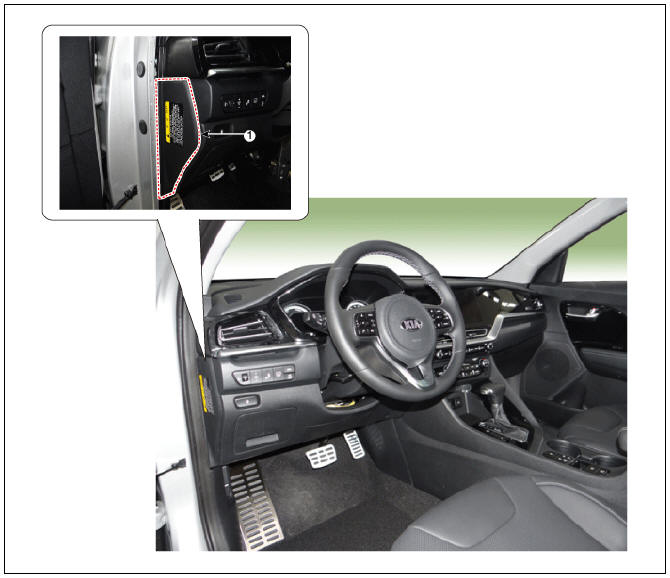
- Crash pad side cover (LH)
RH
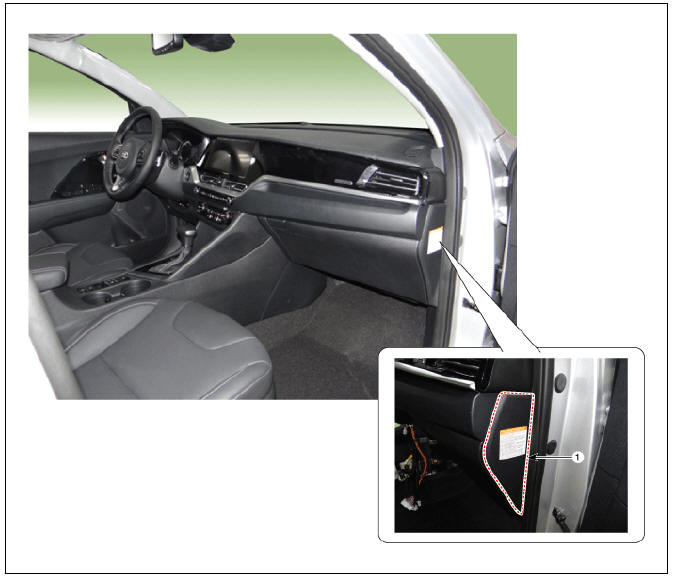
- Crash pad side cover (RH)
Crash Pad Side Cover Repair procedures
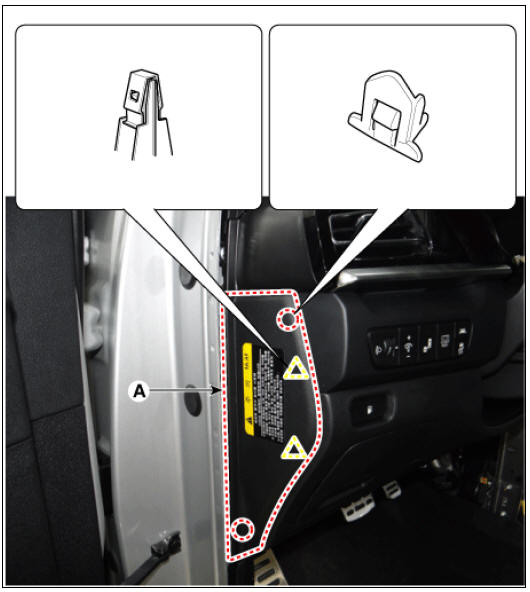
Replacement
Warning
Put on gloves to protect your hands.
Warning
- Use a plastic panel removal tool to remove interior trim pieces without marring the surface.
- Be careful not to bend or scratch the trim and panels.
- Remove the crash pad side cover (A) by using a remover.
LH
RH

- Install in the reverse order of removal.
Warning
- Make sure the connector is connected properly.
- Replace any damaged clips.
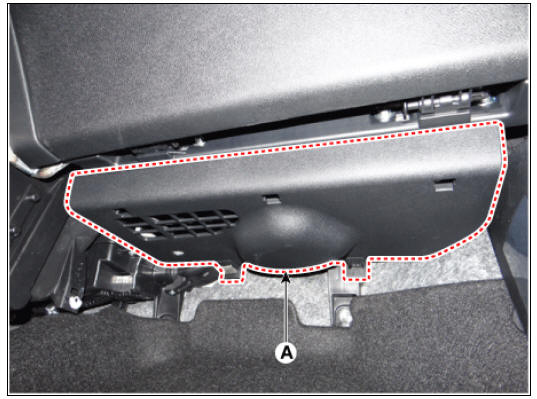
Crash Pad Under Cover Repair procedures
Replacement
Warning
Put on gloves to protect your hands.
Warning
- Use a plastic panel removal tool to remove interior trim pieces without marring the surface.
- Be careful not to bend or scratch the trim and panels.
- Using a screwdriver or remover and remove the crash pad under cover (RH) (A).
- Install in the reverse order of removal.
Warning
- Make sure the connector is connected properly.
- Replace any damaged clips
READ NEXT:
 Crash Pad Main Lower Panel
Crash pad main lower panel
Replacement
Warning
Put on gloves to protect your hands.
Warning
Use a plastic panel removal tool to remove interior trim pieces
without marring the surface.
Be careful not to bend or scratch the trim
Cowl Cross Bar Assembly
Cowl cross bar assembly
Replacement
Remove the cowl top cover.
(Refer to Cowl Top Cover - "Repair procedures")
Remove the main crash pad assembly.
(Refer to Crash Pad - "Main Crash Pad Assembly")
Remove the c
Fender
Fender assembly
Fender / Repair Procedures
Replacement
Warning
Be careful not to damage the fender and body.
Use a plastic panel removal tool to remove interior trim pieces
without marring the surface.
Remove the head
SEE MORE:
Power Door Mirror Switch Repair procedures
Inspection
Non-IMS Type
Disconnect the negative (-) battery terminal.
Remove the front left door trim.
(Refer to Body - "Front Door Trim")
Disconnect the power mirror switch connector from the door trim.
Check for conti
Emission Control System
Components Location
PCV Valve
Canister
Purge Control Solenoid Valve (PCSV)
Fuel Tank Pressure Sensor (FTPS)
Fuel Level Sensor (FLS)
Fuel tank air Filter
Catalytic converter (WCC)
Gasoline Particulate Filter (GPF)
PCV Valve
Categories
- Home
- KIA Niro EV, Hybrid - Second generation - (SG2) (2021-2024) - Owner's manual
- Kia Niro - First generation - (DE) (2017-2022) - Service and Repair Manual
- Contact Us