KIA Niro: Fender
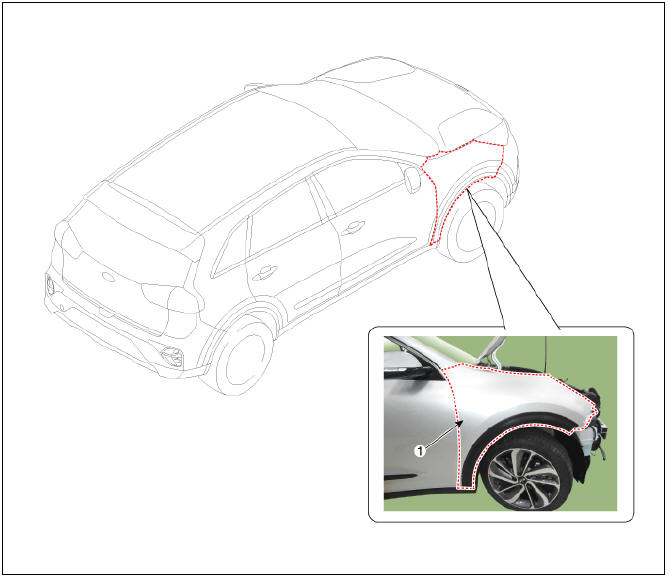
- Fender assembly
Fender / Repair Procedures
Replacement
Warning
- Be careful not to damage the fender and body.
- Use a plastic panel removal tool to remove interior trim pieces without marring the surface.
- Remove the headlamps.
(Refer to Front Bumper - "Front Bumper Cover")
- Remove the side seal molding.
(Refer to Body Side Molding - "Side Sill Molding")
- Remove the front wheel guard.
(Refer to Body Side Molding - "Front Wheel Guard")
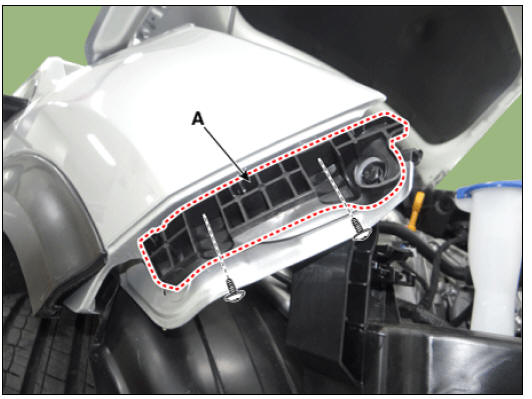
- Remove the front bumper side bracket (A) after loosening the screws.
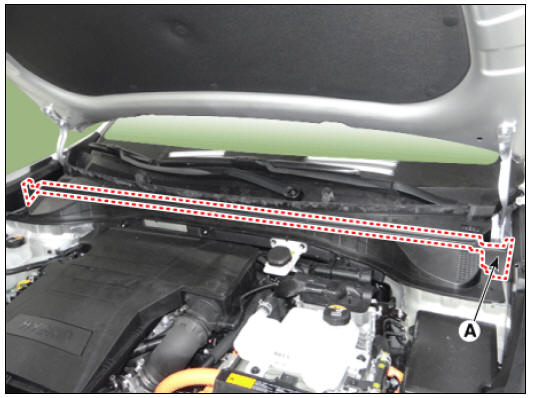
- Separate the hood weatherstrip (A).
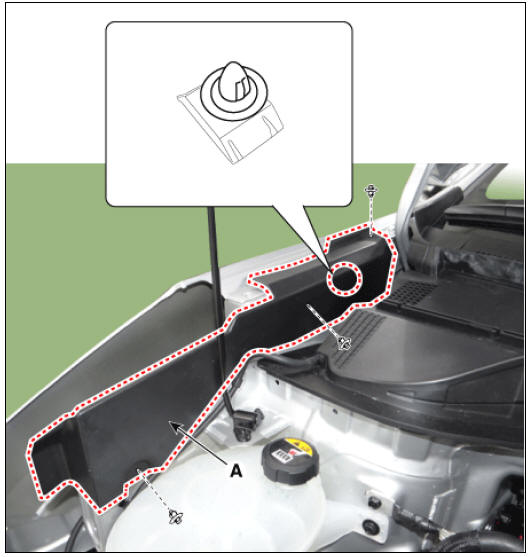
- Remove the fender side cover (A) after loosening the mounting clips.
- After loosening the mounting screws, bolts, and nut, remove the fender assembly (A).

- Install in the reverse order of removal.
Warning
Replace any damaged clips.
READ NEXT:
 Floor Carpet
Floor Carpet / Repair Procedures
Replacement
Warning
Put on gloves to protect your hands.
Warning
Use a plastic panel removal tool to remove interior trim pieces
without marring the surface.
Be careful not to bend or scratch the tr
Floor Console Assembly Repair procedures
Floor Console / Components And Components Location
Console complete
Console front cover (RH)
Console front cover (LH)
Console upper cover
Shift lever boot assembly
Floor Console Assembly Components and components location
F
SEE MORE:
Crankshaft Repair procedures
Disassembly
Warning
Be sure to read and follow the "General Safety Information and
Caution" before doing any work related with
the high voltage system. Failure to follow the safety instructions may
result in serious electrical injuries.
Power limited
A: Power limited
In the following cases, this warning message
is displayed when the vehicle's
power is limited for safety.
When the power is limited for the
safety of the high-powered parts of
an electric vehicle. The power is limi
Categories
- Home
- KIA Niro EV, Hybrid - Second generation - (SG2) (2021-2024) - Owner's manual
- Kia Niro - First generation - (DE) (2017-2022) - Service and Repair Manual
- Contact Us