KIA Niro: Floor Console Assembly Repair procedures
Kia Niro - First generation - (DE) (2017-2022) - Service and Repair Manual / Body (Interior And Exterior) / Floor Console / Floor Console Assembly Repair procedures
Floor Console / Components And Components Location
- Console complete
- Console front cover (RH)
- Console front cover (LH)
- Console upper cover
- Shift lever boot assembly
Floor Console Assembly Components and components location
- Floor console assembly
Floor Console Assembly Repair procedures
Replacement
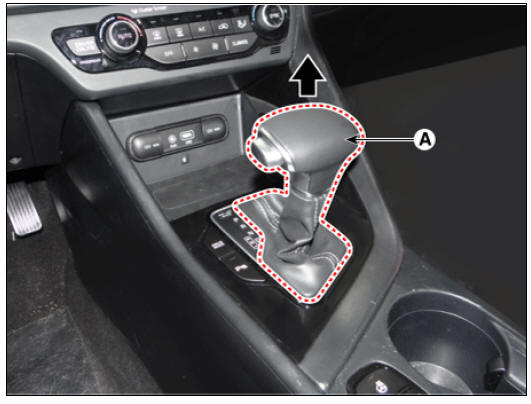
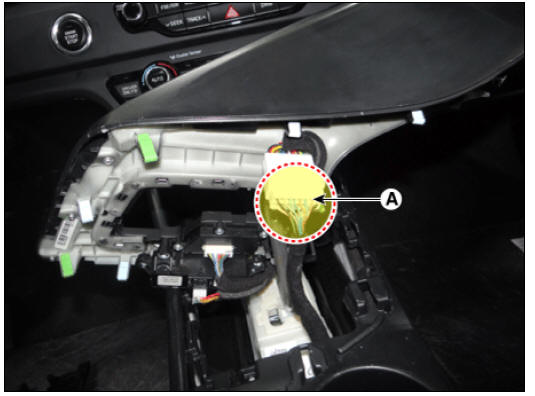
- Pull out and remove the gear knob and gear boots (A).
- Separate the floor console upper cover (A) by using a remover.
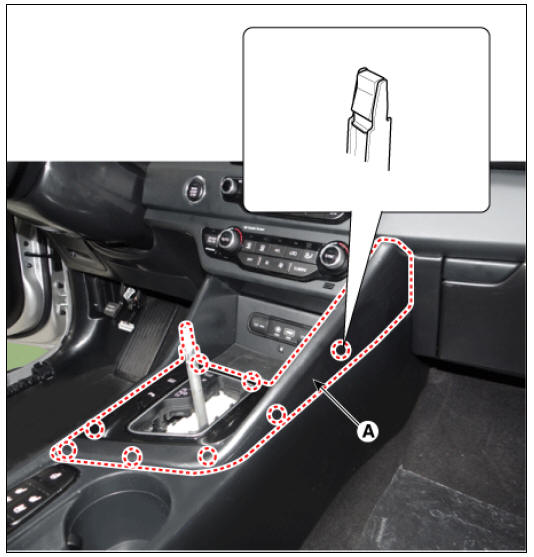
- Remove the floor console upper cover after disconnecting the connectors (A).
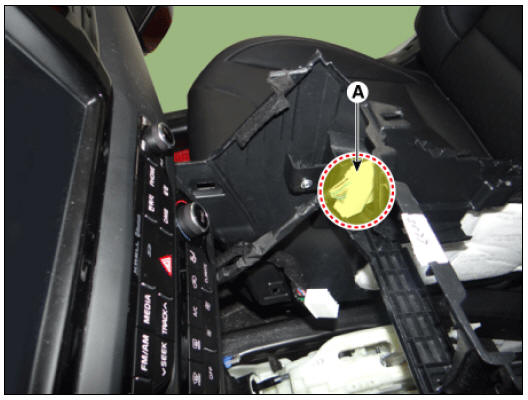
- Separate the floor console tray assembly (A).
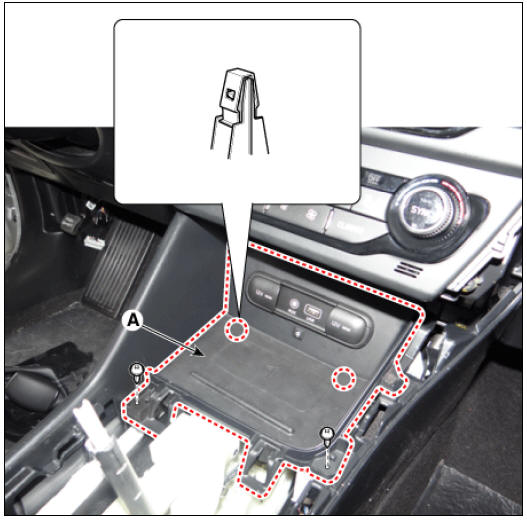
- Remove the floor console tray after disconnecting the connectors (A).

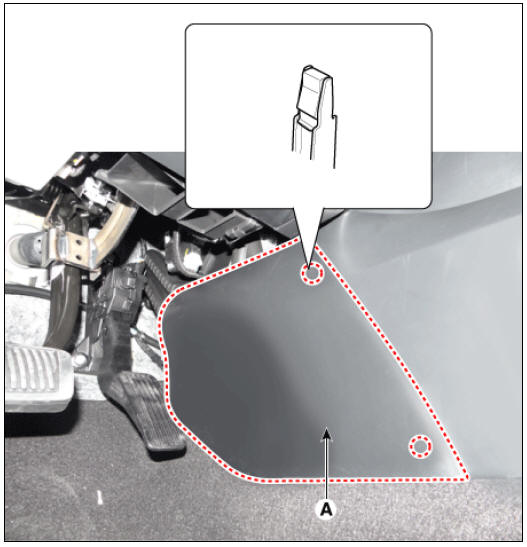
- Remove the side console side covers (A) on both sides by pushing them rearward
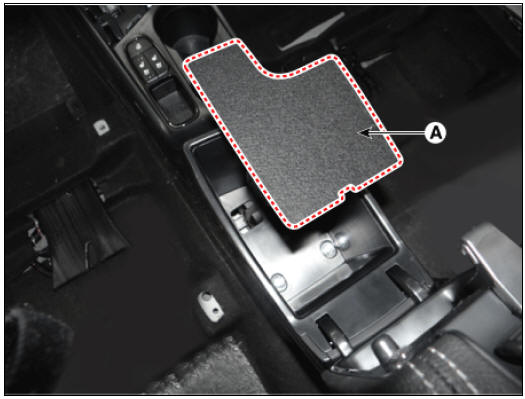
- Remove the console armrest mat (A).
- Loosen the console upper mounting bolts (A).
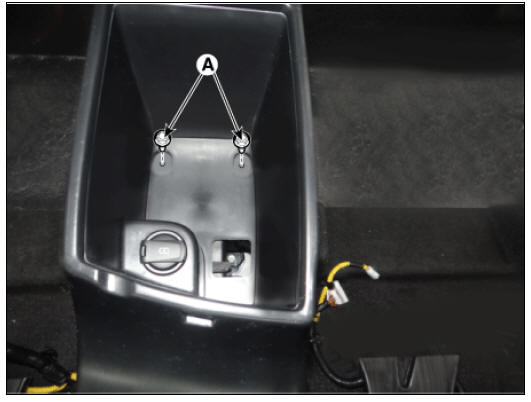
- Separate the console assembly after loosening the screws.
Front
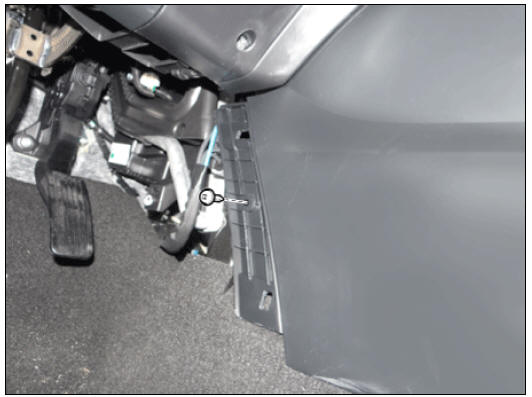
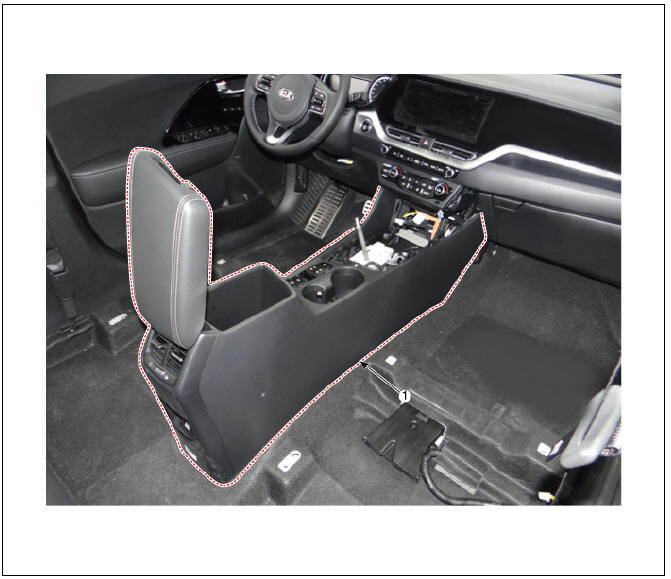
- Disconnect the console wiring connector (A).
- Remove the console complete (A) after loosening the upper mounting screw.

- Install in the reverse order of removal.
Warning
- Make sure the connector is connected properly.
- Replace any damaged clips.
READ NEXT:
 Rear Console Cover / Console Armrest
Rear Console Cover Components and components location
Rear console cover
Rear Console Cover Repair procedures
Replacement
Remove the floor console assembly.
(Refer to Floor Console - "Floor Console Assembly")
Loosen the
Front Bumper Cover, Front Bumper Beam Assembly
Front Bumper / Components And Components Location
Front bumper cover
Front bumper side bracket (LH)
Front bumper side bracket (RH)
Front Bumper Cover Components and components location
Front bumper assembly
Front Bum
SEE MORE:
Clutch Actuator Motor
Remove the under cover.
(Refer to Engine Mechanical System - "Engine Room Under Cover")
Remove the front wheel guard (LH).
(Refer to Body - "Front Wheel Guard")
Disconect the clutch actuator connector (A).
Motor
ESP OFF Switch
ESP OFF Switch Components and components location
ESP OFF swtich
Description
The ESP OFF switch is for the user to turn off the ESP system.
The ESP OFF lamp is on when ESP OFF switch is engaged.
Removal
Turn ignition switch OF
Categories
- Home
- KIA Niro EV, Hybrid - Second generation - (SG2) (2021-2024) - Owner's manual
- Kia Niro - First generation - (DE) (2017-2022) - Service and Repair Manual
- Contact Us