KIA Niro: Cowl Cross Bar Assembly
Kia Niro - First generation - (DE) (2017-2022) - Service and Repair Manual / Body (Interior And Exterior) / Crash Pad / Cowl Cross Bar Assembly
- Cowl cross bar assembly
Replacement
- Remove the cowl top cover.
(Refer to Cowl Top Cover - "Repair procedures")
- Remove the main crash pad assembly.
(Refer to Crash Pad - "Main Crash Pad Assembly")
- Remove the cowl side trim.
(Refer to Interior Trim - "Cowl Side Trim")
- Disconnect the steering column connectors.
(Refer to Steering System - "Steering Column and Shaft")
- Lower the steering column after loosening the mounting bolts.
(Refer to Steering System - "Steering Column and Shaft")
- Remove the accelerator pedal.
(Refer to Engine Control System - "Accelerator Position Sensor (APS)")
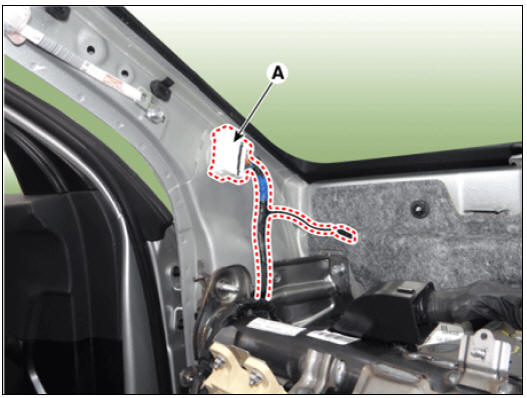
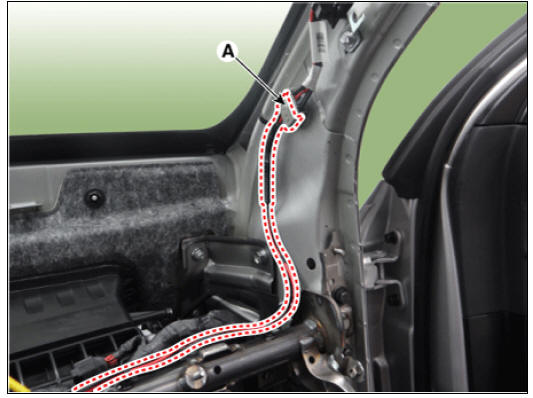
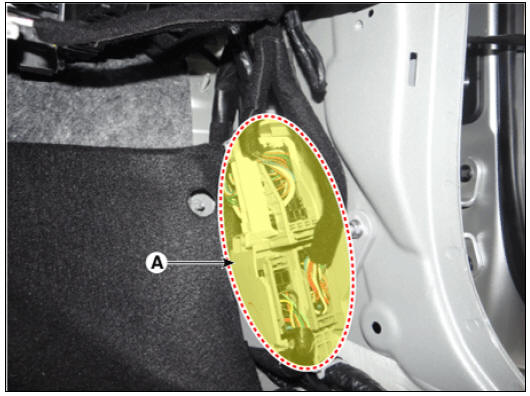
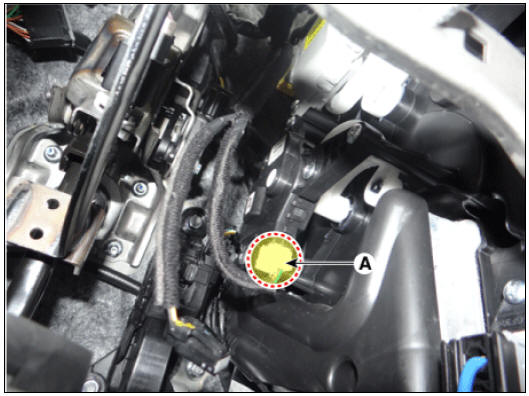
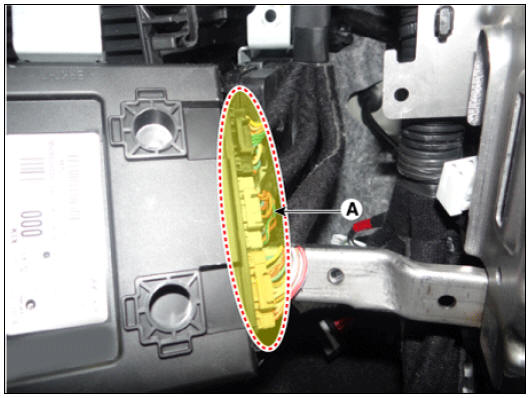
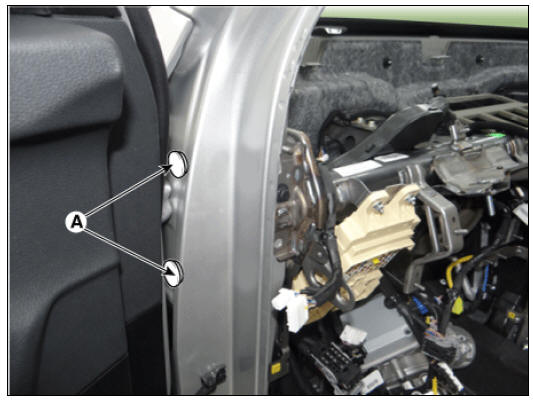
- Disconnect the connector (A) and the mounting clips in the front pillar.
Driver side
Passenger side
- Disconnect the multi box connectors (A).
Driver side
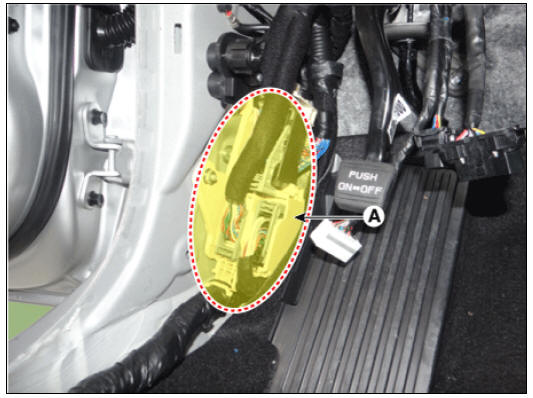
Passenger side
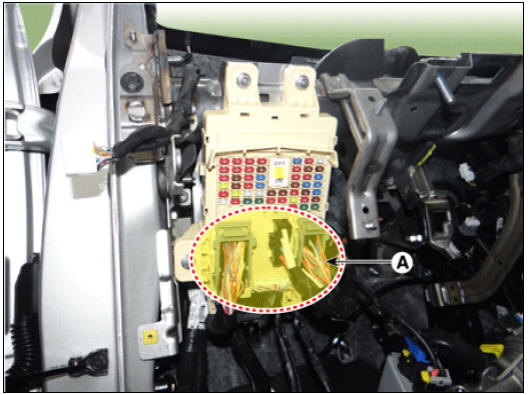
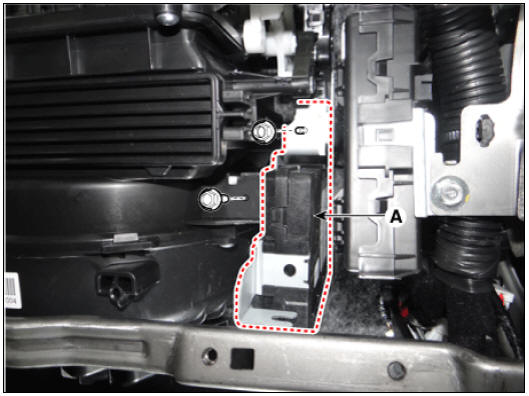
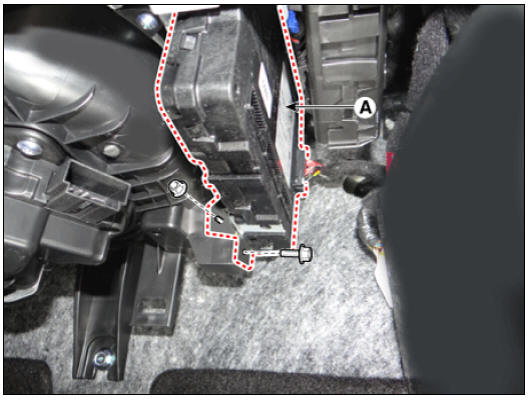
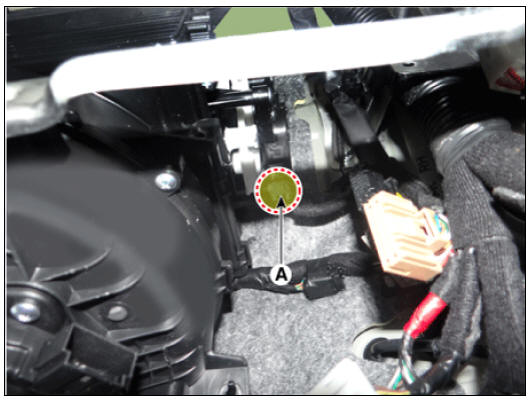
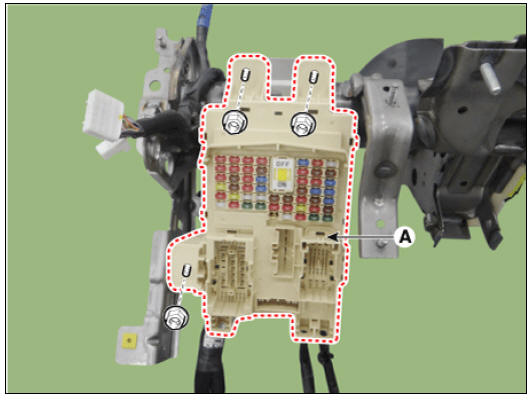
- Disconnect the passenger compartment junction box connectors (A).
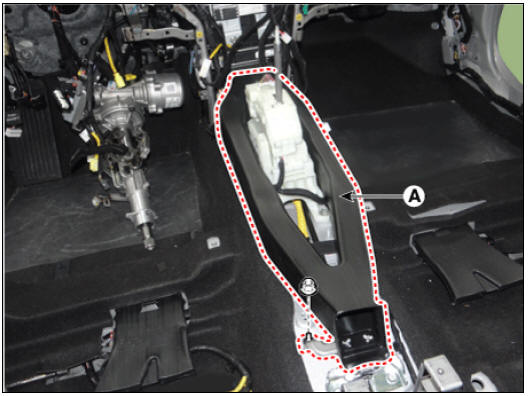
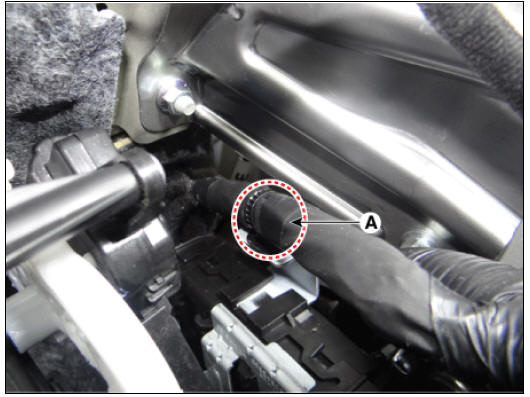
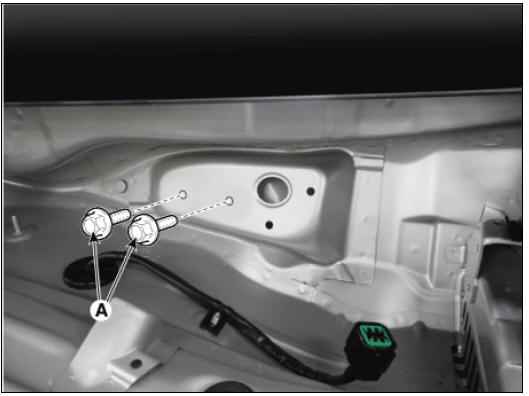
- Remove the rear air duct (A) after loosening the nut.
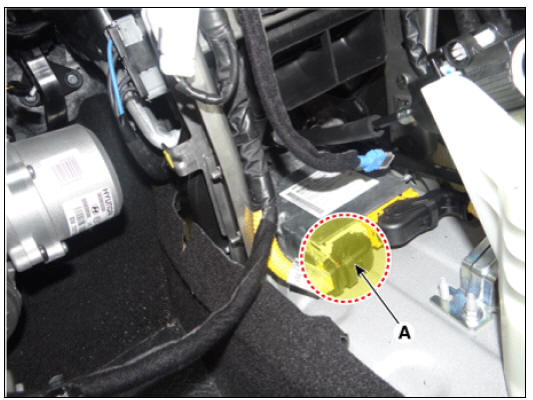
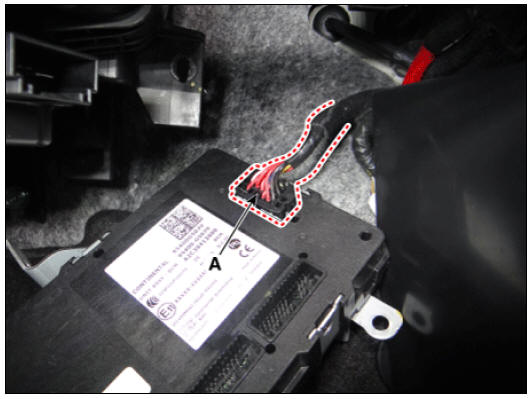
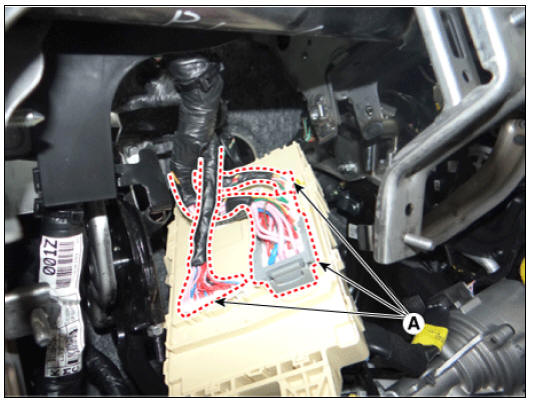
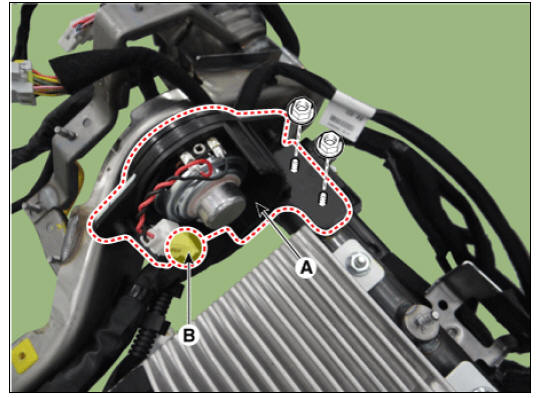
- Disconnect the connector (A) and wiring mounting clip.
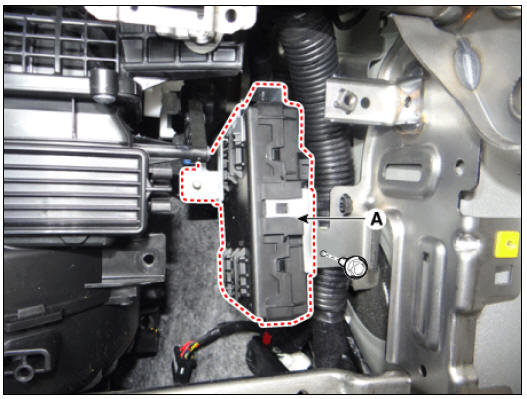
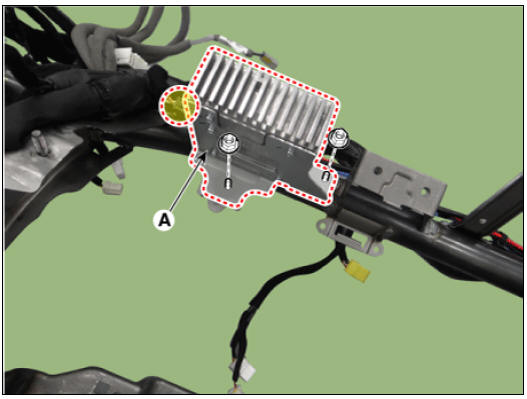
- Disconnect the airbag control module (SRSCM) connector (A) and wiring mounting clip.
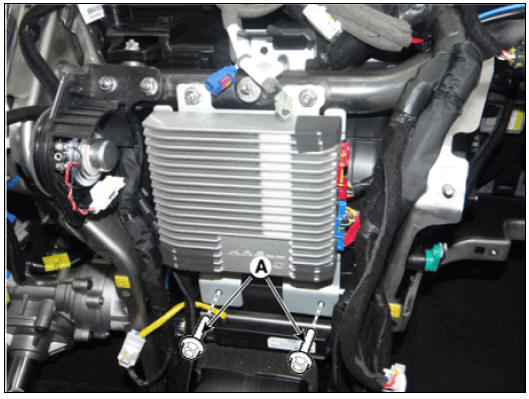
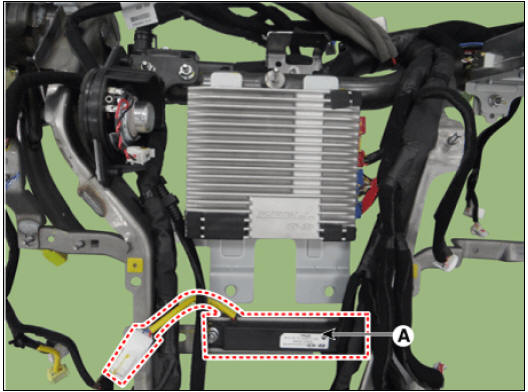
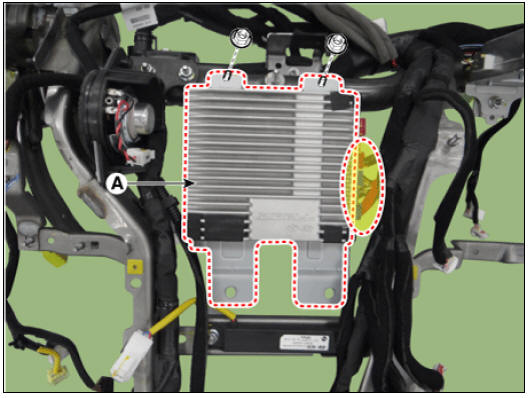
- Loosen the external amplifier mounting bolts (A).
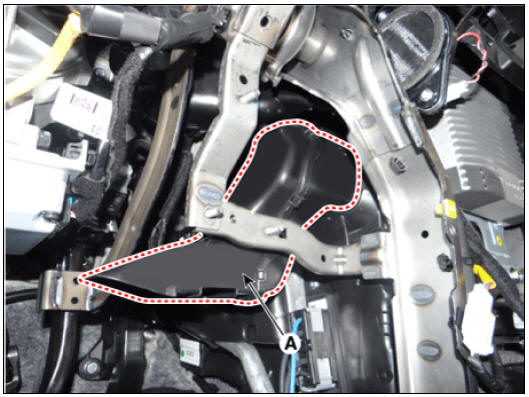
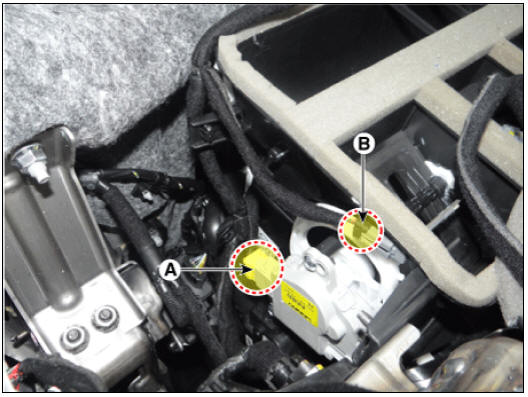
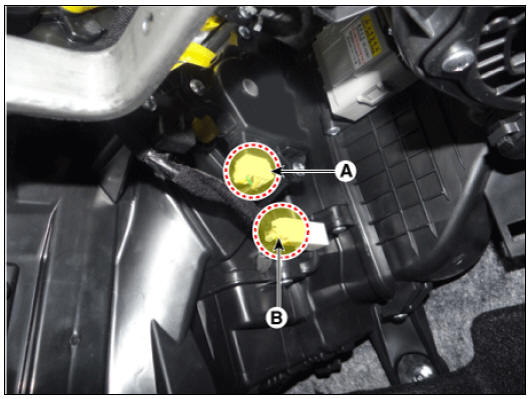
- Separate the shower duct (A).
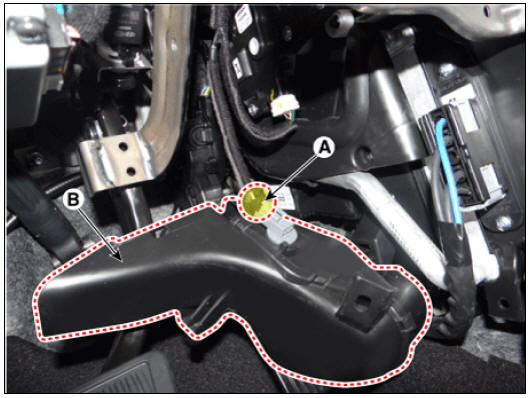
- Remove the shower duct (B) after disconnecting the connector (A).
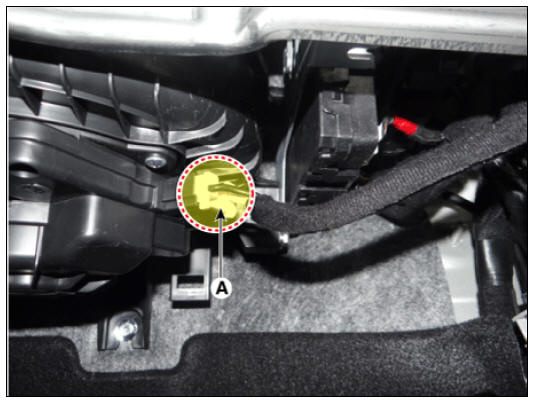
- Disconnect the temperature actuator connector (A).
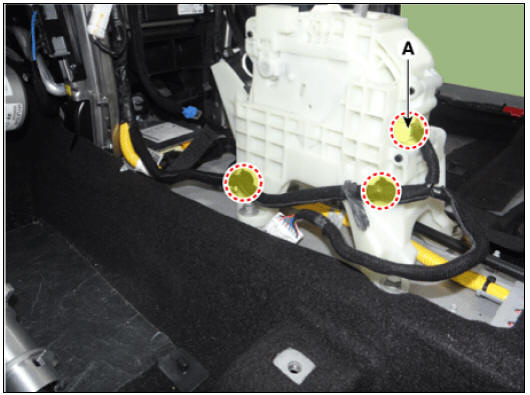
- Disconnect the mode actuator connector (A), duct sensor (B) and wiring mounting clip.
- Disconnect the blower motor connector (A).
- Disconnect the BCM unit connectors (A).

- Separate the BCM unit (A) after loosening the bolts and nuts.
- Remove the BCM unit after disconnecting the connectors (A).
- Disconnect the wiring mounting mounting clip (A).
- Separate the smart key unit (A) after loosening the bolt.
- Remove the smart key unit after disconnecting the connectors (A).
- Disconnect the intake actuator (A).
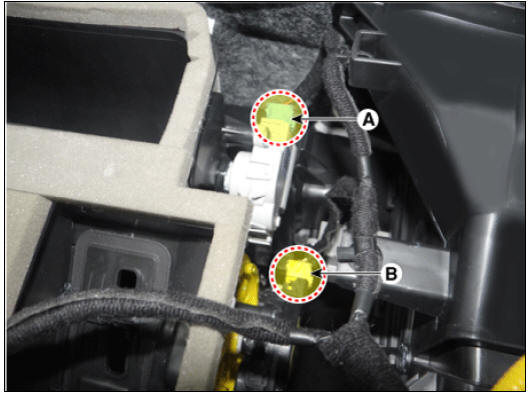
- Disconnect the passenger side temperature actuator (A) & evaporator temperature sensor connectors (B) and then disconnect the wiring mounting clip.
- Disconnect the auto defogging connector (A) & passenger side mode actuator connectors (B) and then disconnect the wiring mounting clip.
- Loosen the cowl cross bar mounting bolts (A).
- Remove the cowl cross bar mounting bolt cap (A).
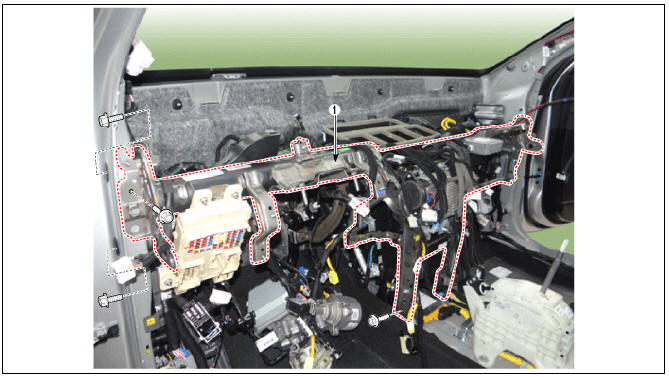
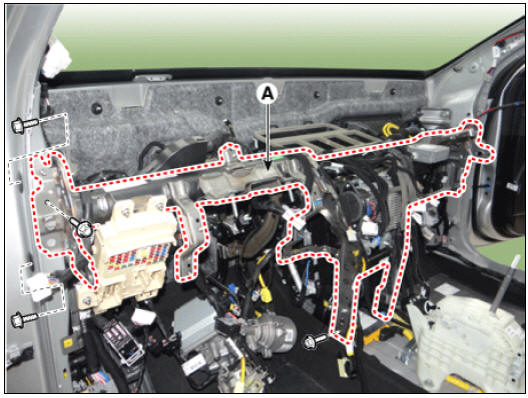
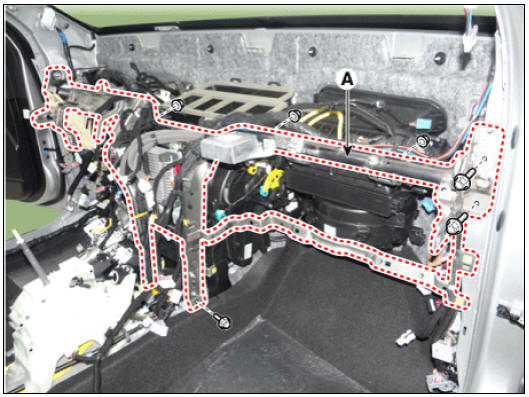
- Remove the cowl cross bar assembly (A) after loosening the mounting bolts & nuts.
Driver Side
Passenger Side
- Remove the smart junction block (SJB) (A) after loosening the mounting nuts.
- Remove the smart junction block (SJB) after disconnecting the connectors (A).
- Remove the smart key antenna (A) after removing the connectors & nuts.
- Remove the external amplifier (A) after removing the connectors & nuts.
- Remove the cluster speaker (A) after removing the connectors (B) & nuts.
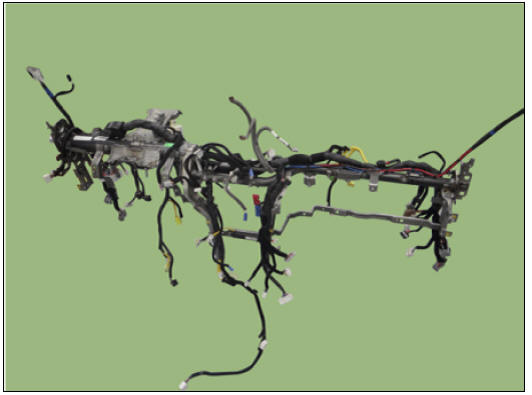
- Remove the main wiring from the cowl cross bar.
- Install in the reverse order of removal.
Warning
- Make sure the crash pad fits onto the guide pins correctly.
- Before tightening the bolts, make sure the crash pad wire harnesses are not pinched.
- Make sure the connectors are plugged in properly, and the antenna lead is connected properly.
- Enter the anti-theft code for the radio, then enter the customer's radio station presets.
READ NEXT:
 Fender
Fender assembly
Fender / Repair Procedures
Replacement
Warning
Be careful not to damage the fender and body.
Use a plastic panel removal tool to remove interior trim pieces
without marring the surface.
Remove the head
Floor Carpet
Floor Carpet / Repair Procedures
Replacement
Warning
Put on gloves to protect your hands.
Warning
Use a plastic panel removal tool to remove interior trim pieces
without marring the surface.
Be careful not to bend or scratch the tr
SEE MORE:
Using the remote key (Kia NIRO Hybrid)
* The information provided may differ
according to which functions are
applicable to your vehicle.
Keys
Record your key number
The key code number is stamped on the
key code tag attached to the key set.
If you lose your keys, Kia recommends
Front Oil Seal Repair procedures | Timing Chain Cover Repair procedures
Components
Front oil seal
Timing chain cover
Variable force solenoid (VFS) valve
O-ring
Timing chain tensioner
Timing chain tensioner arm
Timing chain guide
Timing chain
Timing chain cam guide
Front
Categories
- Home
- KIA Niro EV, Hybrid - Second generation - (SG2) (2021-2024) - Owner's manual
- Kia Niro - First generation - (DE) (2017-2022) - Service and Repair Manual
- Contact Us