KIA Niro: Electric A/C Compressor
Electric A/C Compressor body inside inspection
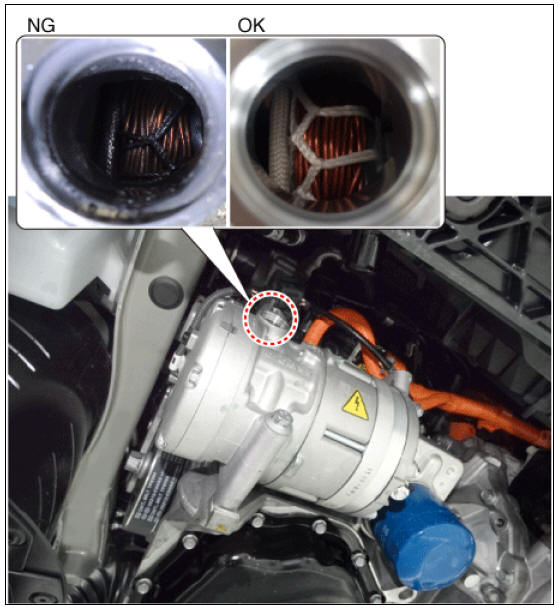
- Electric compressor body inside check procedure.
1) Remove the low-pressure pipe from the electric compressor.
2) Check if the copper wire and white thread inside of the compressor was contaminated.
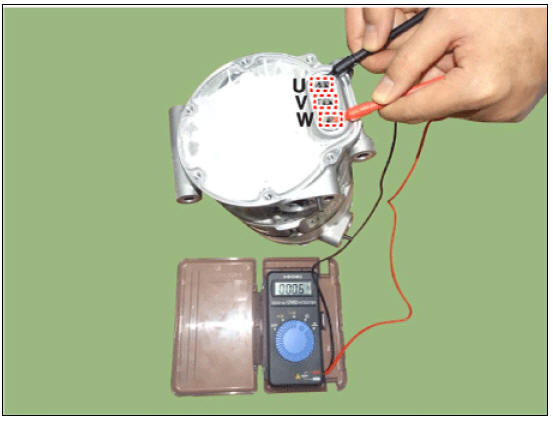
- To check the compressor motor, measure the resistance of the 3-phase power pin.
1) If the 3-phase resistance value is out of specification, it means motor malfunction. Replace the whole compressor assembly.
Electric A/C Compressor inverter inspection
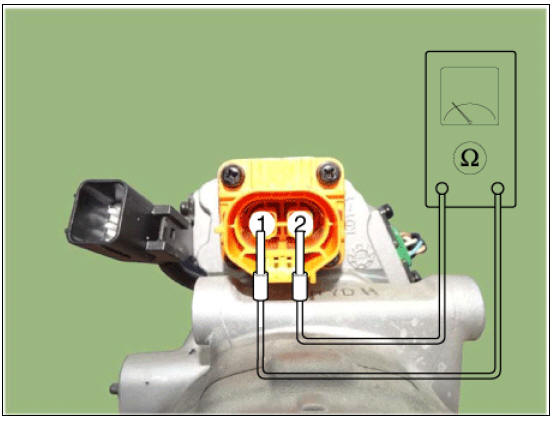
- To check the compressor inverter, measure the resistance value of the compressor's high voltage pin, low voltage pin and insulation.
(1) High voltage pin
Normal resistance value : 100 ↑
Abnormal resistance : 100 ↑
(2) Low voatage pin
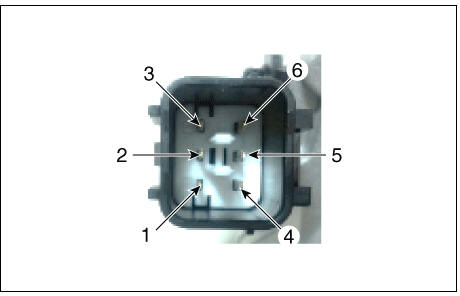
- Measure CAN HIGH/LOW Resistance
- Measure terminals 2 and 5.
Normal : 120 Ω Abnormal : inverter short-circuited (=0Ω)
- Measure CAN Ground Resistance
- Measure terminals 1 and 2 / 1 and 5.
Normal : 13~14 KΩ / 200~600 KΩ (High Performance DSP Specifications) Abnormal : inverter short-circuited (=0Ω)
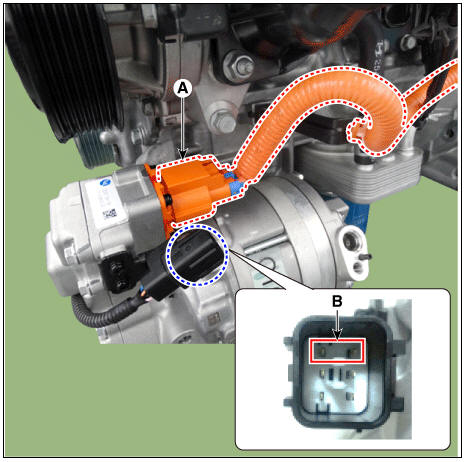
- Measure Interlock HIGH/LOW Resistance measure (Connect high voltage connector (A) and measure low voltage (B) 3 and 6 resistance.)
Normal : Below 1.0 Ω Abnormal : MΩ
Warning


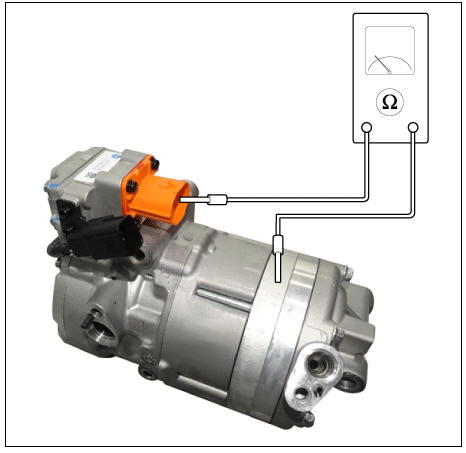
- Compressor insulation resistance measurement.
Normal resistance value : check insulation resistance (Minimum : 100 MΩ) (@500 Vdc, no coolant)
Replacement
READ NEXT:
 Inverter kit / Body kit
Remove the battery (-) cable.
Disconnect the high voltage circuit. (Refer to Generals)
Use the recovery/reproduction/charging device to recover the coolant.
Warning
When removing the connector between the vehicle and the
compressor,
 Condenser
Condenser Components and components location
Condenser
Condenser Repair procedures
Inspection
Check the condenser fins for clogging and damage. Clean and blow
compressed air on any clogged fins. Unfold any bent fins
with a
 A/C Pressure Transducer
A/C Pressure Transducer Components and components location
A/C Pressure Transducer
Description
A/C pressure transducer measures the pressure in high pressure line and
converts it into voltage. Based
on the converted voltage, engine ECU
SEE MORE:
 Door lock features (Kia NIRO Hybrid)
Your vehicle is equipped with features
that will automatically lock or unlock
your vehicle based on settings you
select in the cluster or infotainment system
screen.
Auto lock enable on speed
When this feature is set in the cluster or
infotain
 Safety precautions for electric vehicle
If an accident occurs
If towing is required, tow the vehicle with
a flatbed equipment or dollies with all
wheels off the ground.
Dollies
If you must tow the vehicle using only
two wheels, lift the rear wheels off the
ground an
Categories
- Home
- KIA Niro EV, Hybrid - Second generation - (SG2) (2021-2024) - Owner's manual
- Kia Niro - First generation - (DE) (2017-2022) - Service and Repair Manual
- Contact Us
