KIA Niro: Front Disc Brake
Front Disc Brake Components and components location
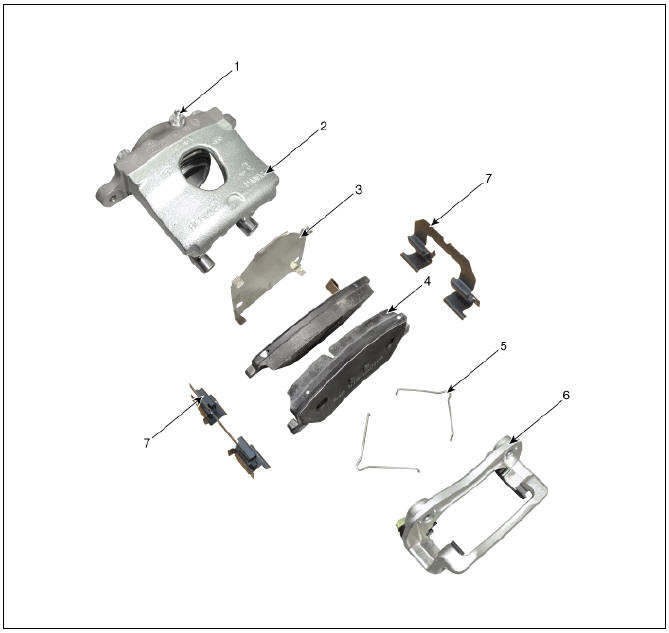
- Bleed screw
- Caliper body
- Pad inner shim
- Brake pad
- Pad return spring
- Caliper carrier
- Pad retainer
Removal
- Remove the wheel & tire.
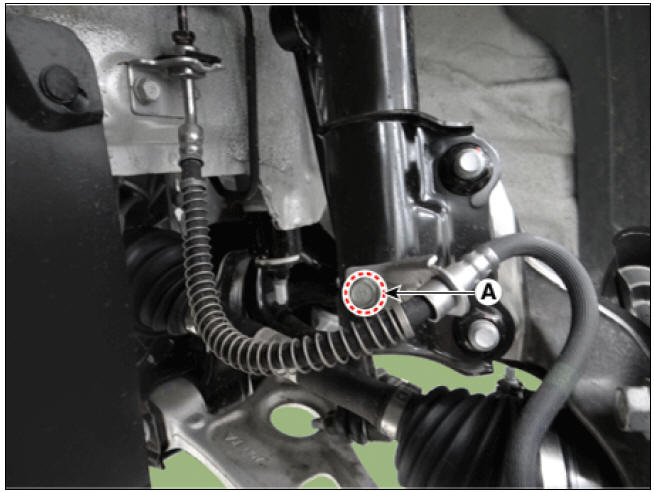
- Remove the caliper hose bracket bolt (A).
Tightening torque : 8.8 - 13.7 N*m (0.9 - 1.4 kgf*m, 6.5 - 10.1 lb*ft)
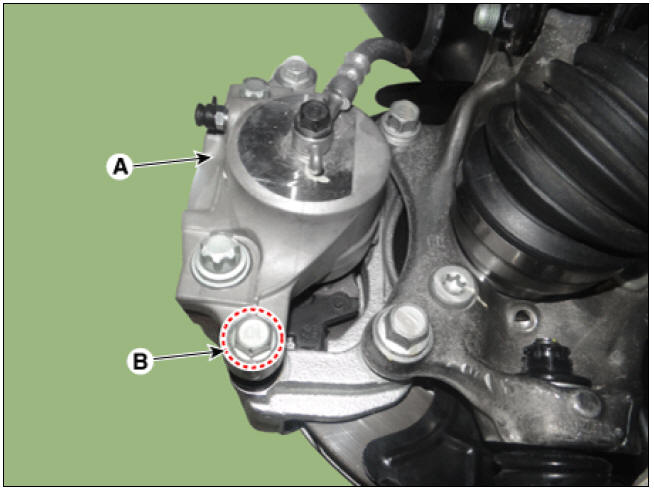
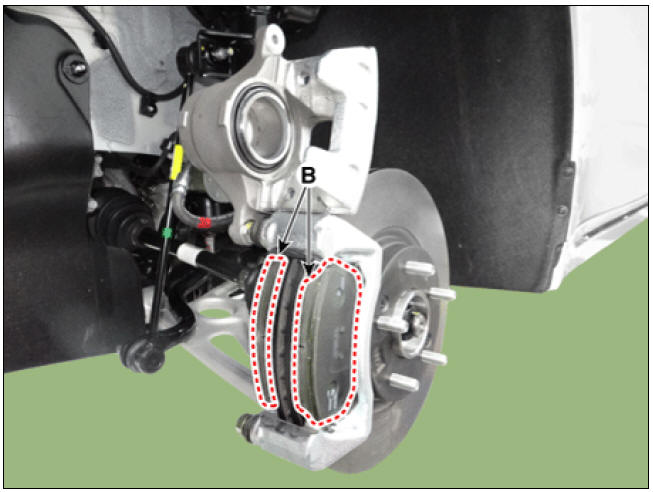
- Loosen the guide rod bolt (B) and pivot the caliper (A) up out of the way.
Tightening torque: 21.6 - 31.4 N*m (2.2 - 3.2 kgf*m, 15.9 - 23.1 lb*ft)
- Remove the return spring (A) and brake pad (B).
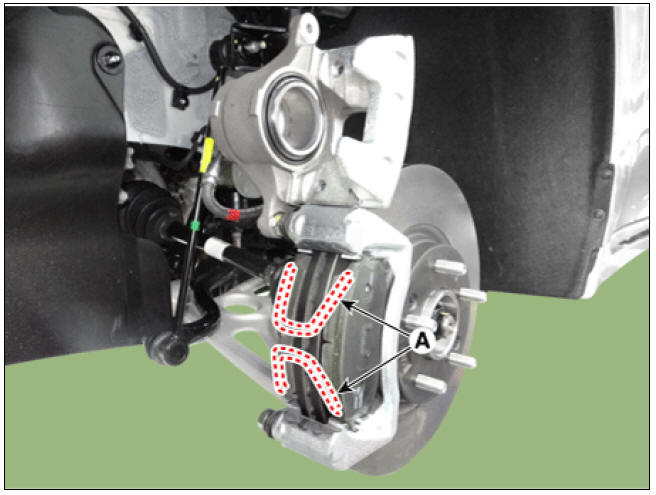
Warning
- Pad return springs must be replaced with new ones whenever pads are replaced.
- Technicians should be careful not to deform pad return springs.
- When pad return springs are deformed, it may cause improper braking, more fuel consumption
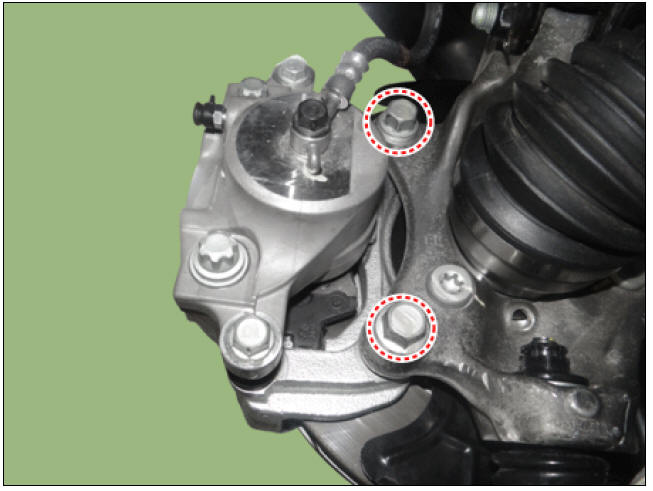
- Loosen the caliper bolts and then remove the caliper carrier.
Tightening torque: 78.4 - 98.0 N*m (8.0 - 10.0 kgf*m, 57.8 - 72.3 lb*ft)
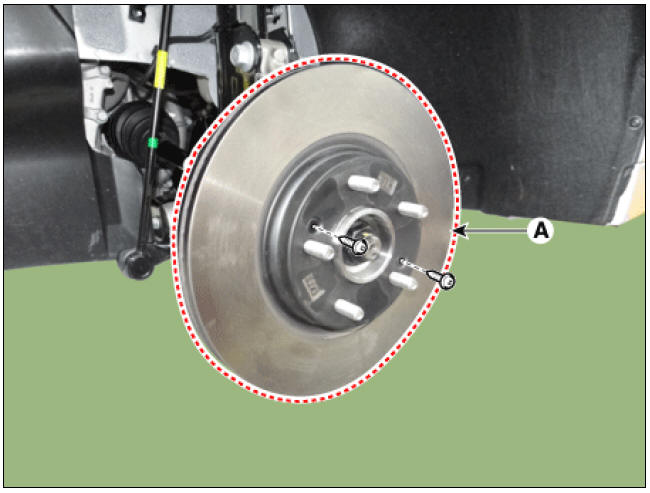
- Loosen the screw and then remove the brake disk (A).
Tightening torque : 4.9 - 5.8 N*m (0.5 - 0.6 kgf*m, 3.6 - 4.3 Ib*ft)
Inspection
Front brake disc thickness check
- Check the brake pads for wear and fade.
- Check the brake disc for damage and cracks.
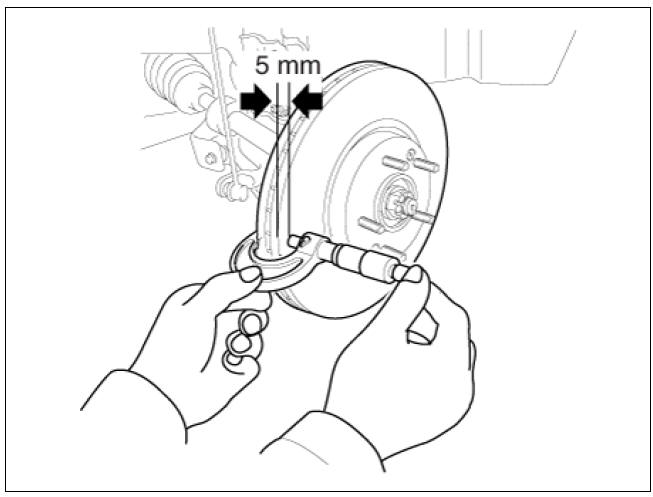
- Remove all rust and contamination from the surface, and measure the disc thickness at 8 points, at least, of same distance (5mm) from the brake disc outer circle.
Front brake disc thickness
- Standard: 22 mm (0.8661 in)
- Service Limit: 20.0 mm (0.7874 in)
Deviation: Less than 0.005mm (0.0002in)
- If wear exceeds the limit, replace the discs and pad assembly left and right of the vehicle.
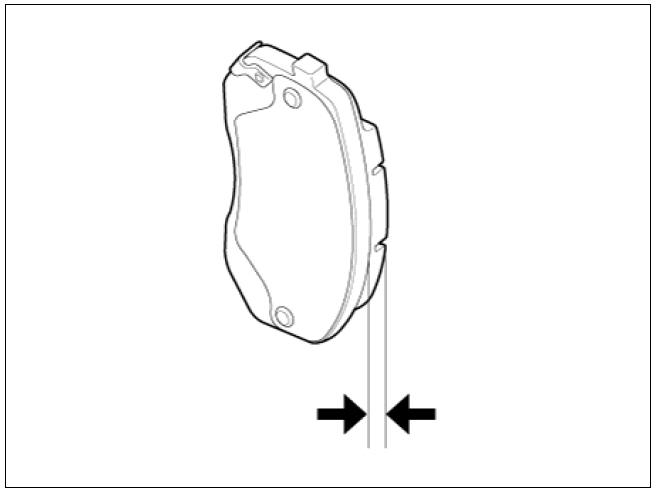
Front Brake Pad Check
- Check the pad wear. Measure the pad thickness and replace it, if it is less than the specified value.
Pad thickness
Standard value: 11.0 mm (0.4331 in.)
Service limit: 2.0 mm (0.079 in.)
- Check that grease is applied, to sliding contact points. Check for metal damage to the pad and backing.
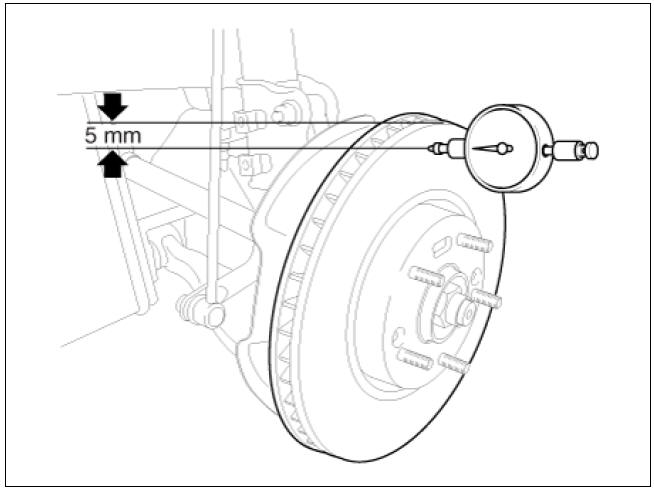
Front brake disc runout check
- Place a dial gauge about 5mm (0.2 in.) from the outer circumference of the brake disc, and measure the runout of the disc.
Brake disc runout
Limit: 0.04 mm (0.0016 in.) or less (new one)
- If the runout of the brake disc exceeds the limit specification, replace the disc, and then measure the runout again.
- If the runout does not meet the limit specification, remove the disc, turn it 180º and reinstall. Then check the runout of the brake disc again.
- If the runout cannot be corrected by changing the position of the brake disc, replace the brake disc.
Installation
- Installation is the reverse of removal.
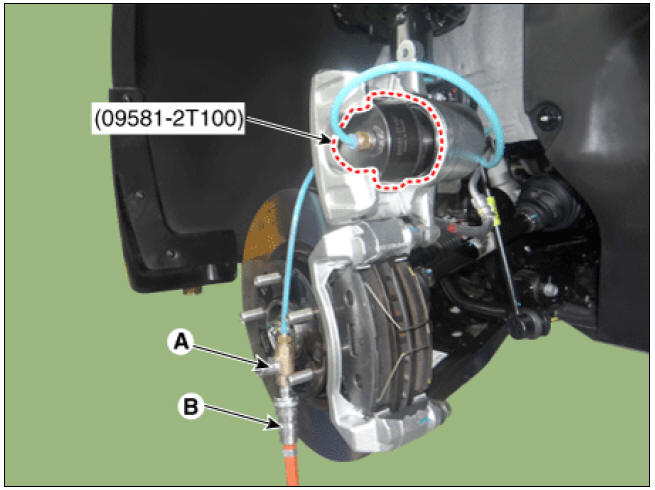
- Use a SST (09581-2T100) when installing the brake caliper assembly.
Warning
- Do not hammer on the piston or pry directly against piston face using a screwdriver to push in piston.
- How to use the SST (09581-2T100)
1) Connect an air hose (B) to the SST after confirming that the valve of the SST is securely closed.
2) Insert the SST into the caliper and press the caliper piston while opening the valve of the SST slowly by turning it counterclockwise.
3) Close the valve (A) of the SST and disconnect the air hose (B); then, open
the valve again to get the
rest of air out and remove the SST from the caliper.
- After filling the brake fluid in the reservoir, perform the air bleed.
(Refer to the Brake system - "Brake Bleeding Procedure")
READ NEXT:
 Rear Disc Brake
With EPB
Brake pad
Pad return spring
Caliper carrier
Pad retainer
Caliper body
Lever return spring
Stopper
Operating lever
Bleed screw
EPB actuator
Bleed screw
Caliper body
Caliper carrier
Pad retainer
Brake
Stop Lamp Switch
Stop Lamp Switch Components and components location
Brake pedal member assembly
Stop lamp switch
Brake pedal arm
Brake pedal pad
Brake pedal stroke sensor
Operation
Operation principle of inductive non-contact switch
Use the
SEE MORE:
Front Stabilizer Bar
Front Stabilizer Bar Components and components location
Stabilizer bar
Stabilizer link
Front Stabilizer Bar Repair procedures
Removal
Disconnect the battery negative cable.
Remove the universal bolt (A).
Tightening torque :
32
Air conditioning refrigerant label
Example Type A
Example Type B
Classification of refrigerant
Amount of refrigerant
Classification of Compressor lubricant
Caution
Flammable Refrigerant
Registered technician to service Air
Conditioning system
Service manual
Categories
- Home
- KIA Niro EV, Hybrid - Second generation - (SG2) (2021-2024) - Owner's manual
- Kia Niro - First generation - (DE) (2017-2022) - Service and Repair Manual
- Contact Us