KIA Niro: Oil Pan Repair procedures
Oil Pan Components and components location
Components
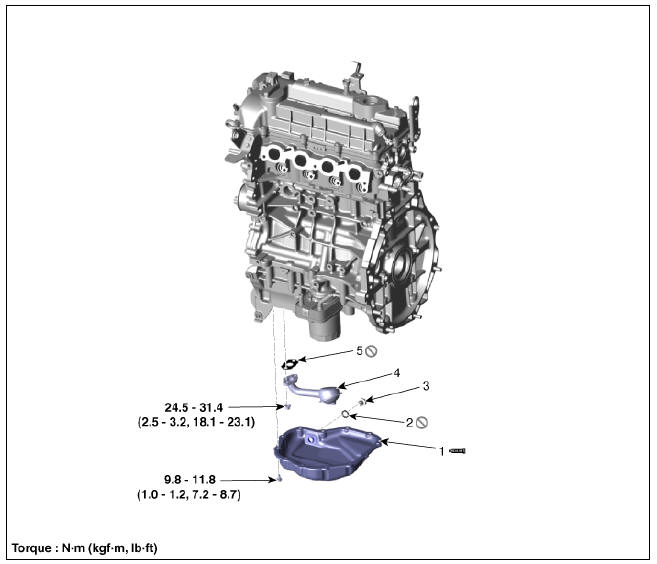
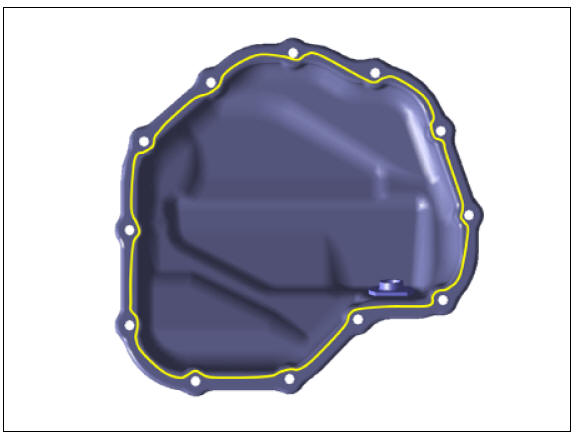
- Oil pan
- Drain plug gasket
- Drain plug
- Oil screen
- Oil screen gasket
Oil Pan Repair procedures
Removal
- Remove the engine room under cover.
(Refer to Engine and Transaxle Assembly - "Engine Room Under Cover")
- Drain engine oil.
(Refer to Lubrication System - "Engine Oil")
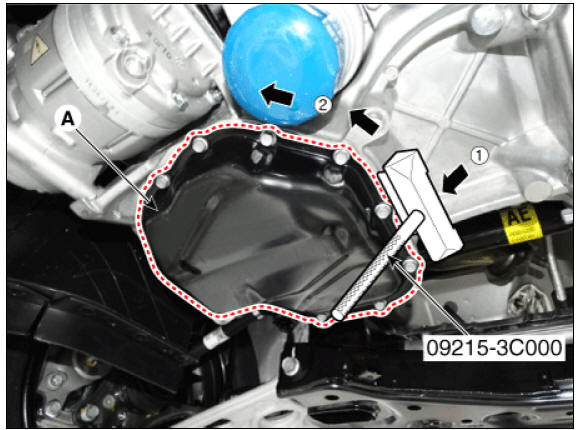
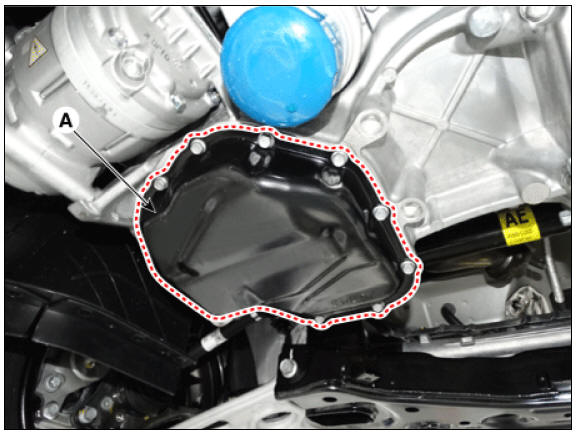
- Remove the oil pan (A).
(1) Unfasten the bolts.
(2) Insert the blade of SST (09215-3C000) between the lower crankcase and the oil pan. Separate the applied sealer and remove the oil pan.
Warning
Loosen one oil pan bolt near each corner of the oil pan leaving the bolts held in by about 2 threads.
Then remove all other pan bolts.
Warning
- Insert the SST between the oil pan and the lower crankcase by tapping it with a plastic hammer in the direction of (1) arrow.
- After tapping the SST with a plastic hammer along the direction of (2) arrow around more than 2/3 edge of the oil pan, remove it from the lower crankcase.
- Do not turn over the SST abruptly without tapping as it may damage the SST.
- Be careful not to damage the contacting surfaces of the lower crankcase and the oil pan.
- Remove the oil screen (A) with the gasket.
Installation
- Install the oil screen (A) with a new gasket.
Tightening torque : 24.5 - 31.4 N*m (2.5 - 3.2 kgf*m, 18.1 - 23.1 lb*ft)
- Install the oil pan.
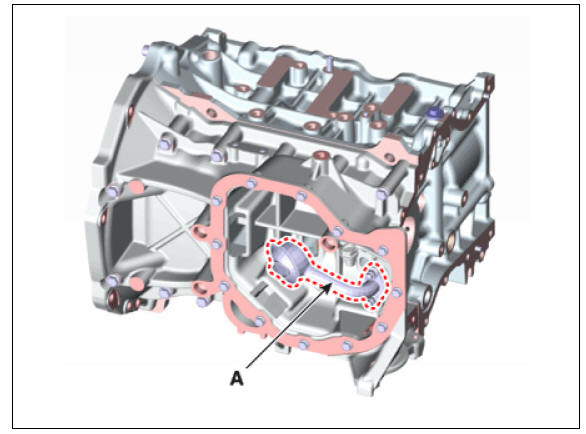
(1) Using a gasket scraper, remove all the old packing material from the gasket surfaces.
(2) The sealant locations on the oil pan and the lower crankcase must be free of harmful foreign materials, oil, dust and moisture.
Spray cleaner on the surface and wipe with a clean duster.
(3) After applying liquid sealant on the oil pan, assemble it within 5 minutes of applying sealant.
Continuous bead of sealant should be applied to prevent any path of oil leakage.
Sealant :
THREE BOND 1217H or LOCTITE 5900H
Warning
- When applying sealant gasket, sealant must not protrude inside the oil pan.
- To prevent leakage of oil, apply sealant gasket on the inner threads of the bolt holes.
- If the sealant is applied to the bottom surface of the lower crankcase, it should be in the same location as the oil pan.
(4) Install the oil pan (A). Uniformly tighten the bolts in several passes.
Tightening torque : 9.8 - 11.8 N*m (1.0 - 1.2 kgf*m, 7.2 - 8.7 lb*ft)
Warning
- After assembly, wait at least 30 minutes before filling the engine with oil.
- Always use a new drain plug gasket.
- Refill engine with engine oil.
READ NEXT:
 Oil Cooler Repair procedures | Oil Pressure Switch Repair procedures
Removal
Remove the engine room under cover.
(Refer to Engine and Transaxle Assembly - "Engine Room Under Cover")
Drain the engine oil and then remove the oil filter.
(Refer to Lubrication
SEE MORE:
Lighting System
Lighting System / Components And Components Location
Specifications
Lighting System / Components And Components Location
Headlamp (Low/High BI-Function)
Turn signal lamp
Sub low beam
Daytime running light, Position lamp
Fog
Main/ Sub High Voltage Battery
Main High Voltage Battery
Power Relay Assembly (PRA)
Cell Monitoring Unit (CMU)
Battery Temperature Sensor
Runaway Arresting Device (RAD)
Warning
Main Relays (Positive, Negative), Pre-Charge Relay, Pre-Charge
Resistor, and Battery
Categories
- Home
- KIA Niro EV, Hybrid - Second generation - (SG2) (2021-2024) - Owner's manual
- Kia Niro - First generation - (DE) (2017-2022) - Service and Repair Manual
- Contact Us