KIA Niro: Front Door Latch
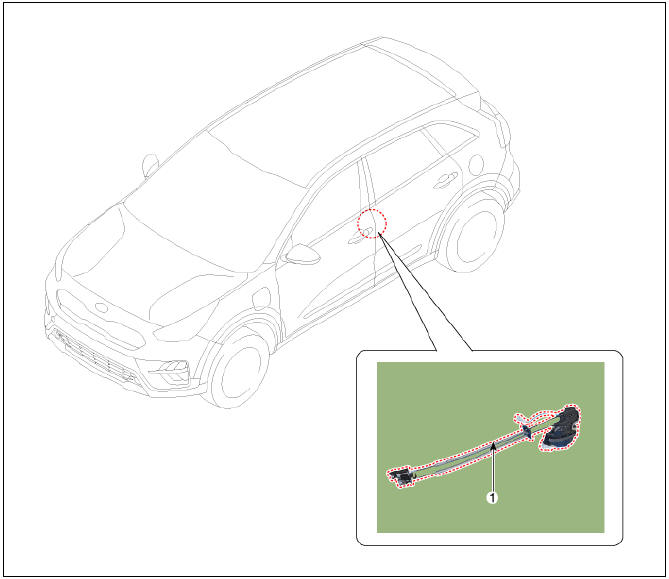
- Front door latch
Replacement
- Remove the front door module.
(Refer to Front Door - "Front Door Module")
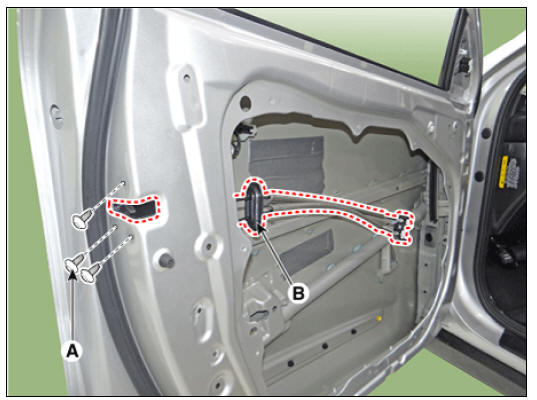
- Disconnect the front door latch rod (A) and extension wiring clip (B).
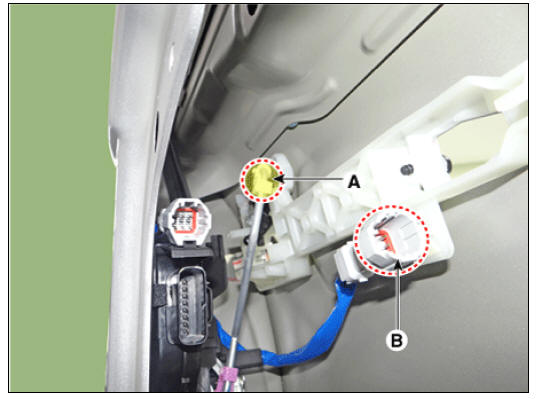
- Remove the front door latch (B) after loosening the mounting screw (A).
- Install in the reverse order of removal.
Warning
- Make sure the connector is connected properly.
- Make sure the door locks/unlocks and opens/closes properly.
- Replace any damaged clips.
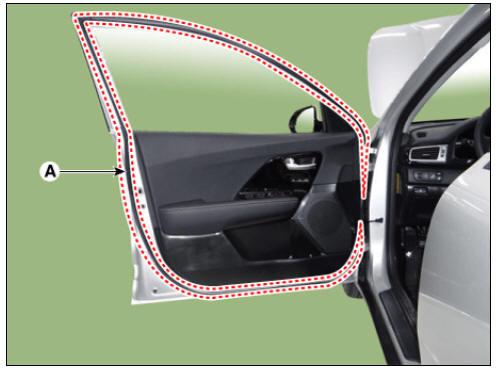
Front Door Belt Inside Weatherstrip
Replacement
- Remove the front door trim.
(Refer to Front Door - "Front Door Trim")
- Remove the front door belt inside weatherstrip (A).
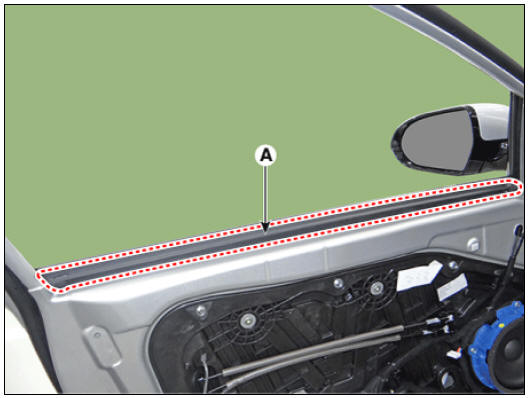
- Install in the reverse order of removal.
Warning
Replace any damaged clips.
Front Door Belt Outside Weatherstrip
Replacement
- Pull down front door window glass by pressing the power window glass switch.
- Remove the front door belt outside weatherstrip (A).

- Install in the reverse order of removal.
Warning
Replace any damaged clips.
Front Door Side Weatherstrip
Replacement
- Loosen the front door checker (A) mounting bolt.
Tightening torque : 19.6 - 29.4 N*m (2.0 - 3.0 kgf*m,14.5 - 21.7 lb*ft)
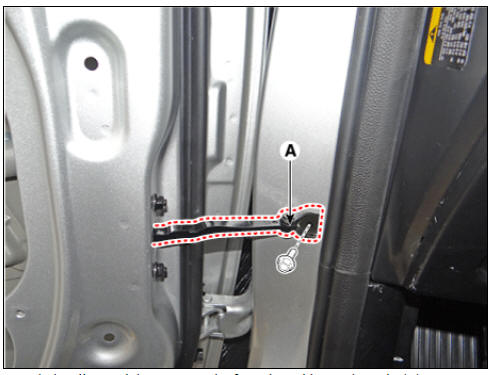
- Detach the clips, and then remove the front door side weatherstrip (A).
- Install in the reverse order of removal.
Warning
Replace any damaged clips.
READ NEXT:
 Fuel Filler Door / Repair Procedures | Charge Port Door Housing Assembly
Components and components location
Fuel filler door
Fuel Filler Door / Repair Procedures
Replacement
Warning
Use a plastic panel removal tool to remove interior trim pieces without marring the surface.
Open the fuel filler door
SEE MORE:
Exterior care
Exterior general caution
It is very important to follow the label
directions when using any chemical
cleaner or polish. Read all warning and
caution statements that appear on the
label.
NOTICE
If you park the vehicle around a stainless
signbo
Front / Rear Outlet Cooling Duct
Front Outlet Cooling Duct
Switch "OFF" the ignition and disconnect the negative (-) terminal of
the auxiliary 12V battery.
Shut off the high voltage circuit.
(Refer to Hybrid Control System - "High Voltage Shutoff Procedure")
Categories
- Home
- KIA Niro EV, Hybrid - Second generation - (SG2) (2021-2024) - Owner's manual
- Kia Niro - First generation - (DE) (2017-2022) - Service and Repair Manual
- Contact Us