KIA Niro: Front Door Trim Repair procedures | Front Door Window Glass
Kia Niro - First generation - (DE) (2017-2022) - Service and Repair Manual / Body (Interior And Exterior) / Front Door / Front Door Trim Repair procedures | Front Door Window Glass
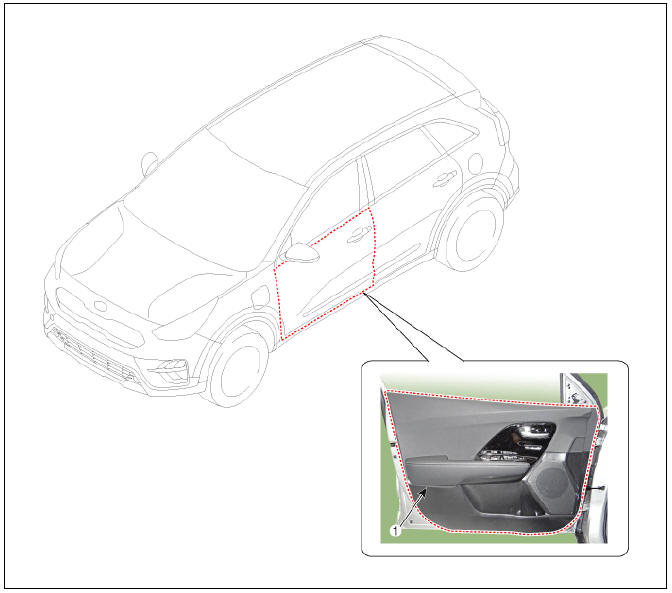
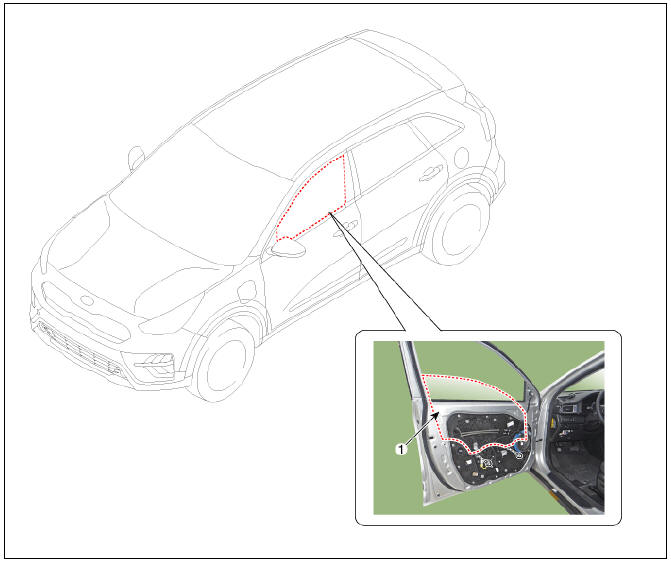
- Front door trim
Replacement
- Remove the front door quadrant inner cover (A) by using a remover.
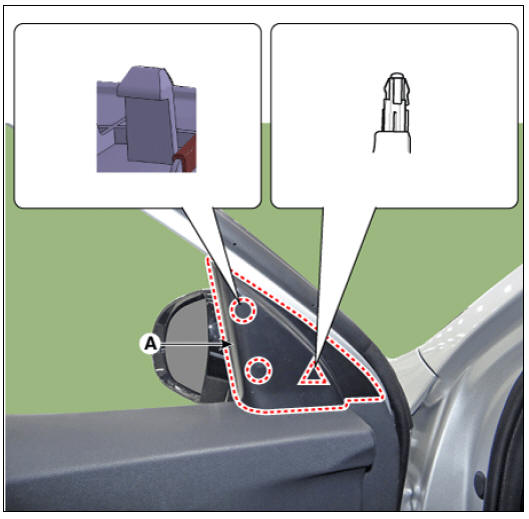
- Disconnect the cap (A) after loosening the screw.
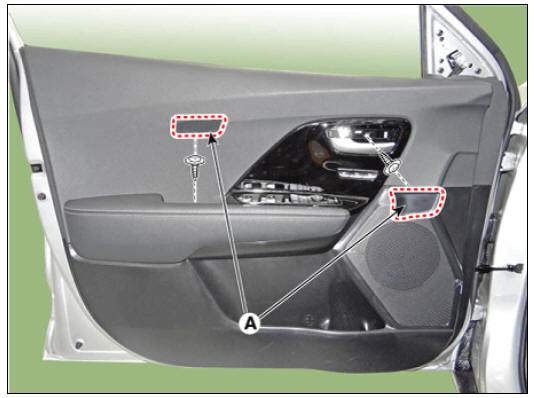
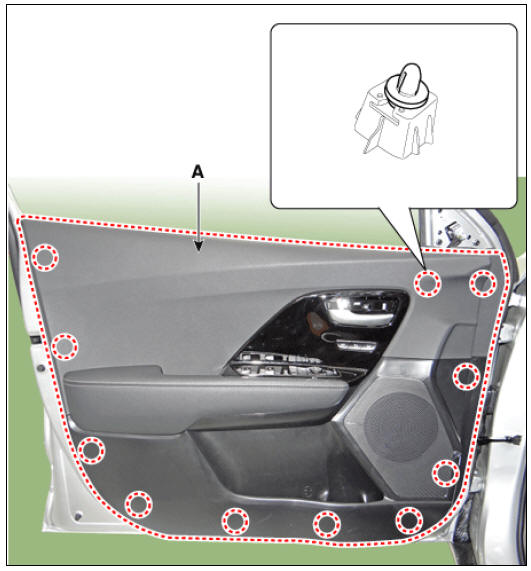
- Remove the front door trim (A).
- Remove the front door inside handle cage (A). Disconnect the IMS connector (B).
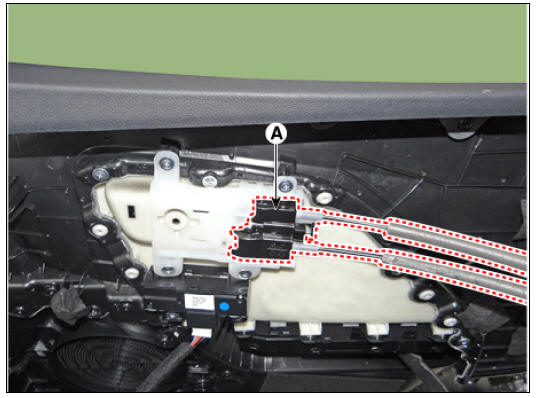
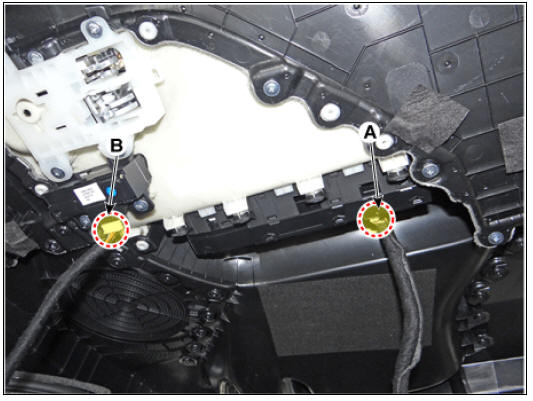
- Disconnect the power window switch connector (A) and IMS switch connector (B).
- Install in the reverse order of removal.
Warning
- Make sure the connector is connected properly.
- Make sure the door locks/unlocks and opens/closes properly.
- Replace any damaged clips.
Front Door Inside Handle Repair procedures
Replacement
- Remove the front door trim.
(Refer to Front Door - "Front Door Trim")
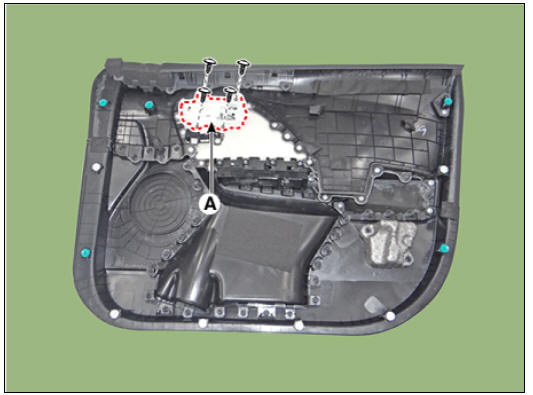
- Remove the front door inside handle (A) after loosening the screws.
Warning
- Make sure the connector is connected properly.
- Make sure the door locks/unlocks and opens/closes properly.
- Replace any damaged clips.
Front Door Window Glass
Front Door Window Glass Components and components
- Front door window glass
Replacement
- Remove the front door trim.
(Refer to Front Door - "Front Door Trim")
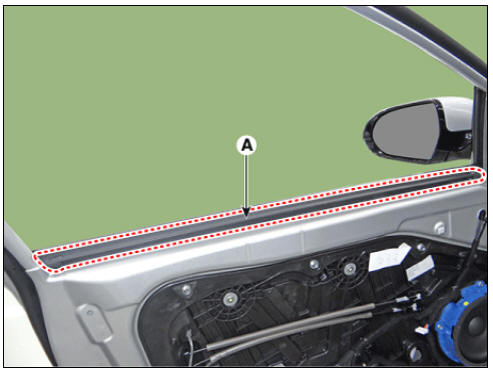
- Remove the front door belt inside weatherstrip (A).
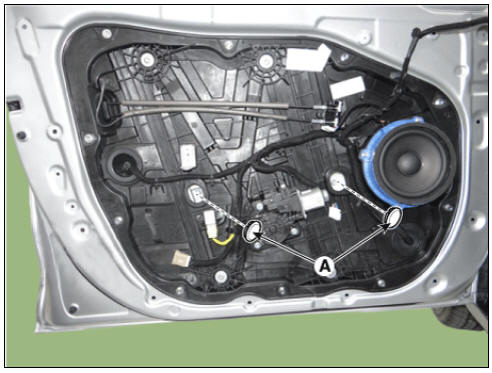
- Remove the front door window glass mounting hole plug (A).
Warning
Be careful not to drop the glass and/or scratch the glass surface.
Warning
- Use the door switch to align the mounting hole/bolt with the hole in the door.
- If unable to operate the window motor, remove the motor and align the hole by hand.
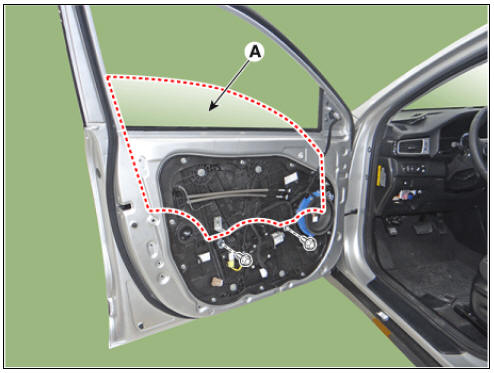
- Carefully adjust the front door window glass (A) until the bolts are visible, then loosen them. Separate the glass from the glass run and carefully pull the glass out through the window slot.
Tightening torque : 7.8 - 11.8 N*m (0.8 - 1.2 kgf*m, 5.8 - 8.7 lb*ft)
- Install in the reverse order of removal.
Warning
- Roll the glass up and down to see if it moves freely without binding.
- Adjust glass position as needed.
- Make sure the door lock and opens properly.
- Replace any damaged clips.
READ NEXT:
 Front Door Module | Front Door Outside Handle
Front Door Module Components and components location
Front door module
Replacement
Remove the front door trim.
(Refer to Front Door - "Front Door Trim")
Disconnect the front door main connector (A).
SEE MORE:
Power tailgate
Operating the power tailgate
Operation
Press the power tailgate open/close
button inside the vehicle or with the
smart key for 1 second. The power
tailgate opens with a warning sound.
Press and hold the power tailgate
open/clos
Manual mode
Paddle shifter is used to shift without
taking your hands off the steering wheel.
Operation
Pull the right side (+) of the paddle
shifter once to shift up.
Pull the left side (-) of the paddle
shifter once to shift down.
Operating
Categories
- Home
- KIA Niro EV, Hybrid - Second generation - (SG2) (2021-2024) - Owner's manual
- Kia Niro - First generation - (DE) (2017-2022) - Service and Repair Manual
- Contact Us