KIA Niro: Front Seat Belt Retractor | Height Adjuster
Kia Niro - First generation - (DE) (2017-2022) - Service and Repair Manual / Body (Interior And Exterior) / Front Seat Belt / Front Seat Belt Retractor | Height Adjuster
Front Seat Belt / Components And Components Location
- Front seat belt retractor
- Height adjuster
- Rear seat belt retractor (side)
- Rear seat belt retractor (center)
Front Seat Belt Retractor
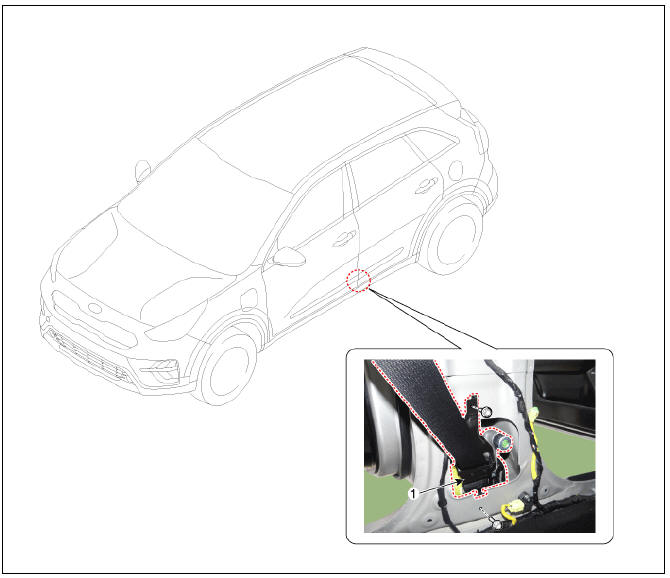
- Front seat belt retractor
Front Seat Belt Retractor Repair procedures
Replacement
- Remove the center pillar upper trim.
(Refer to Interior Trim - "Center Pillar Trim")
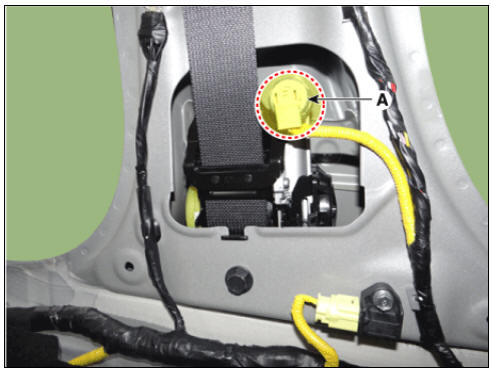
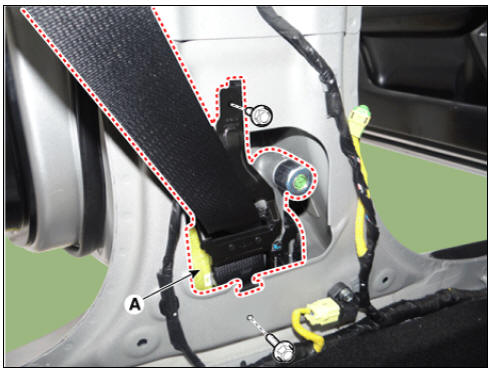
- Disconnect the connector (A).
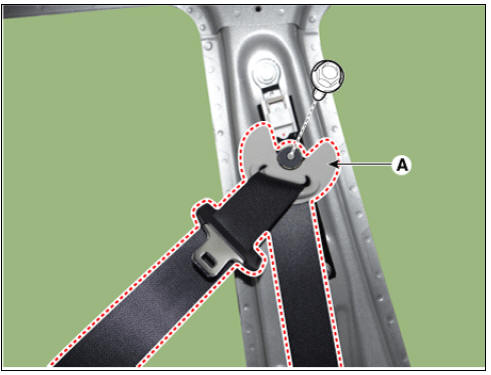
- Remove the front seat belt upper anchor (A) after loosening the mounting bolt.
Tightening torque : 39.2 - 53.9 N*m (4.0 - 5.5 kgf*m, 28.8 - 39.8 lb*ft)
- Remove the front seat belt retractor (A) after loosening the bolts.
Tightening torque :
Lower : 39.2 - 53.9 N*m (4.0 - 5.5 kgf*m, 28.8 - 39.8 lb*ft)
Upper : 7.8 - 11.8 N*m (0.8 - 1.2 kgf*m, 5.8 - 8.7 lb*ft)
- Install in the reverse order of removal
Warning
- Make sure that the connector is plugged in properly.
- Replace any damaged clips.
Height Adjuster
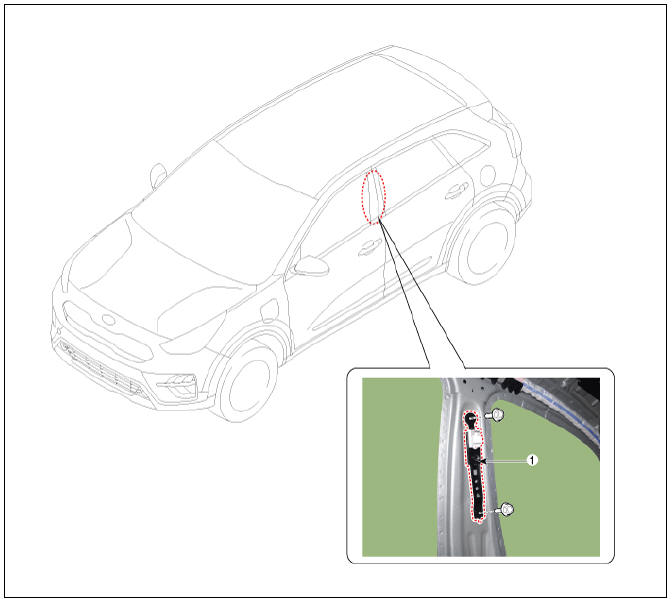
- Height Adjuster
Replacement
- Remove the front seat belt upper anchor.
(Refer to Front Seat Belt - "Front Seat Belt Retractor")
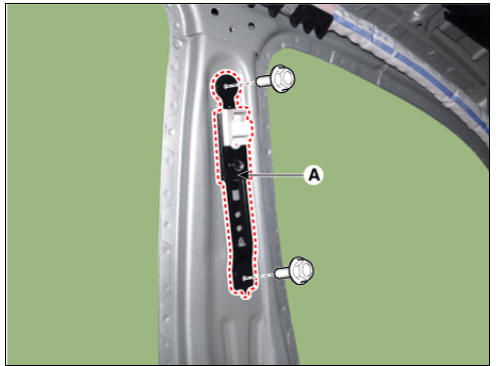
- After loosening the mounting bolts, remove the height adjuster (A).
Tightening torque : 39.2 - 53.9 N*m (4.0 - 5.5 kgf*m, 28.9 - 39.8 lb*ft)
- Install in the reverse order of removal.
Warning
Replace any damaged clips.
Front seat belt buckle
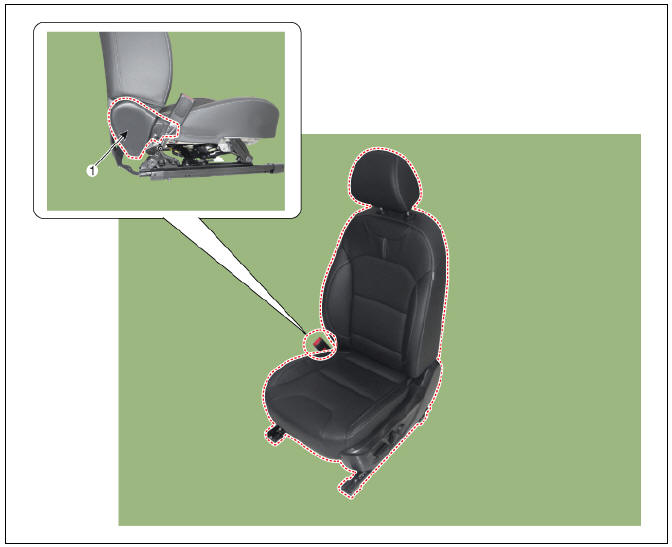
- Front seat belt buckle
Replacement
- Remove the front seat assembly.
(Refer to Front Seat - "Front Seat Assembly")
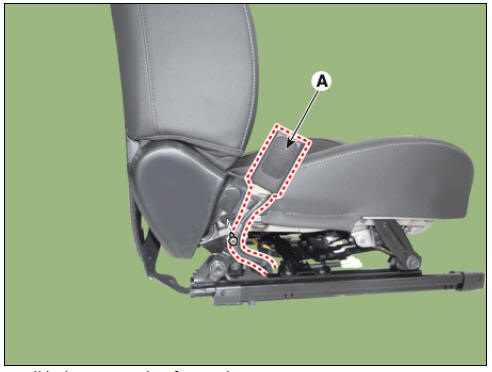
- Remove the front seat belt buckle (A) after loosening the mounting bolt.
Tightening torque : 39.2 - 53.9 N*m (4.0 - 5.5 kgf*m, 28.9 - 39.8 lb*ft)
READ NEXT:
 Hood
Hood
Hood / Repair Procedures
Adjustment
After loosening the hinge (A) mounting bolts, adjust the hood (B) by
moving it up and down, or right and left.
Adjust the hood height by turning the hood overslam bumpers (C).
After loosening the hood l
Hood Assembly Repair procedures
Replacement
Warning
Be careful not to damage the hood and body.
Warning
Work in a group of two when removing and installing the hood.
Use a clip remover to remove clips.
Remove the hood assembly (A) after loosening the hood hinge mount
SEE MORE:
Electric parking brake / Description And Operation
Description
The EPB is an electronic parking brake.
The EPB is different from existing parking systems which operated with the brake
pedal or the lever
type. The EPB system sends the signal to the ECU when a driver operates the EPB
switch. T
Blind-Spot Collision Warning (BCW)
BCW activation condition
(1) BCW on/off switch : On (indicated by the switch LED)
(2) Vehicle Speed : 30 - 255 km/h (20 - 158 mph)
(3) Relative vehicle speed : -10 to 255 km/h (-6 to 158 mph)
(Negative value refers to the distance of the veh
Categories
- Home
- KIA Niro EV, Hybrid - Second generation - (SG2) (2021-2024) - Owner's manual
- Kia Niro - First generation - (DE) (2017-2022) - Service and Repair Manual
- Contact Us