KIA Niro: Hood
Hood / Repair Procedures
Adjustment
- After loosening the hinge (A) mounting bolts, adjust the hood (B) by moving it up and down, or right and left.
- Adjust the hood height by turning the hood overslam bumpers (C).
- After loosening the hood latch (D) mounting bolts, adjust the latch by moving it up and down, or right and left.
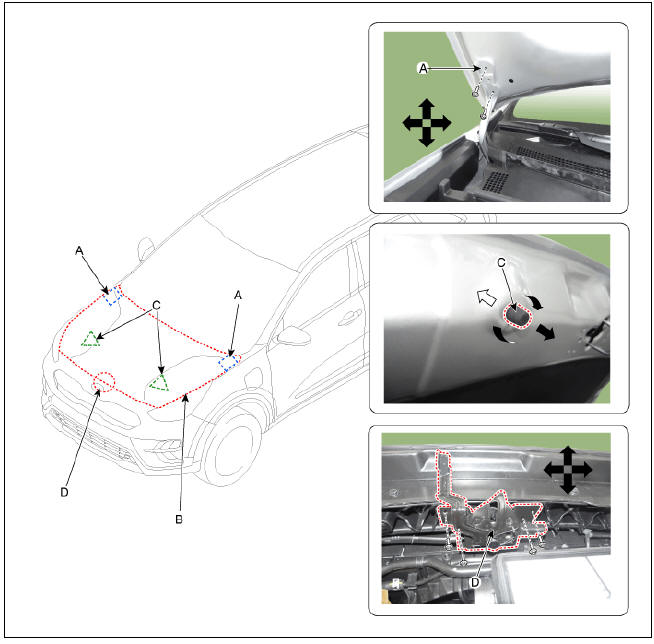
Component Location
- Hood assembly
READ NEXT:
 Hood Assembly Repair procedures
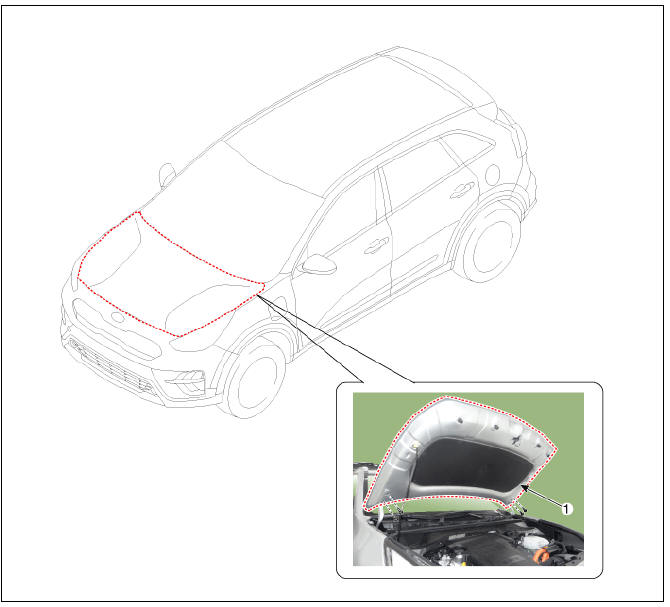
Replacement
Warning
Be careful not to damage the hood and body.
Warning
Work in a group of two when removing and installing the hood.
Use a clip remover to remove clips.
Remove the hood assembly (A) after loosening the hood hinge mount
Hood lower latch assembly
Hood lower latch assembly
Replacement
Remove the front bumper cover.
(Refer to Front Bumper - "Front Bumper Cover")
Disconnect the hood lower latch connector (A).
Remove the engine clutch reservoir (A) after loos
SEE MORE:
Passenger Airbag (PAB) and Side Airbag (SAB)
Passenger Airbag (PAB) Module Description and operation
Description
The passenger airbag (PAB) is installed inside the crash pad and protects the front passenger in the event of a frontal crash. The SRSCM determines if and when to deploy the PAB.
Driveshaft and axle
Service Data
Tightening Torques
Lubricants
Special Service Tools
Tool Name / Number/ Illustration/ Description
Ball joint puller
09568-34000/ / Remove the ball
joint
Puller
09495-33000/ /Used for removal of
spider assembly
Categories
- Home
- KIA Niro EV, Hybrid - Second generation - (SG2) (2021-2024) - Owner's manual
- Kia Niro - First generation - (DE) (2017-2022) - Service and Repair Manual
- Contact Us