KIA Niro: Hood lower latch assembly
Kia Niro - First generation - (DE) (2017-2022) - Service and Repair Manual / Body (Interior And Exterior) / Hood / Hood lower latch assembly
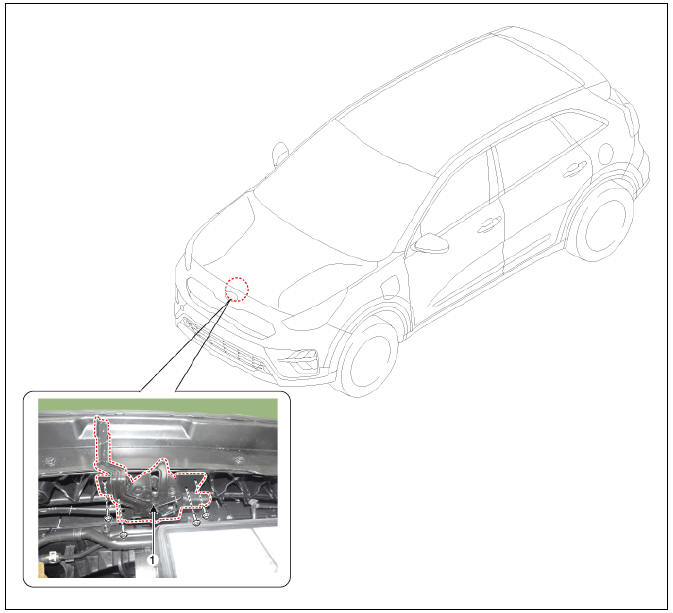
- Hood lower latch assembly
Replacement
- Remove the front bumper cover.
(Refer to Front Bumper - "Front Bumper Cover")
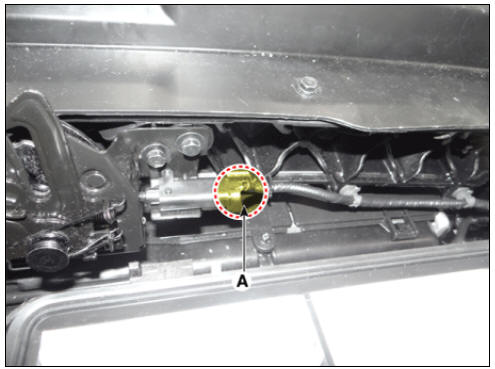
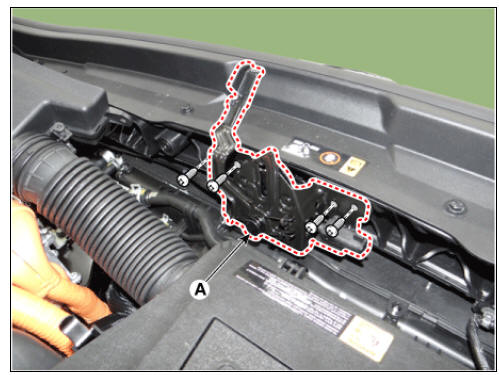
- Disconnect the hood lower latch connector (A).
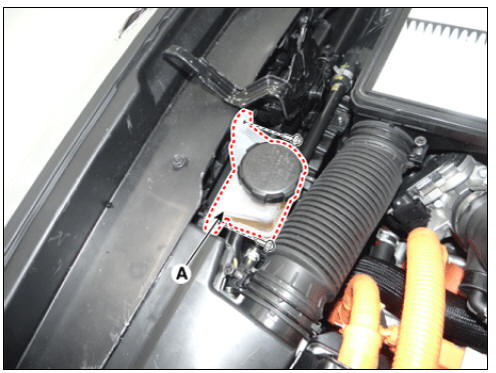
- Remove the engine clutch reservoir (A) after loosening the bolts.
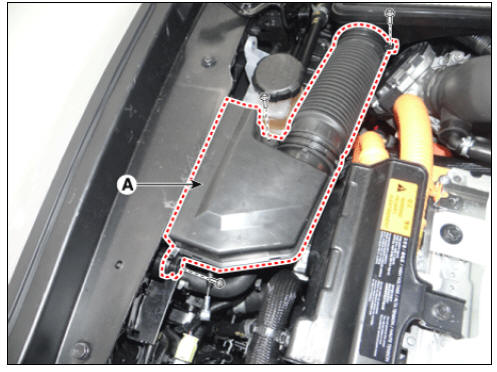
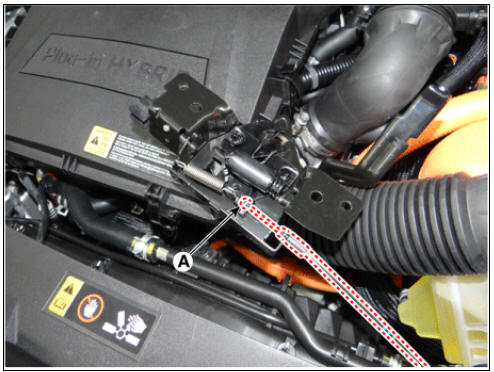
- Remove the air duct (A).
- Disconnect the hood latch connector (A).
Tightening torque : 7.8 - 11.8 N*m (0.8 - 1.2 Kgf*m, 5.8 - 8.7 lb*ft)
- Disconnect the hood latch cable (A) and remove the hood latch.
- Install in the reverse order of removal.
Warning
- Make sure the hood latch release cable is connected properly.
- Make sure the hood locks/unlocks and opens/closes properly.
- Adjust the latch alignment
READ NEXT:
 Door Scuff Trim | Cowl Side Trim
Front pillar trim
Front door scuff trim
Center pillar upper trim
Rear door scuff trim
Cowl side trim
Center pillar lower trim
Rear pillar trim
Door Scuff Trim
Component Location
Front door scuff trim
SEE MORE:
How vehicle radio works
FM reception
AM and FM radio signals are broadcast
from transmitter towers located around
your city. They are intercepted by the
radio antenna on your vehicle. This signal
is then processed by the radio and
sent to your vehicle speakers.
Description of the eCall in-vehicle system
UAE eCall system (if equipped)
Road accident
Wireless network
Public Safety Answering Point (PSAP)
Rescue
The vehicle is equipped with a device*1
connected with the UAE eCall system for
making emergency call to response
teams. The
Categories
- Home
- KIA Niro EV, Hybrid - Second generation - (SG2) (2021-2024) - Owner's manual
- Kia Niro - First generation - (DE) (2017-2022) - Service and Repair Manual
- Contact Us