KIA Niro: Hood Assembly Repair procedures
Kia Niro - First generation - (DE) (2017-2022) - Service and Repair Manual / Body (Interior And Exterior) / Hood / Hood Assembly Repair procedures
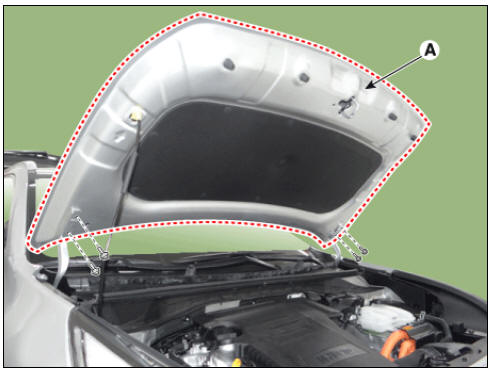
Replacement
Warning
Be careful not to damage the hood and body.
Warning
- Work in a group of two when removing and installing the hood.
- Use a clip remover to remove clips.
- Remove the hood assembly (A) after loosening the hood hinge mounting bolts.
Tightening torque : 21.6 - 26.5 N*m (2.2 - 2.7 kgf*m, 15.9 - 19.5 lb*ft)
- Install in the reverse order of removal.
Warning
- Make sure the hood locks/unlocks and opens/closes properly.
- Adjust the hood alignment.
Hood Insulator Pad Repair procedures
Replacement
Warning
Be careful not to damage the hood and body.
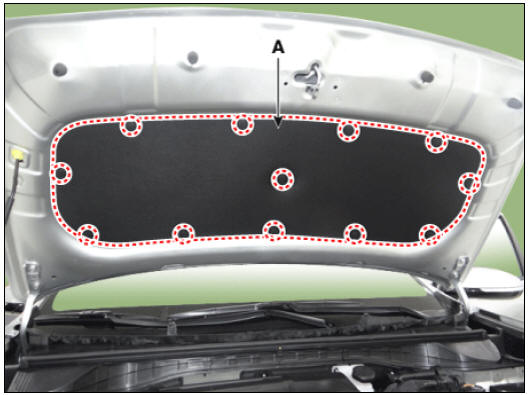
- Install in the reverse order of removal.
Warning
Replace any damaged clips.
Hood Weatherstrip Repair procedures
Replacement
- Remove the hood weatherstrip (A).
Warning
Be careful not to damage the hood and body.
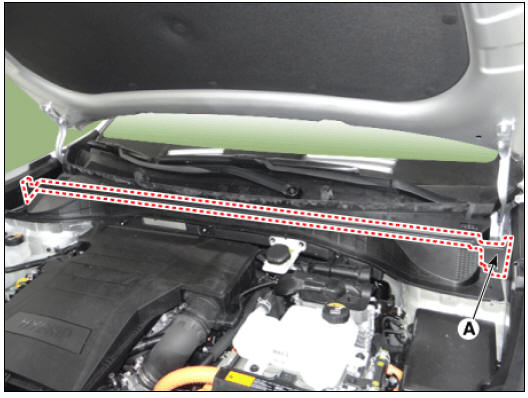
- Install in the reverse order of removal.
Warning
Replace any damaged clips.
Hood Latch Release Handle
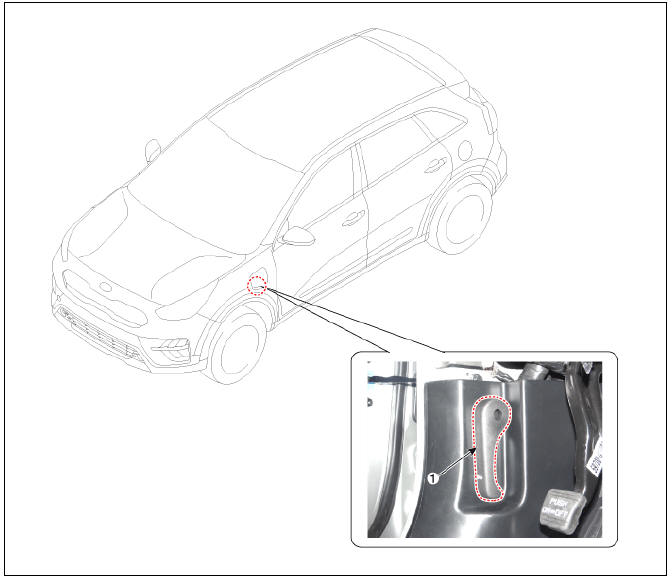
- Hood Latch Release Handle
Hood Latch Release Handle Repair procedures
Replacement
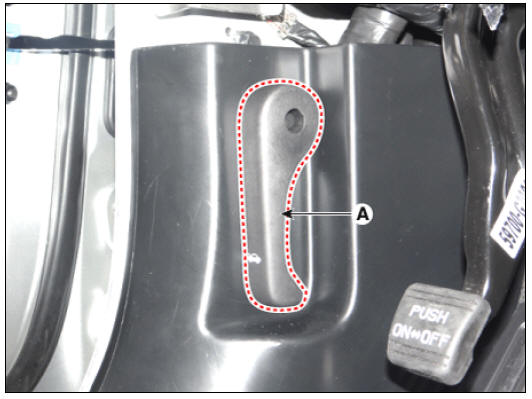
- Using a remover, remove the hood release handle (A).
- Install in the reverse order of removal.
Warning
- Make sure the hood latch cable is connected properly.
- Make sure the hood locks/unlocks and opens/closes properly.
READ NEXT:
 Hood lower latch assembly
Hood lower latch assembly
Replacement
Remove the front bumper cover.
(Refer to Front Bumper - "Front Bumper Cover")
Disconnect the hood lower latch connector (A).
Remove the engine clutch reservoir (A) after loos
Door Scuff Trim | Cowl Side Trim
Front pillar trim
Front door scuff trim
Center pillar upper trim
Rear door scuff trim
Cowl side trim
Center pillar lower trim
Rear pillar trim
Door Scuff Trim
Component Location
Front door scuff trim
SEE MORE:
Door Scuff Trim | Cowl Side Trim
Front pillar trim
Front door scuff trim
Center pillar upper trim
Rear door scuff trim
Cowl side trim
Center pillar lower trim
Rear pillar trim
Door Scuff Trim
Component Location
Front door scuff trim
Setting smart regeneration system (Kia Niro EV)
Smart regeneration system
The Smart Regeneration System controls
the regenerative braking automatically
according to the road gradient and
driving condition of the vehicle in front.
The system minimizes the unnecessary
operation of the brake
Categories
- Home
- KIA Niro EV, Hybrid - Second generation - (SG2) (2021-2024) - Owner's manual
- Kia Niro - First generation - (DE) (2017-2022) - Service and Repair Manual
- Contact Us