
KIA Niro: Quarter Fixed Glass
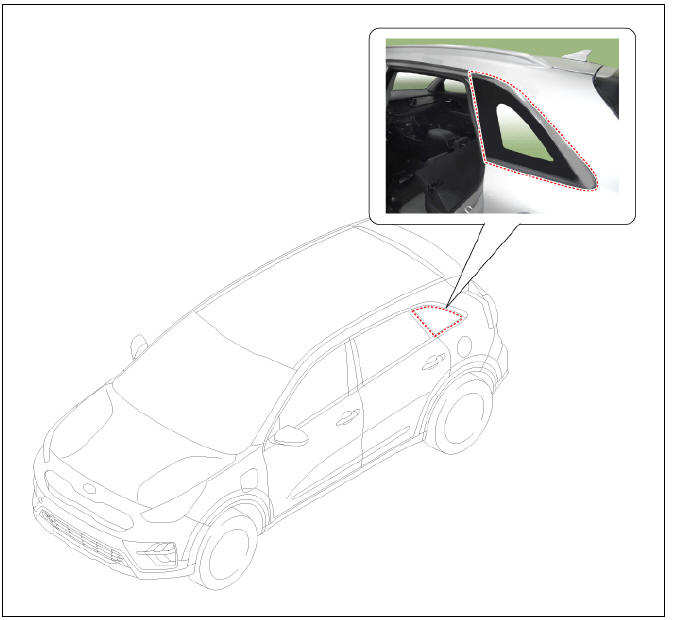
- Quarter fixed glass
Replacement
- Remove the rear pillar trim.
(Refer to Interior Trim - "Rear Pillar Trim")
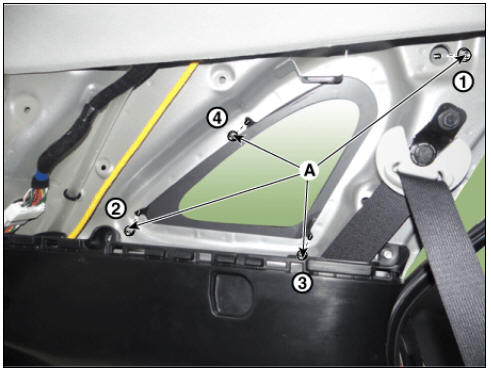
- Loosen the quarter fixed glass (A) mounting nuts.
Tightening torque : 3.9 - 4.4 N*m (0.4 - 0.45 kgf*m, 2.9 - 3.3 lb*ft)
Warning
Tighten mounting nuts in the order of (1) → (2)→ (3) → (4).
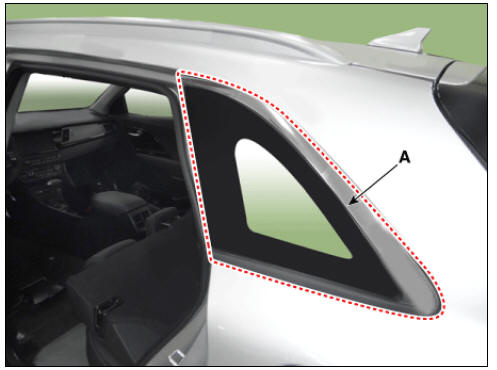
- Remove the quarter fixed glass (A).
- Install in the reverse order of removal.
Warning
Replace any damaged clips.
READ NEXT:
 Rear Bumper
Rear bumper cover assembly
Rear bumper beam assembly
Rear bumper side under cover (RH)
Rear bumper side bracket (RH)
Rear bumper side under cover (LH)
Rear bumper side bracket (LH)
Rear Bumper Assembly
Rear bumper assembly
Replacement
Warning
Put on gloves to protect your hands.
Warning
Use a plastic panel removal tool to remove interior trim pieces
without marring the surface.
Be careful not to bend or scratch the trim and pa
Rear Bumper beam Assembly
Rear bumper beam assembly
Replacement
Warning
Put on gloves to protect your hands.
Warning
Use a plastic panel removal tool to remove interior trim pieces
without marring the surface.
Be careful not to bend or scratch the trim a
SEE MORE:
AHB Brake System Bleeding procedure
The iBAU consists of 3 brake fluid lines in total (Low/high pressure and
pedal simulator lines), therefore, air bleeding should be made
sequentially following the procedure below.
Bleeding sequence : Low pressure/Pedal simulator section (
Safe Exit Assist settings
Exit Safety
Kia NIRO Hybrid
Kia Niro EV
A: Driver Assistance
Driving Safety
Exit Safety
With the vehicle on, touch Settings →
Driver Assistance → Warning Volume
on the instrument cluster or Settings →
Vehicle →
Categories
- Home
- KIA Niro EV, Hybrid - Second generation - (SG2) (2021-2024) - Owner's manual
- Kia Niro - First generation - (DE) (2017-2022) - Service and Repair Manual
- Contact Us
