KIA Niro: Fuel Sender Repair procedures
Kia Niro - First generation - (DE) (2017-2022) - Service and Repair Manual / Engine Control / Fuel System / Fuel Delivery System / Fuel Sender Repair procedures
Removal
- Remove the fuel pump.
(Refer to Fuel Delivery System - "Fuel Pump")
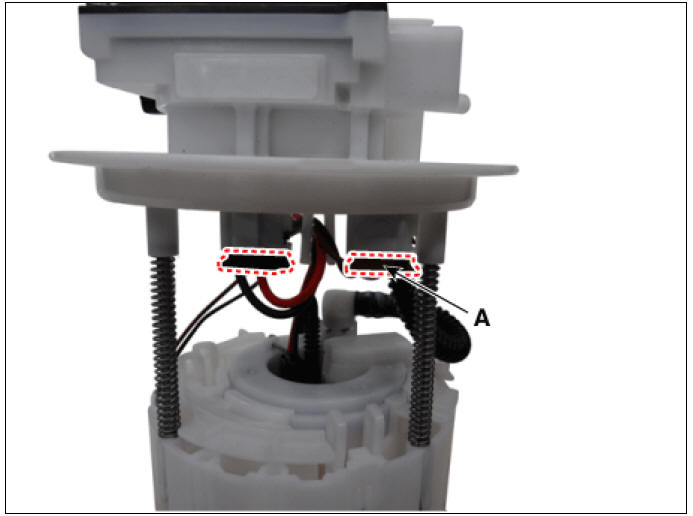
- Disconnect the fuel sender connector (A).
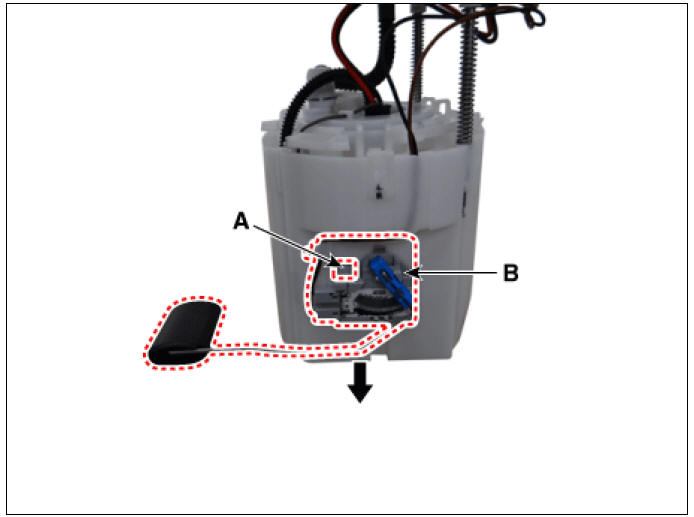
- Lift the fixing hook (A) by using a common driver, and then remove the fuel sender (B).
Installation
- Install in the reverse order of removal.
Fuel tank isolation valve (FTIV)
Description
Fuel tank isolation valve (FTIV) is installed between the fuel tank and the
canister to isolate
evaporating gas generated in the fuel tank.
Fuel Tank
Removal
- Switch "OFF" the ignition and disconnect the negative (-) battery terminal.
- Remove the fuel tank.
(Refer to Engine Control/Fuel System - "Fuel Tank")
- Disconnect the vapor tube quick-connector (A).
- Remove the canister (B) from the fuel tank after loosening the bolts (C).
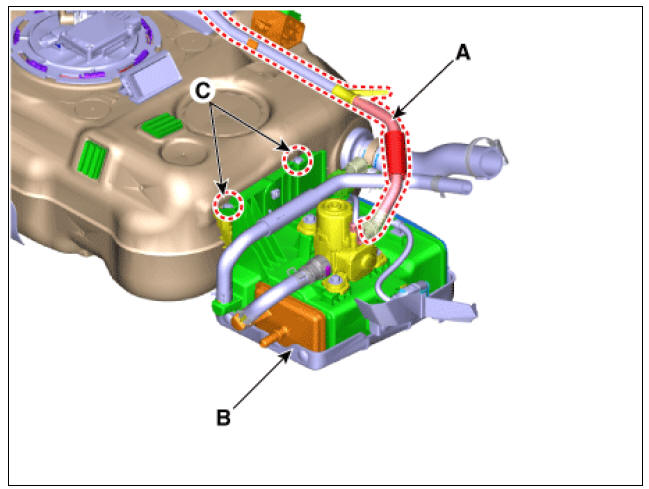
- Disconnect the fuel tank isolation valve (FTIV) connector (A).
- Disconnect the vapor tube quick-connector (B).
- Disconnect the vapor hose (C).

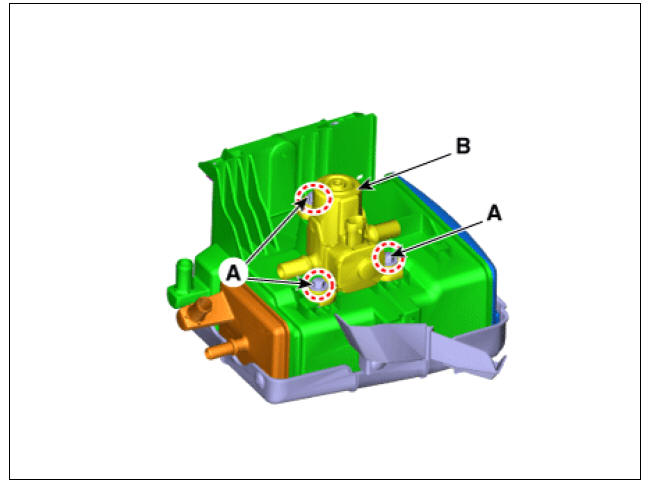
- Remove the fuel tank isolation valve (B) from the canister after loosening the bolts (A).
Installation
- Install in the reverser order of removal.
Fuel tank isolation valve installation nut : 3.9 - 5.9 N.m (0.4 - 0.6 kgf.m, 2.9 - 4.3 lb-ft)
READ NEXT:
 Fuel Pressure Regulator Repair procedures | Fuel Line Repair procedures
Removal
Remove the fuel pump.
(Refer to Fuel Delivery System - "Fuel Pump")
Disconnect the fuel pump motor connector (A) and fuel sender connector (B).
Lift the fixing hook (A) by using a comm
Filler-Neck Assembly Repair procedures | Fuel Pump Control Module (FPCM)
Removal
Open the fuel filler door.
Switch "OFF" the ignition and disconnect the negative (-) terminal of the auxiliary 12V battery.
Remove the filler-neck assembly mounting screws (A).
Lift the vehicle.
Re
SEE MORE:
Immobilizer system
The immobilizer system reduces the risk
of unauthorized vehicle use.
It is comprised of a small transponder in
the ignition switch and electronic
devices inside the vehicle. It checks and
determines and verifies if the ignition
key is valid o
Rear Door Belt Outside/ Inside Weatherstrip
Rear Door Belt Outside Weatherstrip
Replacement
Pull down the rear door window glass to the lowest level by pressing the
power window glass
switch.
Remove the rear door belt outside weatherstrip (A) after loosening the
mounting screw.
Categories
- Home
- KIA Niro EV, Hybrid - Second generation - (SG2) (2021-2024) - Owner's manual
- Kia Niro - First generation - (DE) (2017-2022) - Service and Repair Manual
- Contact Us