KIA Niro: Headlamps Description and operation | Lighting System / Headlamps Repair Procedures
Description
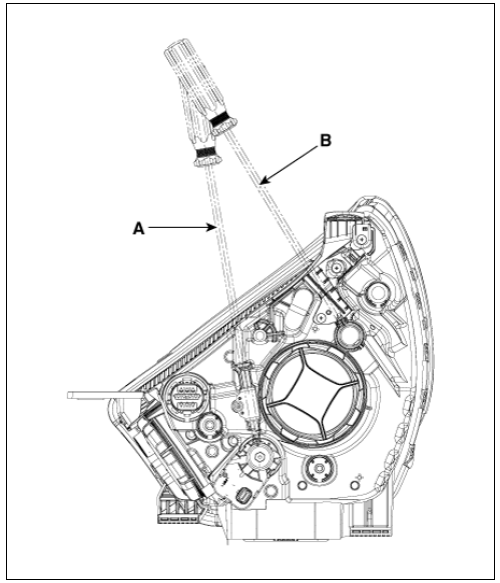
BI-FUNCTION
- Definition
- A headlamp with integrated functions of high and low beam
- The light is controlled by rotating the shield inserted to the lens. (A solenoid is adopted.)

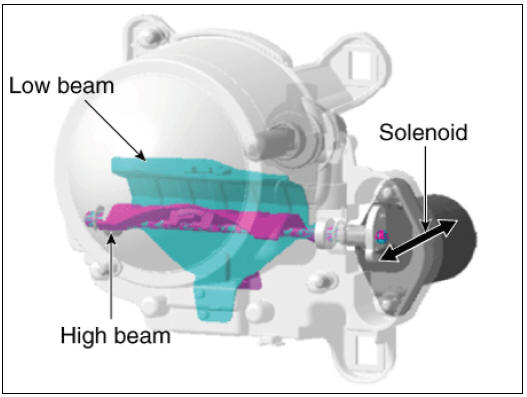
- Structure and mechanism
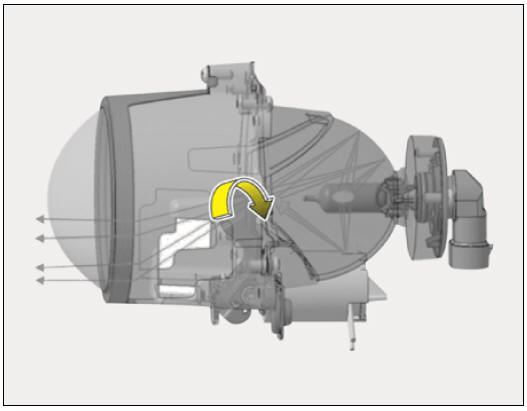
- When working as a low beam
The light illuminates to the restricted area of low beam by blocking the light with the stopped shield.
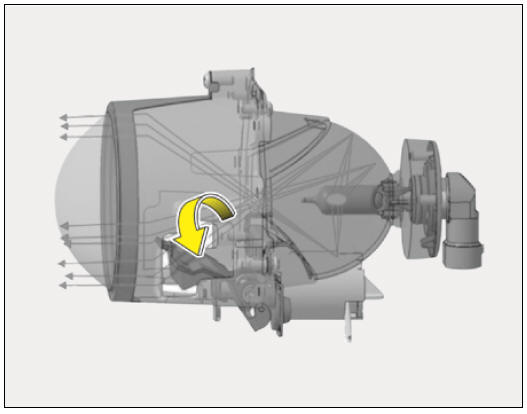
- When working as a high beam
The light is not blocked by the open shield and the light illuminates to the area of high beam.
Connector and Terminal Function
Connector
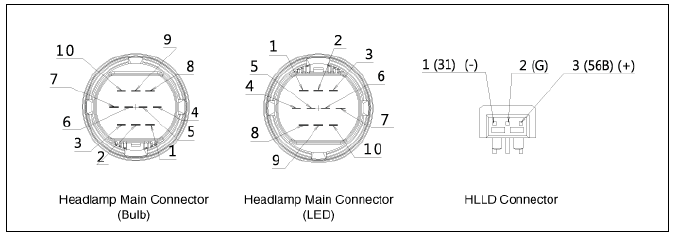
Terminal Function
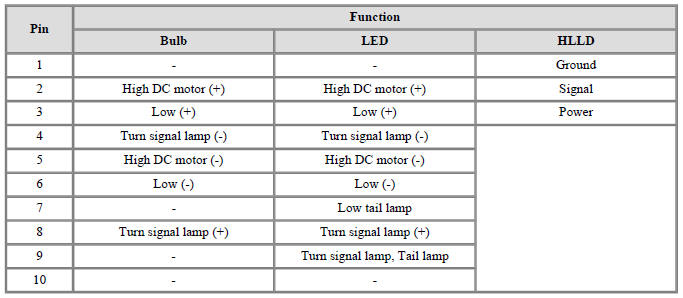
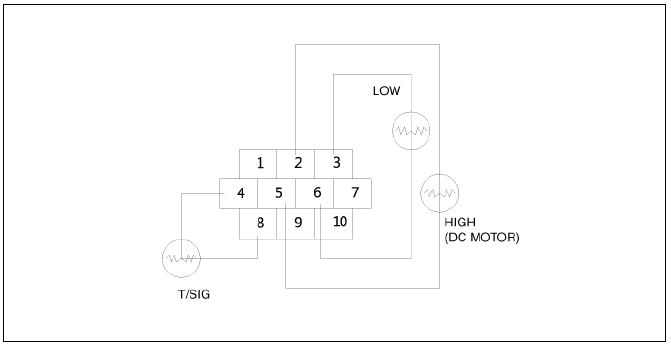
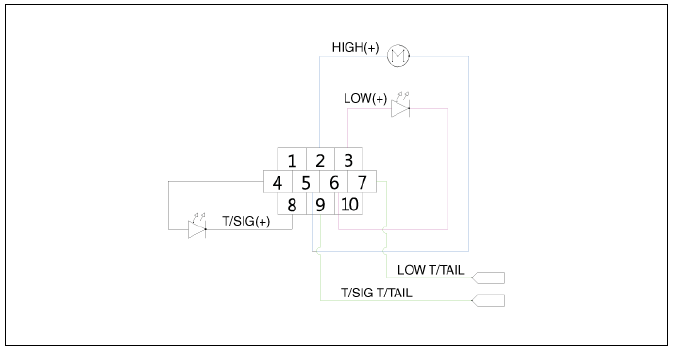
Circuit Diagram
Headlamp (Bulb)
Headlamp (LED)
Lighting System / Headlamps Repair Procedures
Inspection
- Check the battery voltage. (Low beam will be on when the battery voltage is above 9 V.)
- Check the fuse and relay.
- Securely connect the bulb connector.
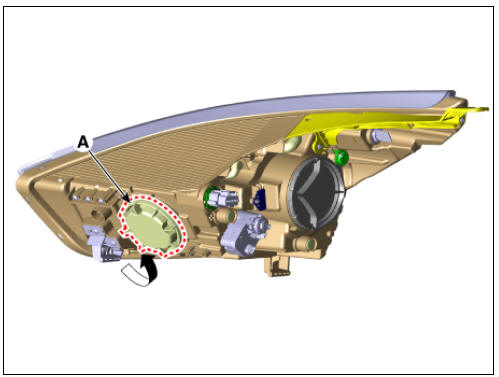
Removal
Headlamp
- Disconnect the negative battery terminal.
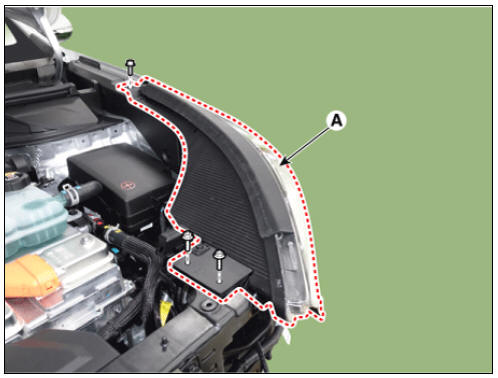
- Remove the front bumper assembly.
(Refer to Body - "Front Bumper Assembly")
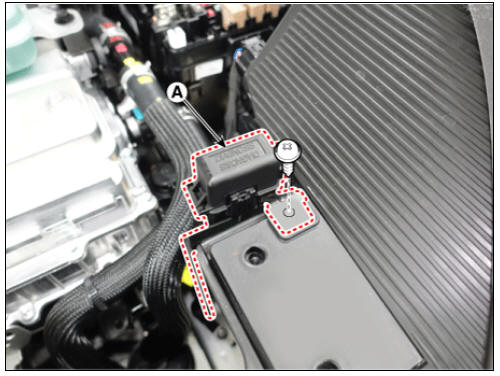
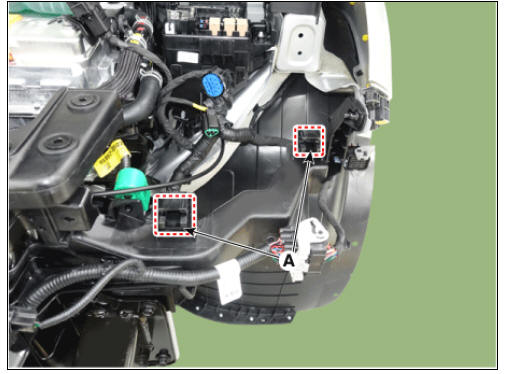
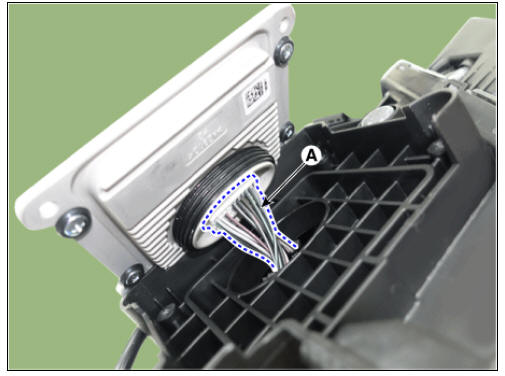
- Remove the diagnosis connector (A) after loosening the mounting screw.
- Remove the headlamp (A) after loosening the mounting bolts.
Warning
Be careful not to damage the retaining clips (A).
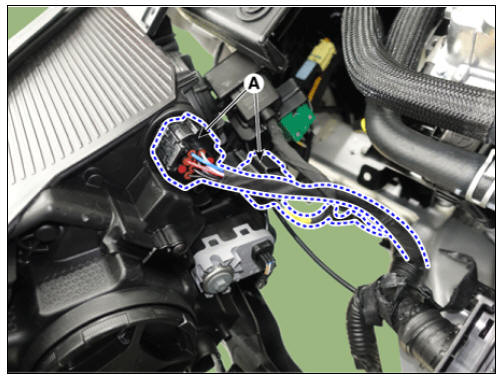
- Disconnect the connector (A) from the headlamp.
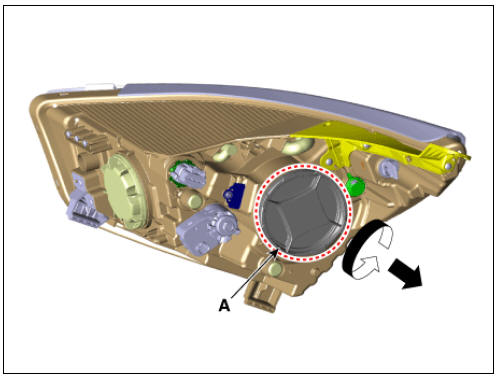
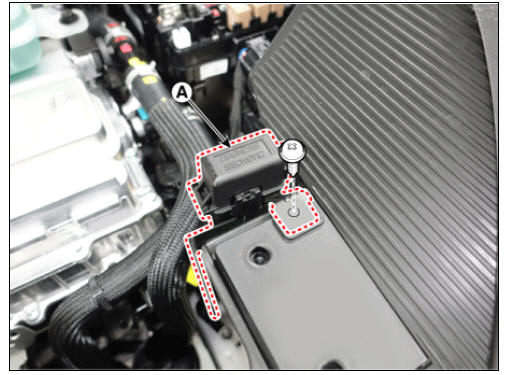
LED Driver Module
- Remove the headlamp.
(Refer to Lighting System - "Headlamps")
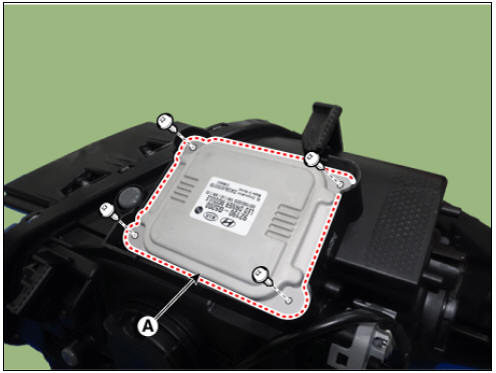
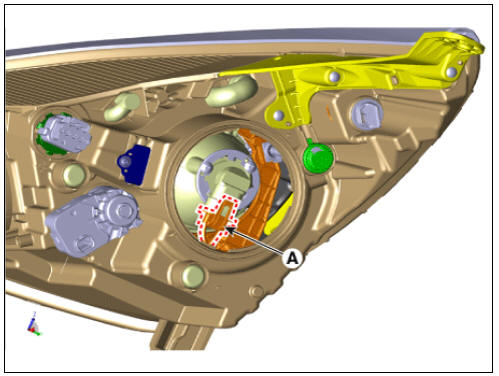
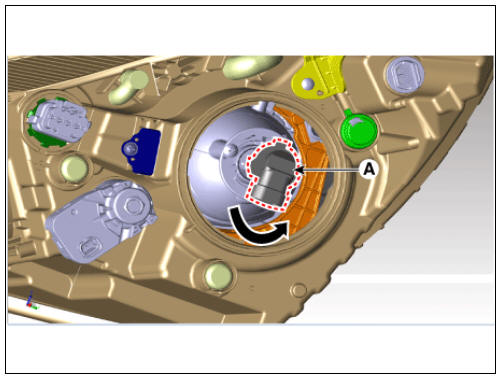
- Remove the LED driver module (A) after loosening the mounting screws.
- Disconnect the connector (A) from the LED driver module.
Installation
- Install in the reverse order of removal.
Warning
If the headlamp needs to be adjusted, refer to headlamp aiming procedure.
(Refer to Headlamp - "Adjustment")
Replacement
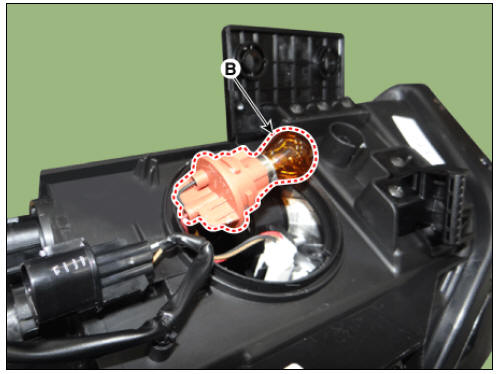
Headlamp Bulb
- Remove the dust caps (A) from the headlamp assembly after turning in the counterclockwise direction.
- Disconnect the connector (A) from the socket.
- Remove the headlamp high/low beam bulb (A) from the headlamp assembly after turning in the counterclockwise direction.
Turn Signal Lamp Bulb
- Remove the dust caps (A) from the headlamp assembly after turning in the counterclockwise direction.
- Replace the turn signal lamp bulb (B) after removing the turn signal lamp socket (A) by turning in the counterclockwise direction.
Moisture Absorbent
- Turn the headlamp switch off.
- Remove the dust caps (A) from the headlamp assembly after turning in the counterclockwise direction.
(LH)
(1) Remove the diagnosis connector (A) after loosening the mounting screw.
(2) Remove the dust cap (A).
RH

- Remove the moisture absorbent brakcet (A) from the dust cover after loosening the mounting screws (B).
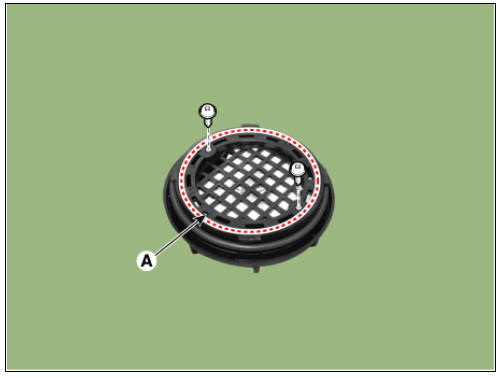
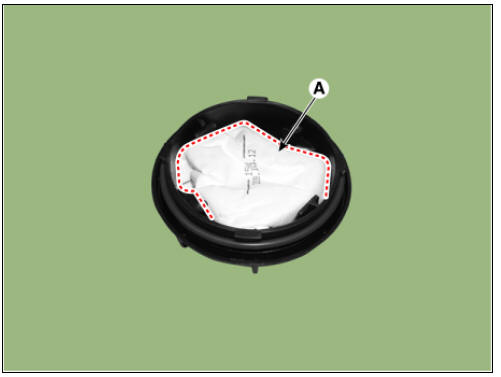
- Remove the moisture absorbent (A).
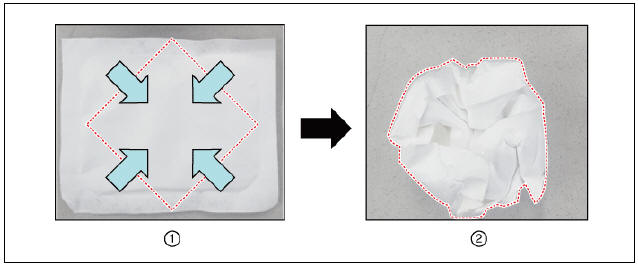
- Fold an new absorbent material as the picture below.
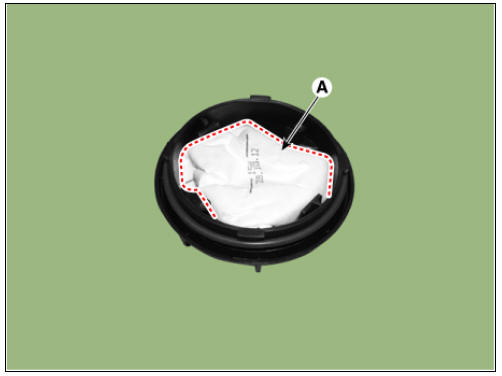
- Replace the moisture absorbent (A) with the folding side facing downwards.
Warning
Be careful of the installation direction of the moisture absorbent bracket 
Adjustment
Headlamp Aiming
Adjust the headlamp aiming by turning the adjustment bolt. If do not have aiming alignment equipment, follow the procedure below.
- Inflate the tires to the specified pressure and remove any loads from the vehicle except the driver, spare tire, and tools.
- The vehicle should be placed on a flat floor.
- Check suspecsion spring for defects.
- Check that the surface of the headlamp lens is clean.
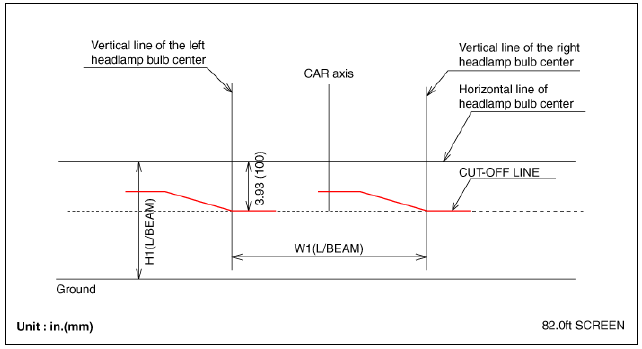
- Draw vertical lines (passing through respective headlamp centers) and a horizontal line (passing through center of headlamps) on the screen.
- If headlamp leveling device is equipped, adjust the headlamp leveling device switch with 0 positions.
- With the headlamps and battery in normal condition, aim the headlamps so the brightest portion falls on the horizontal and vertical lines.
- Vertical
- Horizontal
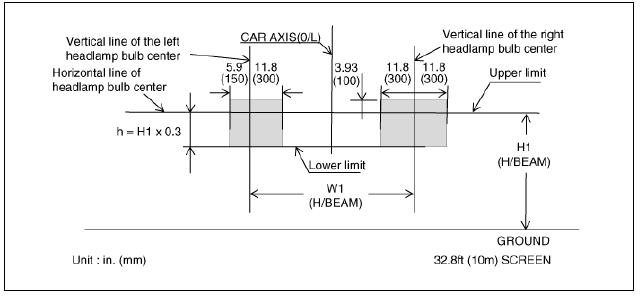
Headlamp Aiming Point
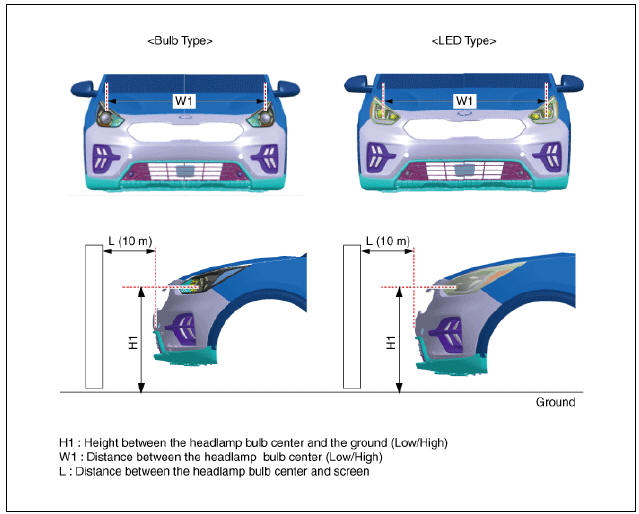
Bulb Type

LED Type

- If headlamp leveling device is equipped, adjust the headlamp leveling device switch with 0 positions.
- Turn the low beam on without driver aboard.
The low beam cut-off line should be projected as shown in the picture.
- After adjusting the horizontal aiming, adjust the vertical aiming.
LHD
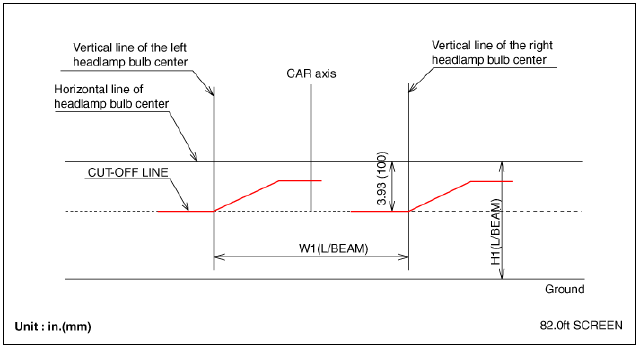
RHD
- Turn the front fog lamp on without the driver aboard.
- After adjusting LOW BEAM and after turning ON the HIGH BEAM it is necessary to check HIGH BEAM HOT ZONE range.
- If the HOT ZONE range after LOW BEAM AIM'G deviateds the refulation, it is because the product is defective. So, in this case it should change the lamp.
Side Repeater (Outside Mirror)
Removal
- Remove the outside mirror scalp.
(Refer to Body - "Outside Rear View Mirror")
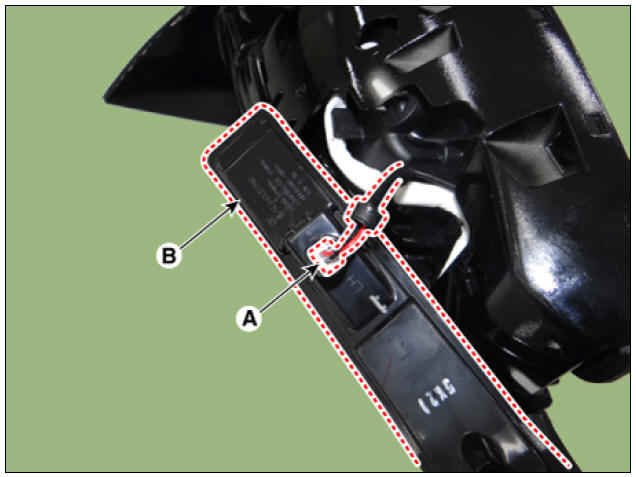
- Remove the side repeater lamp (A) after loosening the mounting screw.
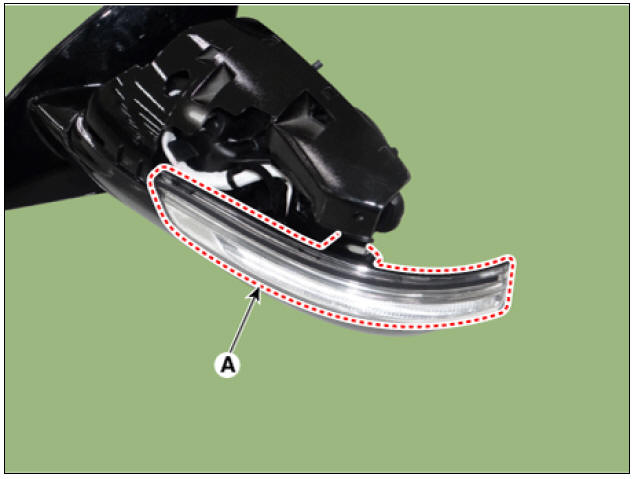
- Disconnect the connector (A) from the side repeater lamp (B).
Installation
- Install in the reverse order of removal.
READ NEXT:
 Room Lamp Repair procedures | Vanity Lamp Repair procedures
Removal
Warning
Put on gloves to prevent hand injuries.
When removing with a flat-tip screwdriver or remover, wrap protective tape around the tools to prevent damage to components.
Disconnect the negative (-) battery terminal
SEE MORE:
Air Conditioning System / General Safety Information and Caution
Instructions (R- 134a)
When Handling Refrigerant
R-134a liquid refrigerant is highly volatile. A drop on the skin of your
hand could result in localized
frostbite. When handling the refrigerant, be sure to wear gloves.
It is standard prac
Blind-Spot Collision-Avoidance Assist malfunction and limitations
Blind-Spot Collision-Avoidance Assist
malfunction
A: Check blind-spot safety systems
When Blind-Spot Collision-Avoidance
Assist is not working properly, the warning
message will appear on the cluster
for several seconds, and the master (
Categories
- Home
- KIA Niro EV, Hybrid - Second generation - (SG2) (2021-2024) - Owner's manual
- Kia Niro - First generation - (DE) (2017-2022) - Service and Repair Manual
- Contact Us