KIA Niro: Room Lamp Repair procedures | Vanity Lamp Repair procedures
Kia Niro - First generation - (DE) (2017-2022) - Service and Repair Manual / Body Electrical System / Lighting System / Room Lamp Repair procedures | Vanity Lamp Repair procedures
Removal
Warning
- Put on gloves to prevent hand injuries.
- When removing with a flat-tip screwdriver or remover, wrap protective tape around the tools to prevent damage to components.
- Disconnect the negative (-) battery terminal.
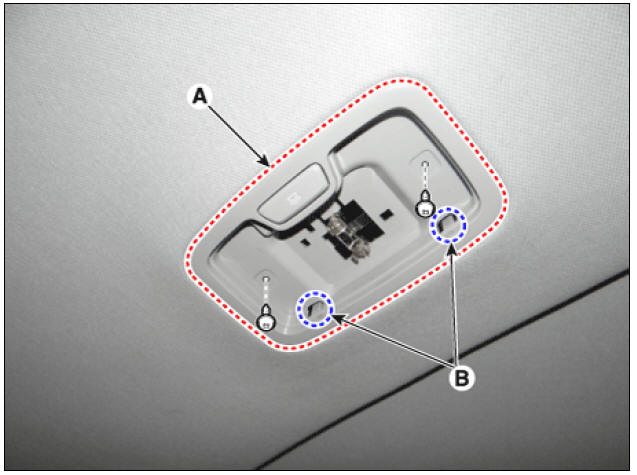
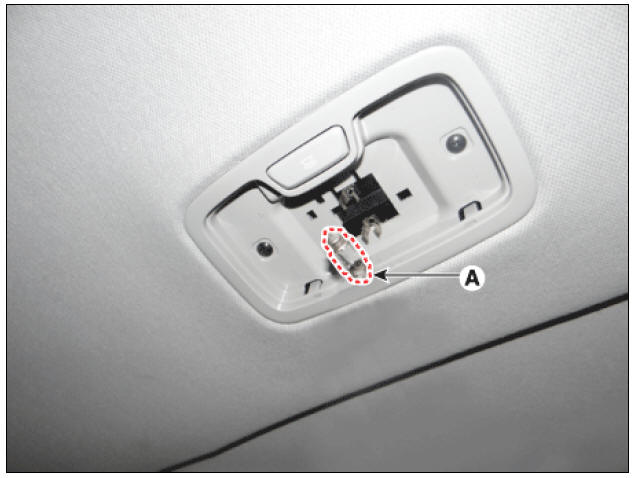
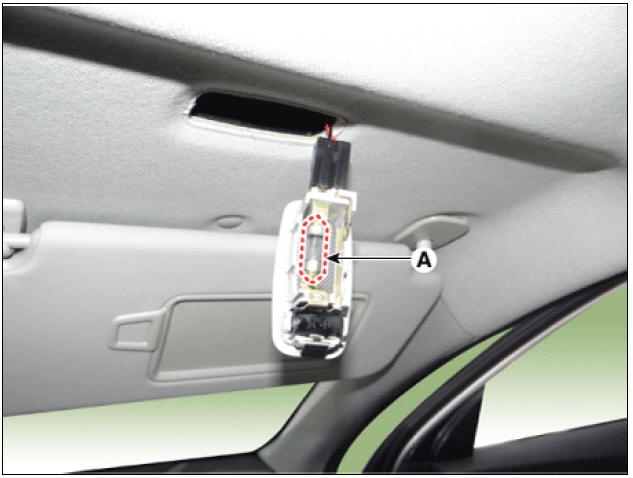
- Using a screwdriver or remover, separate the room lamp lens (A) from the room lamp.
- Remove the room lamp (A) after loosening the screws.
Warning
- When removing the room lamp, be careful of the direction in which the tool is inserted (B).
- When inserting the tool in the opposite direction, take caution as the room lamp may be damaged.
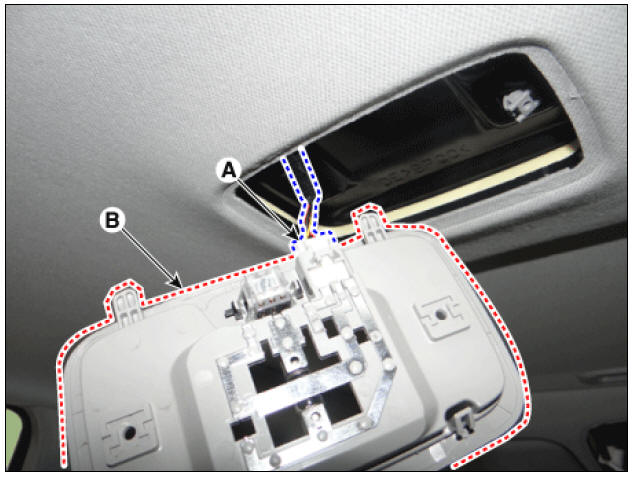
- Remove the room lamp assembly (B) after disconnecting the room lamp connector (A).
Bulb Replacement
- Using a screwdriver or remover, separate the room lamp lens (A) from the room lamp.
- Disconnect the room lamp bulb (A).
Installation
- Install in the reverse order of removal.
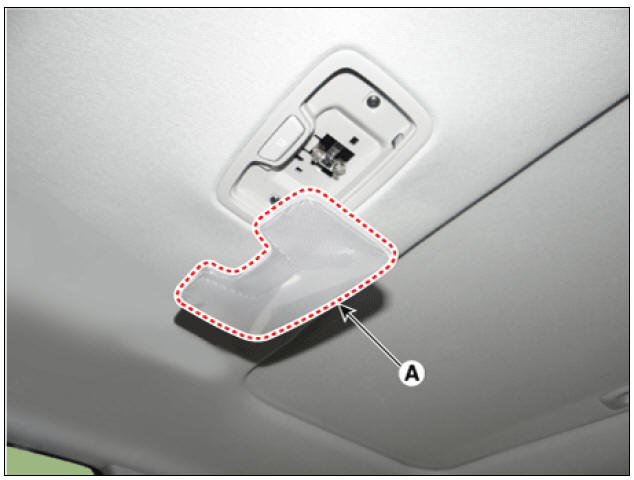
Vanity Lamp Repair procedures
Removal
- Disconnect the negative (-) battery terminal.
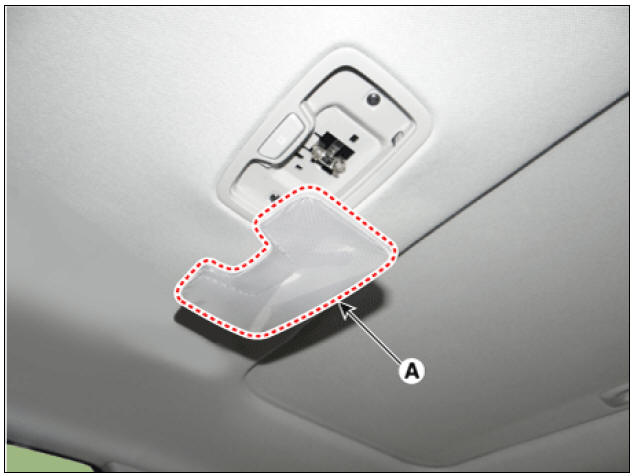
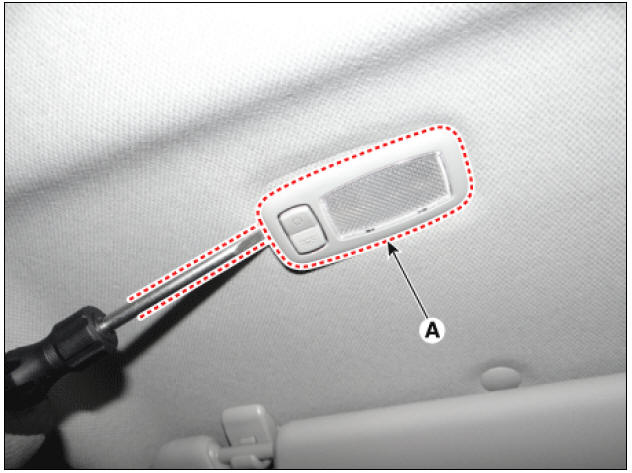
- Detach the vanity lamp (A) using a flat-tip screwdriver.
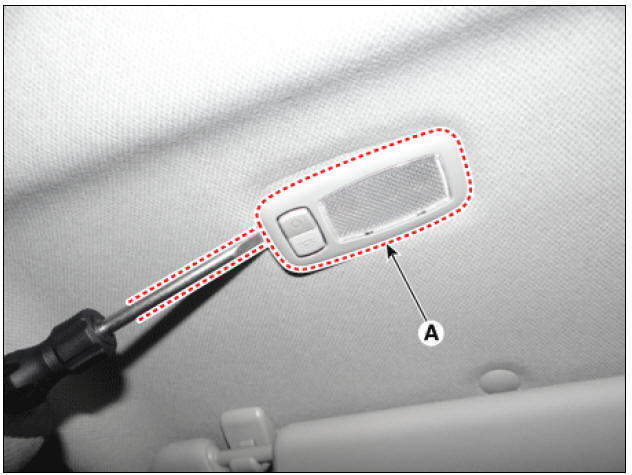
- Disconnect the vanity lamp connector (A).
Bulb Replacement
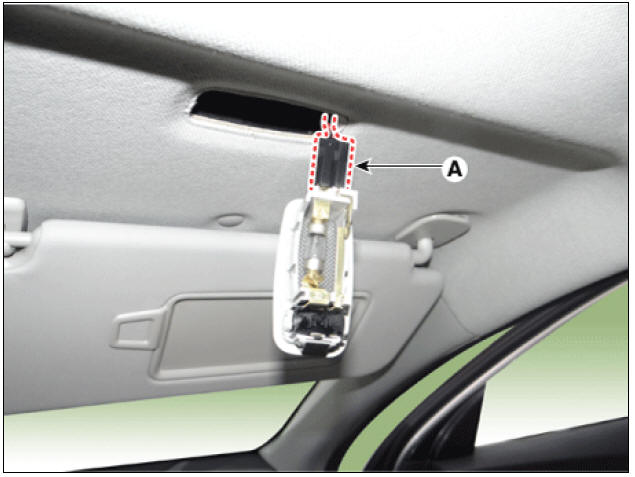
- Detach the vanity lamp (A) using a flat-tip screwdriver.
- Remove the vanity lamp bulb (A).
Installation
- Install in the reverse order of removal.
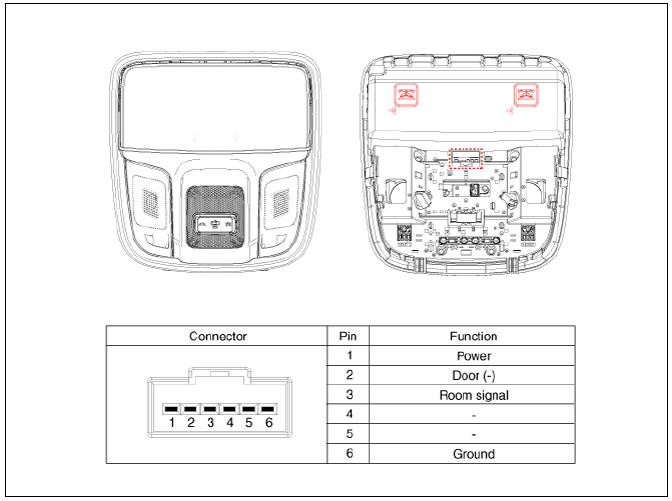
Connector and Terminal Function
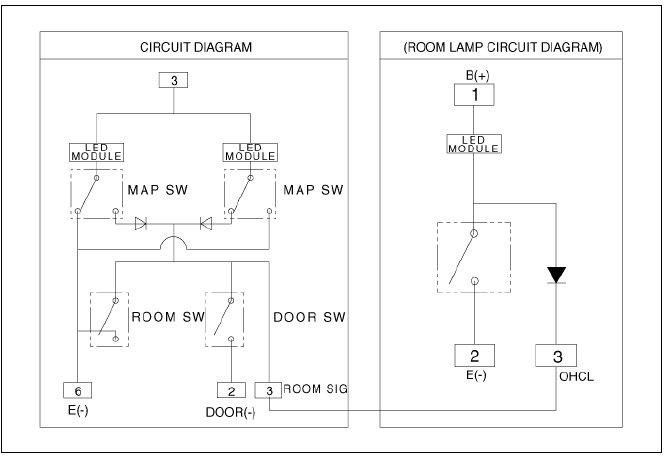
Circuit Diagram
Non-Sunroof

Sunroof (Bulb Type)

Sunroof (LED Type)
READ NEXT:
 Overhead Console Lamp Repair procedures | Hazard Lamp Switch
Inspection
Remove the overhead console lamp.
(Refer to Lighting System - "Overhead Console Lamp")
Check for continuity between terminals.
Removal
Disconnect the negative (-) battery terminal.
Remove
SEE MORE:
Emission control system (if equipped)
Kia NIRO Hybrid
The emission control system of your
vehicle is covered by a written limited
warranty. Please see the warranty information
contained in the Warranty &
Maintenance book in your vehicle.
Your vehicle is equipped with an emiss
Engine Clutch Actuator
Components
Clutch disc
Clutch cover
Concentric slave cylinder
Hybrid motor assembly
Engine clutch actuator
Reservoir
Specifications
Schematic Diagrams
Harness Connector
Engine Clutch Actuator Repair procedu
Categories
- Home
- KIA Niro EV, Hybrid - Second generation - (SG2) (2021-2024) - Owner's manual
- Kia Niro - First generation - (DE) (2017-2022) - Service and Repair Manual
- Contact Us