KIA Niro: Overhead Console Lamp Repair procedures | Hazard Lamp Switch
Kia Niro - First generation - (DE) (2017-2022) - Service and Repair Manual / Body Electrical System / Lighting System / Overhead Console Lamp Repair procedures | Hazard Lamp Switch
Inspection
- Remove the overhead console lamp.
(Refer to Lighting System - "Overhead Console Lamp")
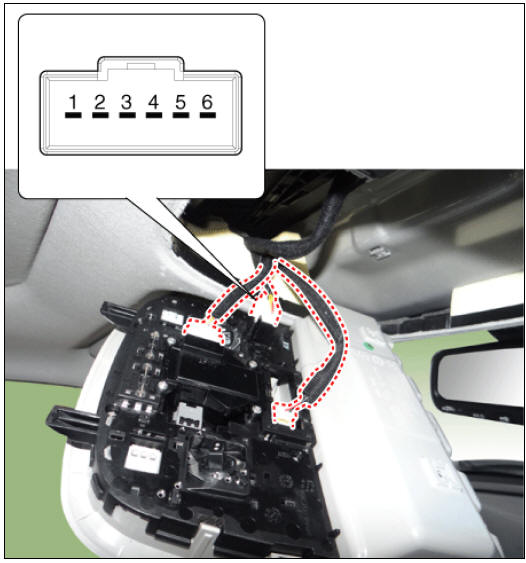
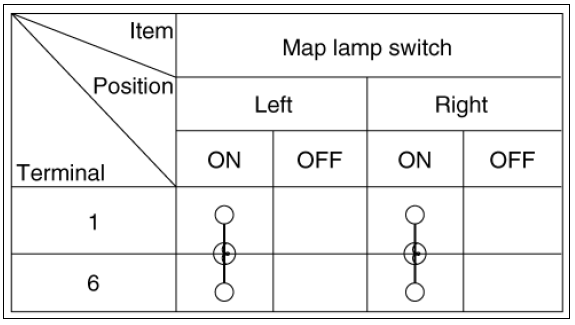
- Check for continuity between terminals.
Removal
- Disconnect the negative (-) battery terminal.
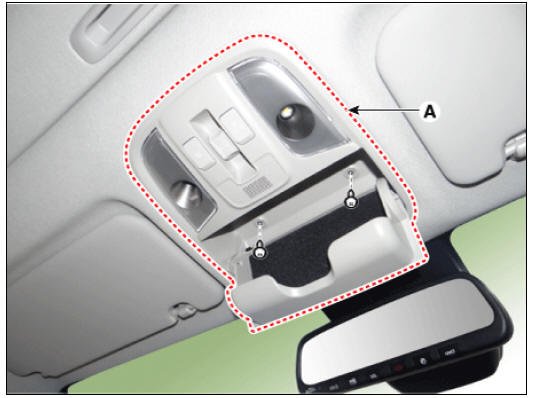
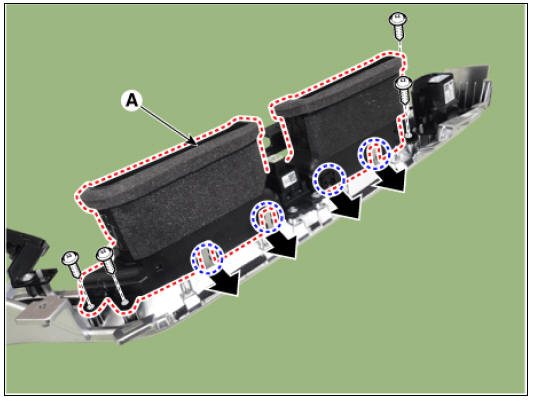
- Remove the overhead console lamp (A) after loosening the mounting screws.

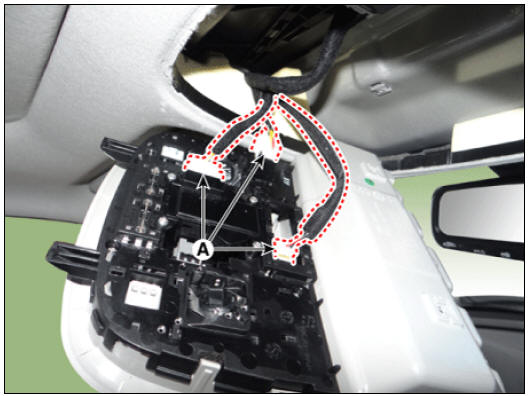
- Remove the overhead console after disconnecting the connectors (A).
Installation
- Install in the reverse order of removal.
Replacement
- Remove the overhead console lamp (A) after loosening the mounting screws.
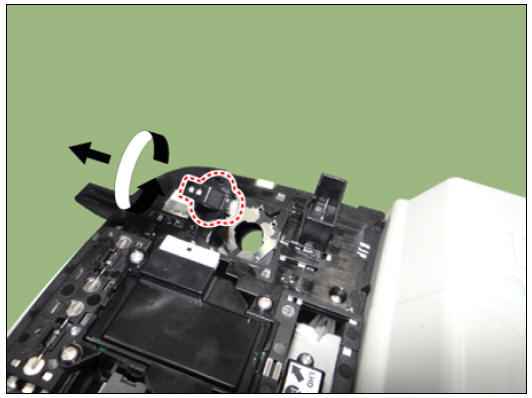
- Remove the socket (A) by rotating in the counterclockwise.
Hazard Lamp Switch
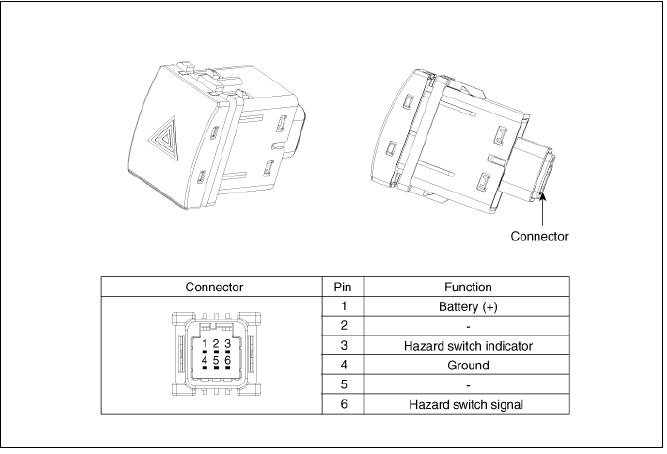
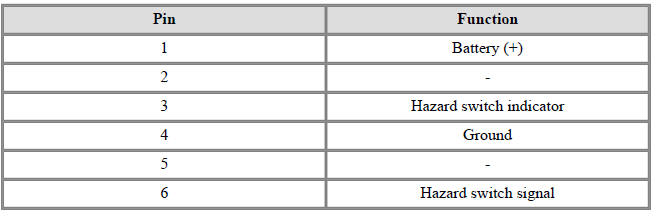
Connector and Terminal Function
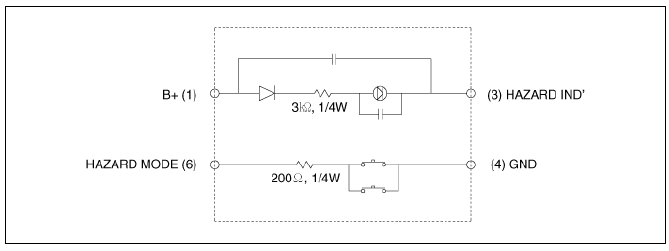
Circuit Diagram
Inspection
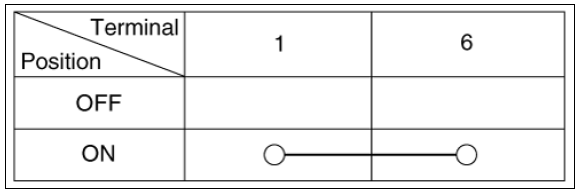
- Check for continuity between terminals.
Removal
- Disconnect the negative battery terminal.
- Remove the crash pad garnish assembly (RH).
(Refer to Body - "Crash Pad Garnish (RH)")
- Remove the air ventilation duct (A) by pulling it in the direction of the arrow after loosening the mounting screws.
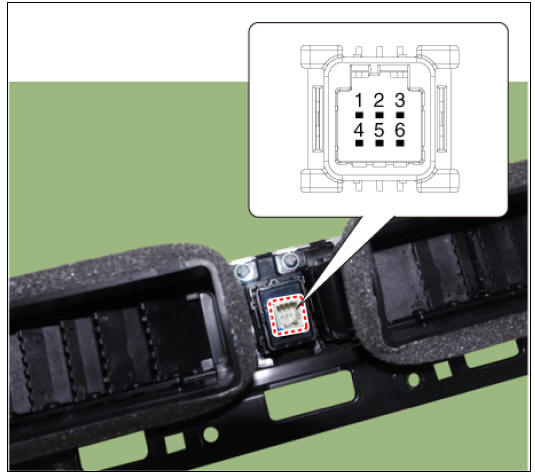
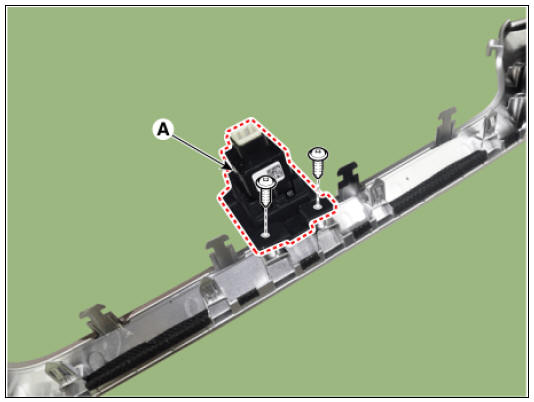
- Remove the hazard switch (A) after loosening the mounting screws.
Installation
- Install in the reverse order of removal.
READ NEXT:
 Rheostat | Front Fog Lamps Repair procedures
Connector and Terminal Function
Rheostat Repair procedures
Removal
Disconnect the negative (-) battery terminal.
Remove the crash pad lower panel.
(Refer to Body - "Crash Pad Lower Panel")
Remove the crash
SEE MORE:
Before Troubleshooting
Check applicable fuses in the appropriate fuse/relay box.
Check the battery for damage, state of charge, cleanliness and tight
connections.
(Refer to Engine Electrical System - "Battery")
Warning
Do not quick-charge a batte
Trickle charger (portable charging
cable)
Trickle charger can be used if AC Charger
is unavailable.
Plug and cable
Control box (ICCB)
Charging connector/cable
How to connect portable charger (ICCB: In-Cable
Control Box)
Connect the plug to a household electric
outlet.
Categories
- Home
- KIA Niro EV, Hybrid - Second generation - (SG2) (2021-2024) - Owner's manual
- Kia Niro - First generation - (DE) (2017-2022) - Service and Repair Manual
- Contact Us