KIA Niro: Rheostat | Front Fog Lamps Repair procedures
Kia Niro - First generation - (DE) (2017-2022) - Service and Repair Manual / Body Electrical System / Lighting System / Rheostat | Front Fog Lamps Repair procedures
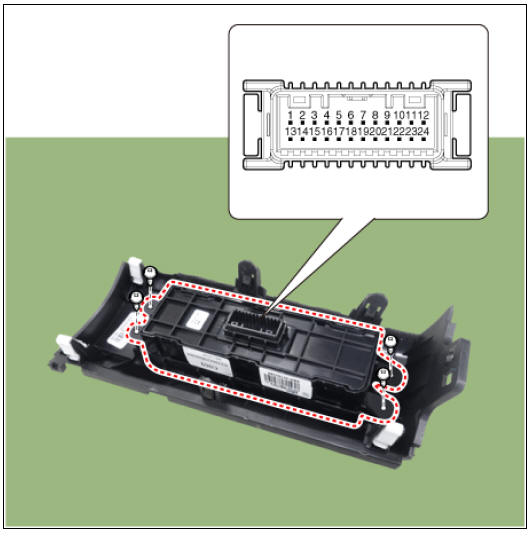
Connector and Terminal Function
Rheostat Repair procedures
Removal
- Disconnect the negative (-) battery terminal.
- Remove the crash pad lower panel.
(Refer to Body - "Crash Pad Lower Panel")
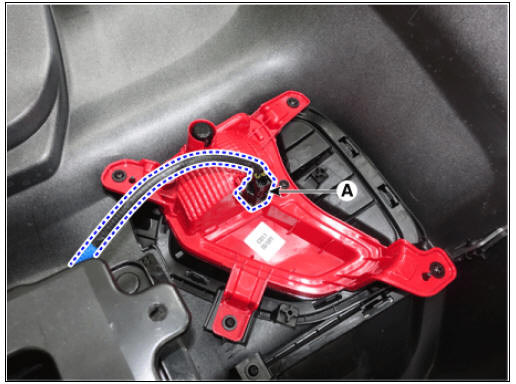
- Remove the crash pad plate (LH) (A) after loosening the screws.

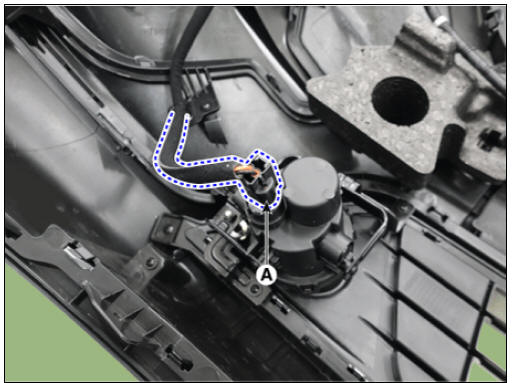
- Disconnect the crash pad side switch connector (A).
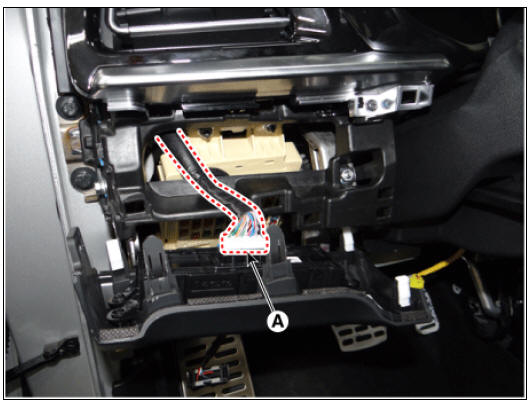
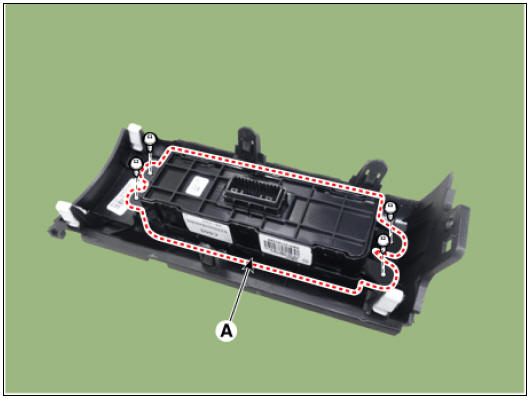
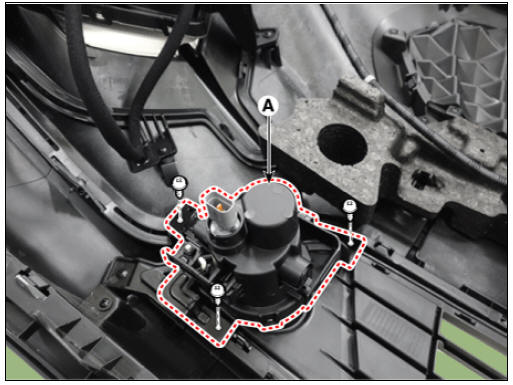
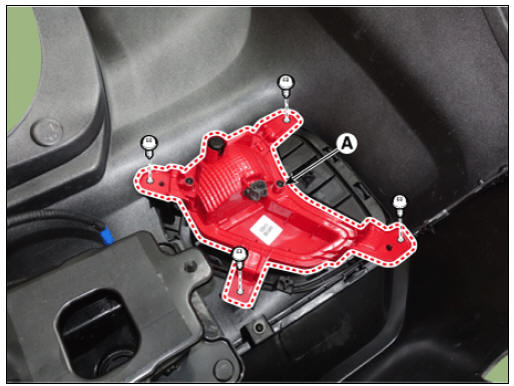
- Remove the crash pad side switch (A) after loosening the screws.
Installation
- Install in the reverse order of removal.
Inspection
- Check for intensity of new rheostat switch. If the light intensity of the lamps changes smoothly without any flickering when the rheostat is turned, it can be assumed that the rheostat is normal.
Front Fog Lamps Repair procedures
Removal
Front Fog Lamp
- Disconnect the negative battery terminal.
- Remove the front bumper assembly.
(Refer to Body - "Front Bumper Assembly")
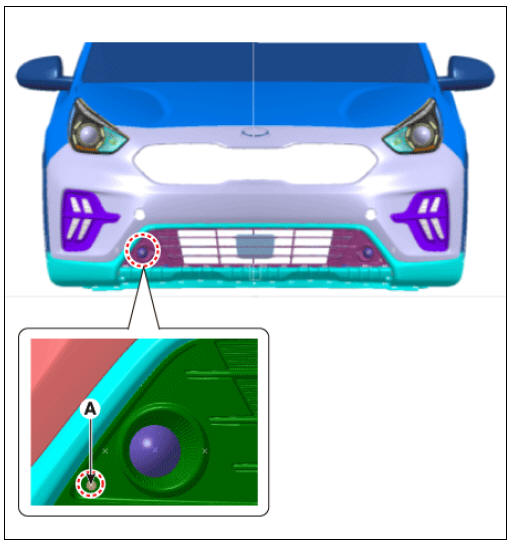
- Disconnect the connector (A) from the front fog lamp.
- Remove the front fog lamp (A) after loosening the mounting screws.
Rear Fog Lamp
- Disconnect the negative battery terminal.
- Remove the rear bumper assembly.
(Refer to Body - "Rear Bumper Assembly")
- Disconnect the connector (A) from the rear fog lamp.
- Remove the rear fog lamp (A) after loosening the mounting screws.
Installation
- Install in the revesr order of removal.
Warning
If the fog lamp needs to be adjusted, refer to fog lamp aiming procedure.
(Refer to Fog Lamp - "Adjustment")
Replacement
- Remove the engine room under cover.
(Refer to Engine Mechanical System - "Engine Room Under Cover")
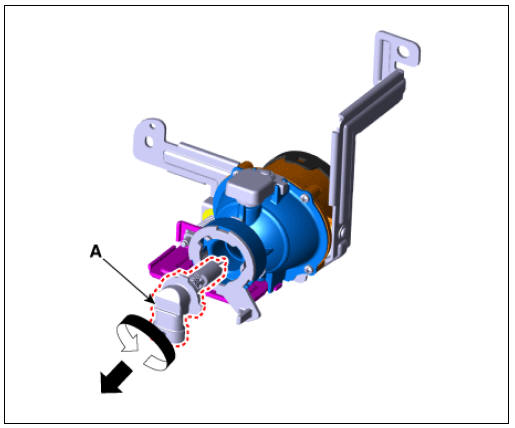
- Remove the front fog lamp bulb (A) by turning it in the counterclockwise direction after disconnecting the connector.
Adjustment
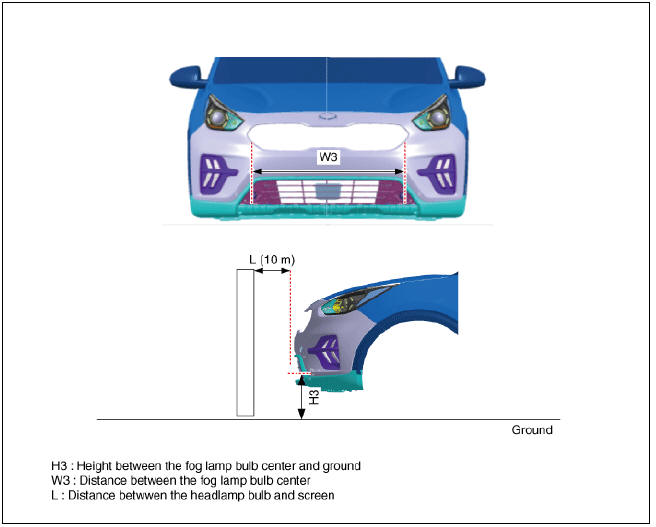
Front Fog Lamp Aiming Procedures
Adjust the headlamp aiming by turning the adjustment bolt. If do not have aiming alignment equipment, follow the procedure below.
- Inflate the tires to the specified pressure and remove any loads from the vehicle except the driver, spare tire, and tools.
- The vehicle should be placed on a flat floor.
- Check suspecsion spring for defects.
- Check that the surface of the headlamp lens is clean.G602
- Draw vertical lines (passing through respective headlamp centers) and a horizontal line (passing through center of headlamps) on the screen.
- If headlamp leveling device is equipped, adjust the headlamp leveling device switch with 0 positions.
- With the headlamps and battery in normal condition, aim the headlamps so the brightest portion falls on the horizontal and vertical lines.
Front Fog Lamp Aiming Point
Bulb Type

- Turn the front fog lamp on without the driver aboard.
- The cut-off line should be projected in the allowable range (shaded region).
READ NEXT:
 License Lamps Repair procedures | High Mounted Stop Lamp Repair procedures
Removal
Disconnect the negative (-) battery terminal.
Remove the license lamp assembly (A) after pressing the locking pin.
Disconnect the license lamp connector (A).
Remove the license lamp bulb (B) after removing th
SEE MORE:
Operating climate control system
Left-hand drive
Right-hand drive
Operating climate control system- (Kia Niro Hybrid only)
Operating climate control system- (Kia Niro EV only)
Operation
Start the vehicle.
Set the mode-selection buttons as
desired. To impr
Intelligent Speed Limit Assist settings
Speed limit
A: Driver Assistance
Speed Limit
Speed Limit Assist
Speed Limit Warning
Off
With the vehicle on, touch Settings →
Driver Assistance → Speed Limit on
the instrument cluster or Settings →
Vehicle → Driver As
Categories
- Home
- KIA Niro EV, Hybrid - Second generation - (SG2) (2021-2024) - Owner's manual
- Kia Niro - First generation - (DE) (2017-2022) - Service and Repair Manual
- Contact Us