KIA Niro: License Lamps Repair procedures | High Mounted Stop Lamp Repair procedures
Kia Niro - First generation - (DE) (2017-2022) - Service and Repair Manual / Body Electrical System / Lighting System / License Lamps Repair procedures | High Mounted Stop Lamp Repair procedures
Removal
- Disconnect the negative (-) battery terminal.
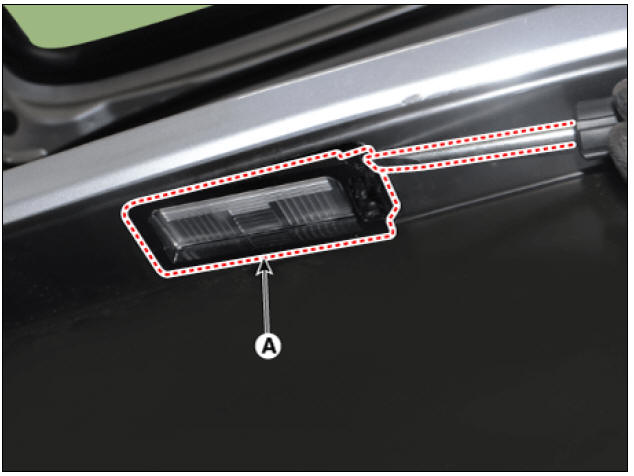
- Remove the license lamp assembly (A) after pressing the locking pin.
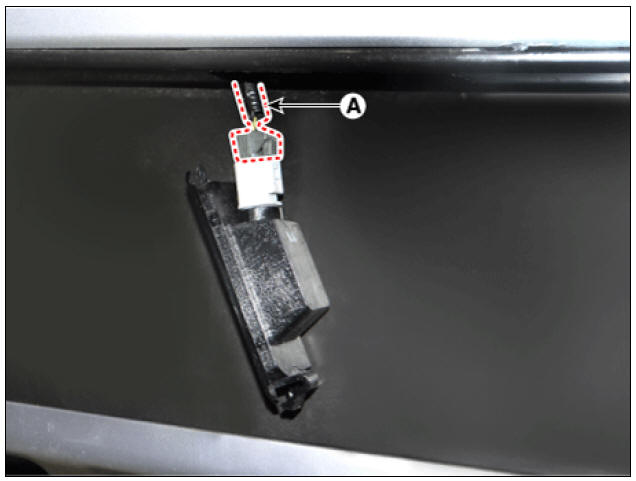
- Disconnect the license lamp connector (A).
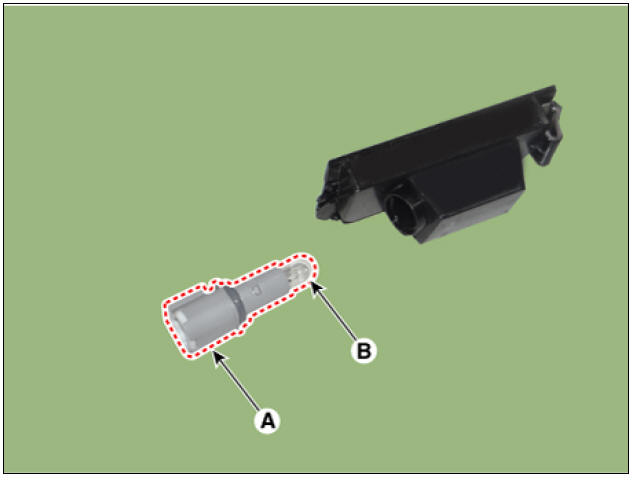
- Remove the license lamp bulb (B) after removing the license lamp socket (A).
Installation
- Install in the reverse order of removal.
High Mounted Stop Lamp Repair procedures
Removal
- Disconnect the negative (-) battery terminal.
- Remove the rear spoiler.
(Refer to Body - "Rear Spoiler")
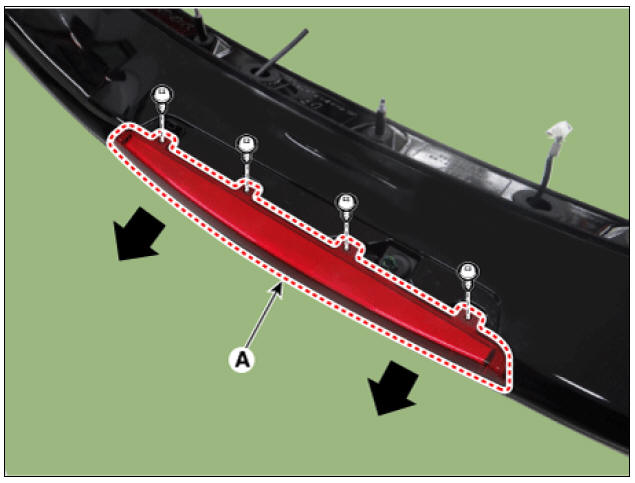
- Remove the high mounted stop lamp cover.
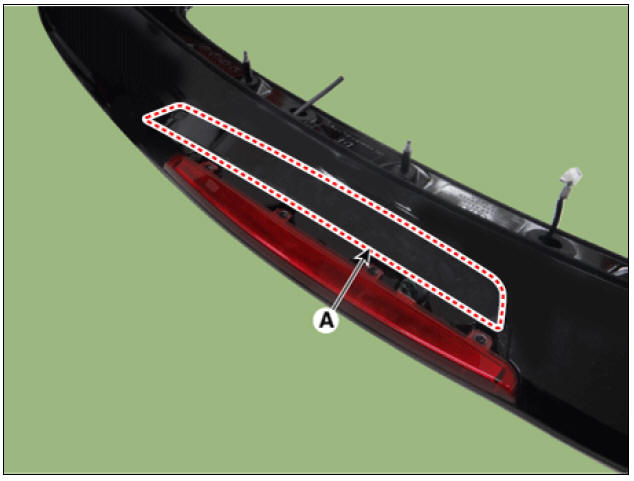
- Remove the high mounted stop lamp (A) after loosening the mounting screws.
Installation
- Install in the reverse order of removal.
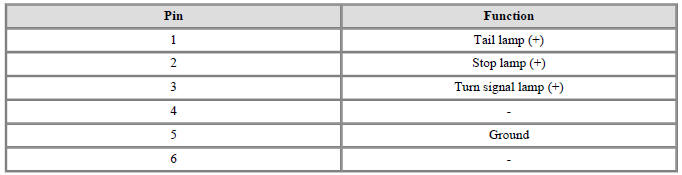
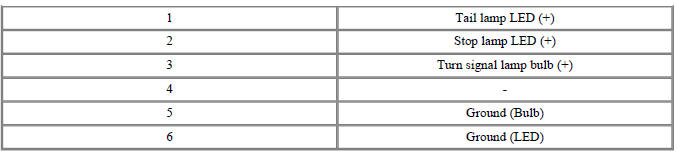
Circuit Diagram
Bulb Type
Outside Rear Combination Lamp
Inside Rear Combination Lamp

LED Type
Outside Rear Combination Lamp

Inside Rear Combination Lamp

READ NEXT:
 Rear Combination Lamp Repair procedures | Tail Lamp
Removal
Rear Combination Lamp (Outside)
Disconnect the negative (-) battery terminal.
Using a screwdriver or remover, remove the rear combination lamp cover (A).
Remove the rear combination lamp (A) after loosening the screw
SEE MORE:
Temporarily canceling Smart Cruise Control
A: SCC (Smart Cruise Control) cancelled
Smart Cruise Control will be temporarily
canceled automatically when:
Your driving speed is above 200 km/h
(120 mph)
The vehicle is stopped for a certain
period of time
The accelerator pedal i
Emergency Stop Signal (ESS)
The Emergency Stop Signal (ESS) alerts
the driver behind by flashing the brake
lights when braking sharply and
severely.
Operating condition(s)
The vehicle suddenly stops.
ABS is activated and the driving speed
is over 55 km/h (34 mph).
Categories
- Home
- KIA Niro EV, Hybrid - Second generation - (SG2) (2021-2024) - Owner's manual
- Kia Niro - First generation - (DE) (2017-2022) - Service and Repair Manual
- Contact Us