KIA Niro: Horn
Specifications
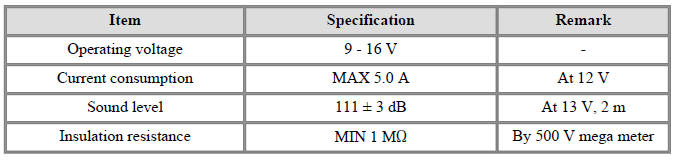
- Horn switch
- Horn relay (Built - in Metal Core Block PCB)
- Horn (Low pitch)
- Horn (High pitch)
- Clock spring
Body Electrical System / Horn / Repair Procedures
Removal
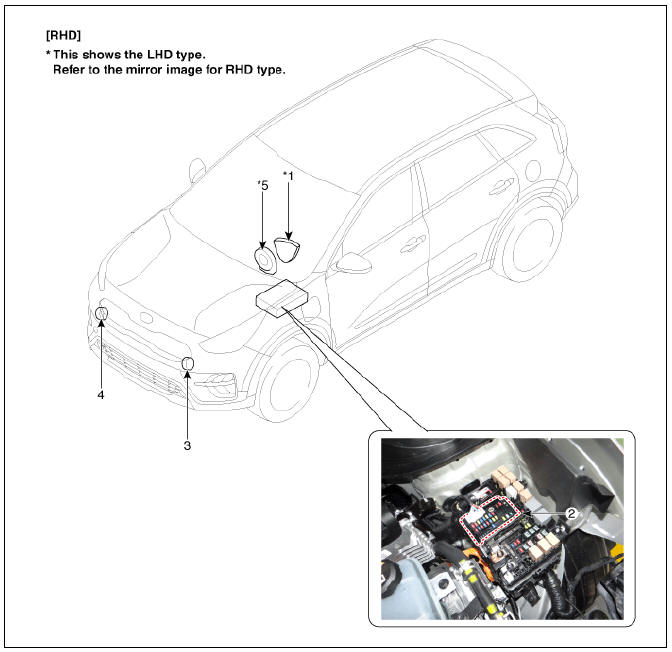
- Remove the front bumper cover.
(Refer to Body - "Front Bumper Cover")
- Disconnect the connector (A) from the horn.
Low

High
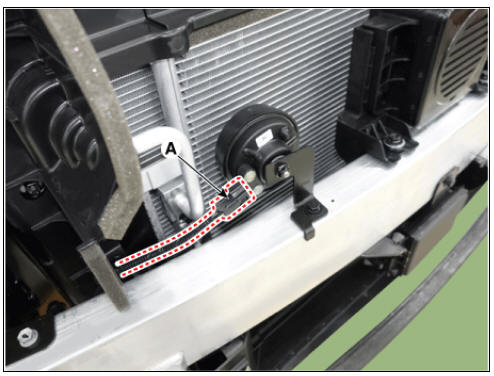
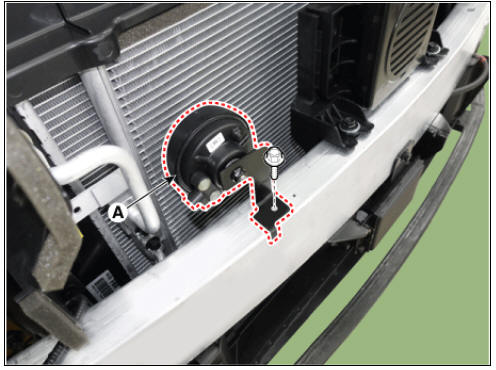
- Remove the horn (A) after loosening the mounting bolt.
Tightening torque : 10.7 - 11.7 N*m (1.1 - 1.2 kgf*m, 7.9 - 8.6 lb*ft)
Low

High
Installation
- Install in the reverse order of removal.
Inspection
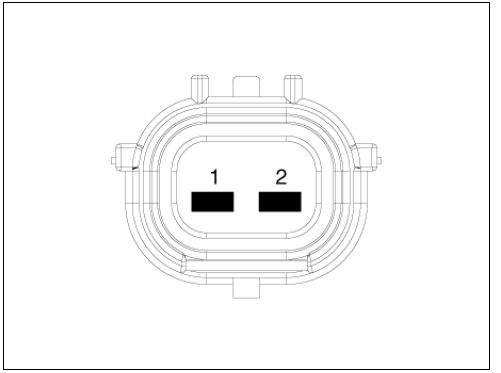
- Test the horn by connecting battery power to the terminal 2 and ground the terminal 1.
- The relay on the horn of this vehicle is implanted into the metal core block PCB of the engine room relay block.
Warning
The semi-conductor type relay inserted in the PCB is impossible to replace. If the relay needs to be replaced, replace the metal core box and conduct a test on it.
READ NEXT:
 Ignition Switch
Ignition Switch / Repair Procedures
Inspection
Disconnect the key warning switch connector (A) and ignition switch
connector (B) from the steering column.
Check for continuity between the terminals.
If continuity is not specif
Instrument Cluster Description and operation
Instrument Cluster Components and components location
Connector and Terminal Function
Instrument Cluster Description and operation
Description
Main Function
High speed CAN communication (C-CAN)
(1) Custom Function : car seats l
SEE MORE:
Blower Motor Repair procedures | Climate Control Air Filter Repair procedures
Inspection
Operate the heater controls at IGN2 to ensure that the motor is running.
Battery (+)
Input signal
Ë—
Ground
If the blower motor does not operate well, substitute with a known-good blower m
Manual mode
Paddle shifter is used to shift without
taking your hands off the steering wheel.
Operation
Pull the right side (+) of the paddle
shifter once to shift up.
Pull the left side (-) of the paddle
shifter once to shift down.
Operating
Categories
- Home
- KIA Niro EV, Hybrid - Second generation - (SG2) (2021-2024) - Owner's manual
- Kia Niro - First generation - (DE) (2017-2022) - Service and Repair Manual
- Contact Us