KIA Niro: Rear Door Module
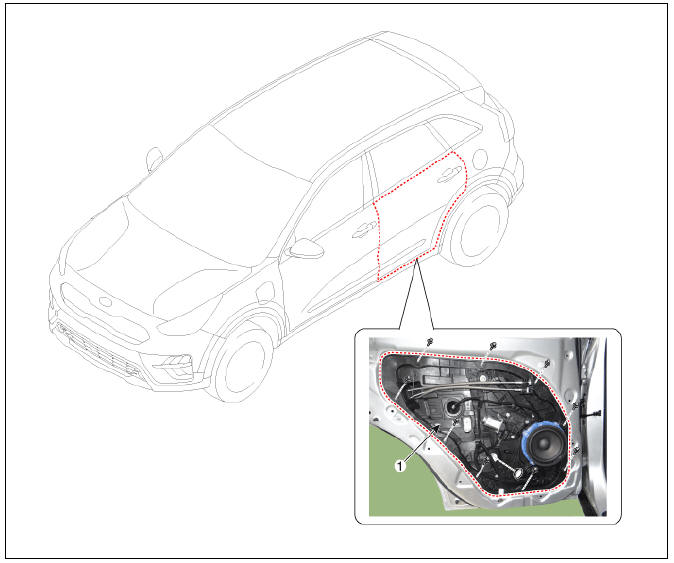
- Rear door module
Replacement
- Remove the rear door window glass.
(Refer to Rear Door - "Rear Door Window Glass")
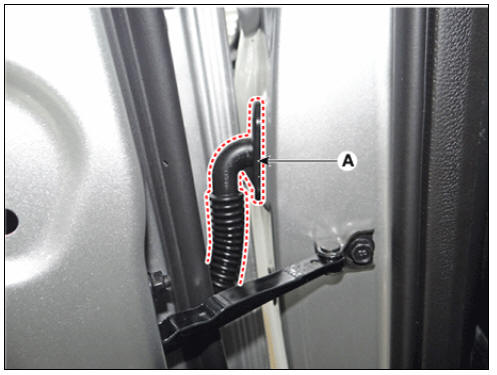
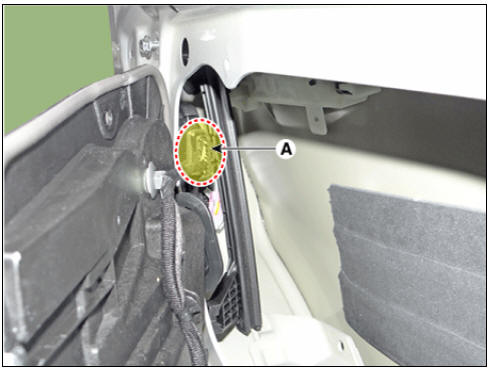
- Remove the rear door channel (A) after loosening the mounting bolts and nut.
Tightening torque :
Bolt : 6.9 - 10.8 N.m (0.7 - 1.1 kgf.m, 5.1 - 8.0 lb-ft)
Nut : 3.9 - 5.9 N.m (0.4 - 0.6 kgf.m, 2.9 - 4.3 lb-ft)

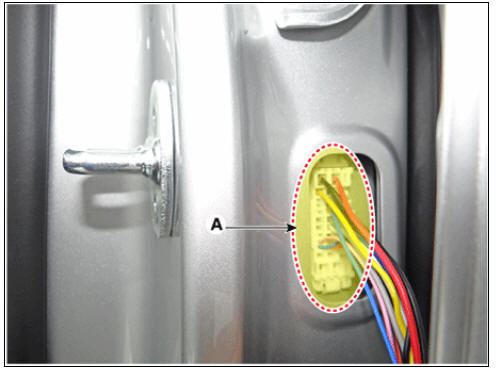
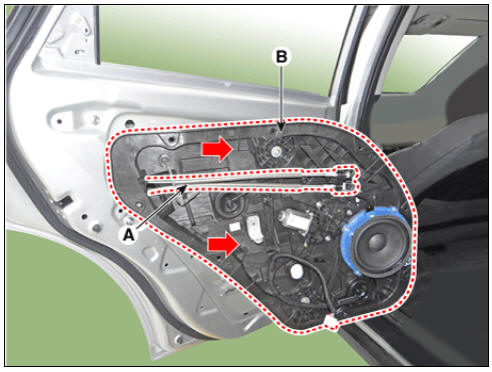
- Disconnect the rear door main wiring connector cover (A).
- Disconnect the rear door main wiring connector (A).
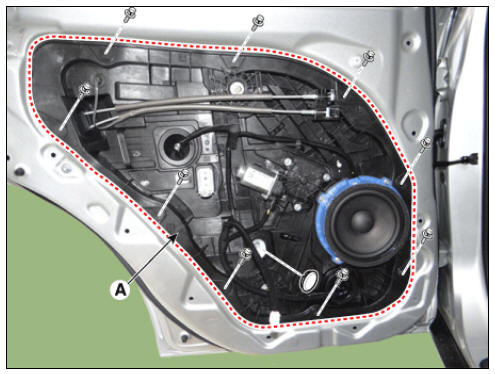
- Remove the rear door module (A) after loosening the mounting bolts.
Tightening torque : Bolt : 7.8 - 11.8 N.m (0.8 - 1.2 kgf.m, 5.8 - 8.7 lb-ft)
- Disconnect the rear door latch connector (A).
- Remove the rear door module (B) from the inside handle (A) by pulling in the direction of the arrow.
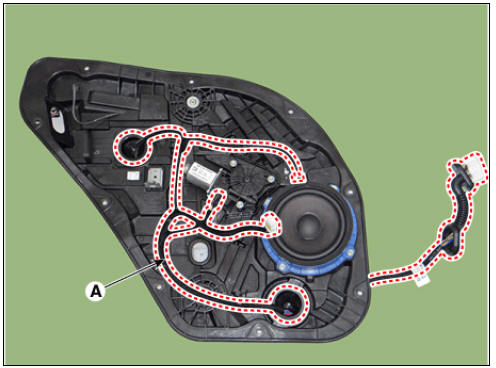
- Remove ther rear door main wiring (A).
- Remove the rear speaker.
(Refer to Body Electrical System - "Speakers")
- Remove the rear power window motor.
(Refer to Body Electrical System - "Power Window Motor")
- Install in the reverse order of removal.
Warning
- Apply enough grease onto the whole parts.
- Make sure that connectors are connected properly and each rod is connected securely.
- Make sure that the door locks/unlocks and opens/closes properly.
READ NEXT:
 Rear Door Outside Handle | Rear Door Latch
Rear door outside handle
Replacement
Remove the rear door trim.
(Refer to Rear Door - "Rear Door Trim")
Remove the rear door outside handle cover (A) after loosening the mounting bolt.
Tightening torqu
Rear Door Belt Outside/ Inside Weatherstrip
Rear Door Belt Outside Weatherstrip
Replacement
Pull down the rear door window glass to the lowest level by pressing the
power window glass
switch.
Remove the rear door belt outside weatherstrip (A) after loosening the
mounting screw.
SEE MORE:
Ignition Coil Repair procedures | Spark Plug Repair procedures
Removal
Turn ignition switch OFF and disconnect the battery negative (-) terminal.
Remove the engine cover.
Disconnect the ignition coil connector (A).
Remove the ignition coil (A) after loosening the mounting bolt.
I
Replacing main/multi fuses
Operation
Turn off the vehicle.
Remove the fuse panel cover by
pressing the tab and pulling the cover
up.
Disconnect the negative battery cable.
Remove the nuts shown in the picture
above.
Replace the fuse with a new one of
th
Categories
- Home
- KIA Niro EV, Hybrid - Second generation - (SG2) (2021-2024) - Owner's manual
- Kia Niro - First generation - (DE) (2017-2022) - Service and Repair Manual
- Contact Us