
KIA Niro: Rear Door Belt Outside/ Inside Weatherstrip
Kia Niro - First generation - (DE) (2017-2022) - Service and Repair Manual / Body (Interior And Exterior) / Rear Door / Rear Door Belt Outside/ Inside Weatherstrip
Rear Door Belt Outside Weatherstrip
Replacement
- Pull down the rear door window glass to the lowest level by pressing the power window glass switch.
- Remove the rear door belt outside weatherstrip (A) after loosening the mounting screw.
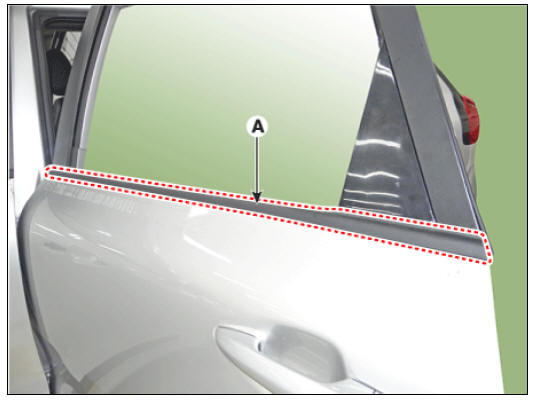
- Install in the reverse order of removal.
Warning
Replace any damaged clips.
Rear Door Belt Inside Weatherstrip
Replacement
- Remove the rear door trim.
(Refer to Rear Door - "Rear Door Trim")
- Remove the rear door belt outside weatherstrip (A) after loosening the mounting screw.
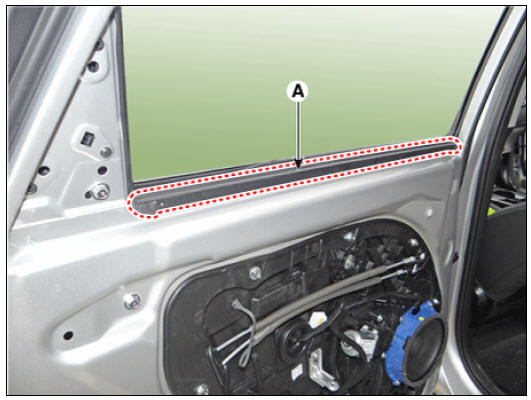
- Install in the reverse order of removal.
Warning
Replace any damaged clips.
Rear Door Side Weatherstrip Repair procedures
Replacement
- Loosen the rear door checker (B) mounting bolt.
Tightening torque : 19.6 - 29.4 N*m (2.0 - 3.0 kgf*m,14.5 - 21.7 lb*ft)
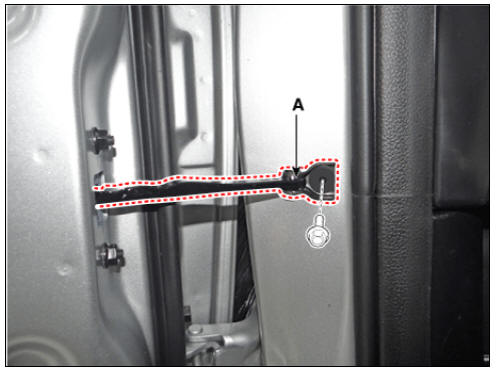
- Detach the clips, and remove the rear door side weatherstrip (A).
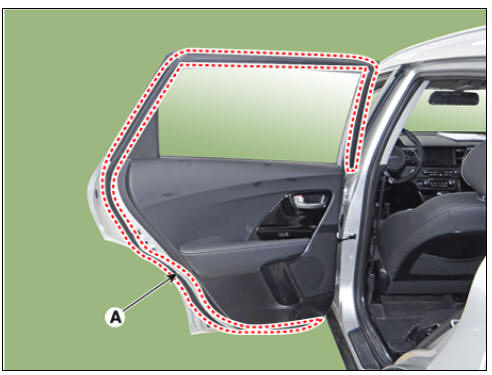
- Install in the reverse order of removal.
Warning
Replace any damaged clips.
READ NEXT:
 Rear Seat Assembly | Rear Seat Back Cover
Rear seat back assembly
Rear seat cushion covering
Rear seat cushion pad
Rear seat cushion heater
Rear seat armrest
Rear seat back covering
Rear seat back pad
Rear seat back frame
Rear seat headrest guide
SEE MORE:
Battery Terminal
Move back and forth to check that the battery terminals (A) are loose or
corroded.If the terminals are corroded,
clean them.
If battery positive connection is loose, disconnect ground(GND) cable first
before attempting to remove
Front Radar Unit
Specification
Circuit Diagram
Front Radar Unit Repair Procedures
Inspection
Warning
Put the vehicle on the level ground.
Take out heavy luggage from the vehicles' seats or tailgate.
Set all tires according to the specified pressur
Categories
- Home
- KIA Niro EV, Hybrid - Second generation - (SG2) (2021-2024) - Owner's manual
- Kia Niro - First generation - (DE) (2017-2022) - Service and Repair Manual
- Contact Us
