KIA Niro: Scheduled charging
You can set-up a charging schedule for your vehicle using the Infotainment system or Kia Connect application. Refer to the manual provided in the infotainment system and the quick reference guide for detailed information about setting scheduled charging.
Scheduled charging can only be done when using a AC charger or the portable charger (ICCB: In-Cable Control Box).
When scheduled charging is set and the AC charger or the portable charger (ICCB: In-Cable Control Box) is connected for charging, the indicator lamp blinks from the first level to the last for about 3 minutes to indicate that scheduled charging is set.
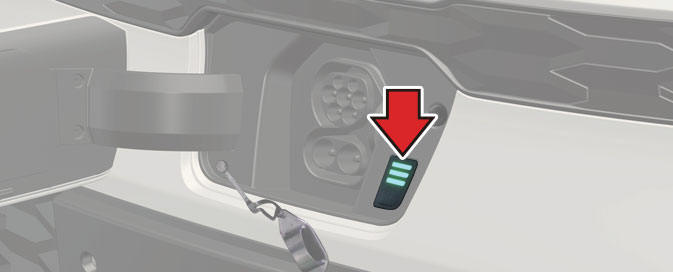
When scheduled charging is set, charging is not initiated immediately when the AC charger or portable charger (ICCB: In-Cable Control Box) is connected.
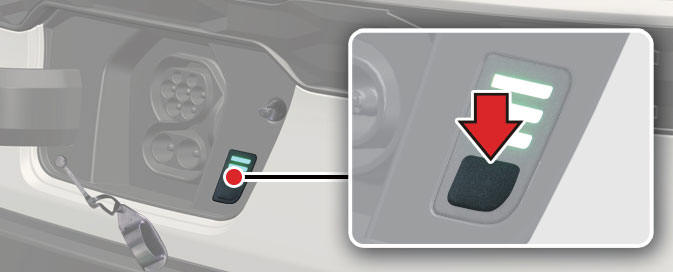
When immediate charging is required, press and hold the charging button on the charging door for 2 seconds or deactivate the scheduled charge setting with the infotainment system or Kia Connect application.
Refer to "AC charge" or "Portable charge" for details about connecting the AC charger and the portable charger (ICCB: In-Cable Control Box).
READ NEXT:
 Charging door
Opening the charging door
Operation
Press the right center edge of the
charging door.
The charging door is not open when
the vehicle is locked.
Closing the charging door
Operation
Close the charging door by pressing
rear
AC charge
* Actual charger image and charging
method may vary in accordance with
the charger manufacturer.
How to connect AC charger
Depress the brake pedal and apply
the parking brake.
Turn OFF all switches, shift to P
(Park), and turn OF
SEE MORE:
Main Fuse Inspection | Checking for Welding in the High Voltage Main Relay
Turn the ignition switch OFF and disconnect the auxiliary 12V battery negative (-) terminal.
Shut off the high voltage.
(Refer to Hybrid Control System - "High voltage Shut-off Procedures")
Remove the center tra
LCD display messages (Kia Niro EV)
* For EV warning messages, refer to "LCD display messages"
LCD displays / Displayed contents
Door, hood, tailgate, sunroof
open
Low tire pressure warning display
A: Low tyre pressure
A: Lights
1:
2:
3: AUTO
4: OFF (O)
Categories
- Home
- KIA Niro EV, Hybrid - Second generation - (SG2) (2021-2024) - Owner's manual
- Kia Niro - First generation - (DE) (2017-2022) - Service and Repair Manual
- Contact Us