KIA Niro: Sun Visor | Roof Trim Assembly
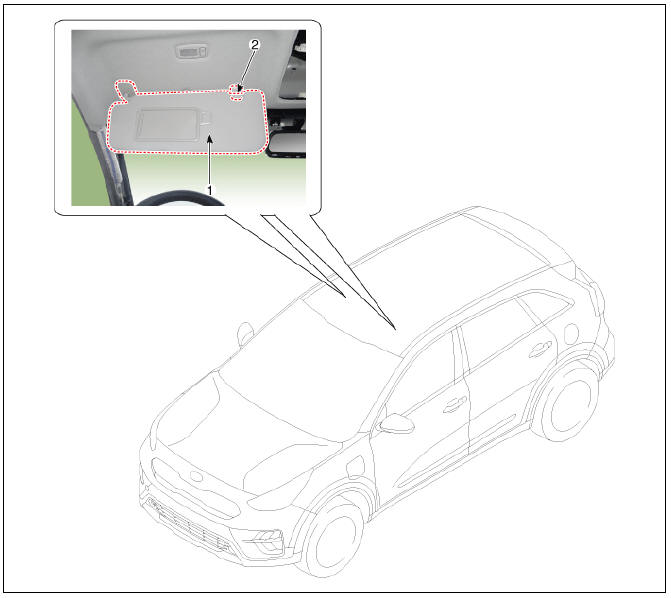
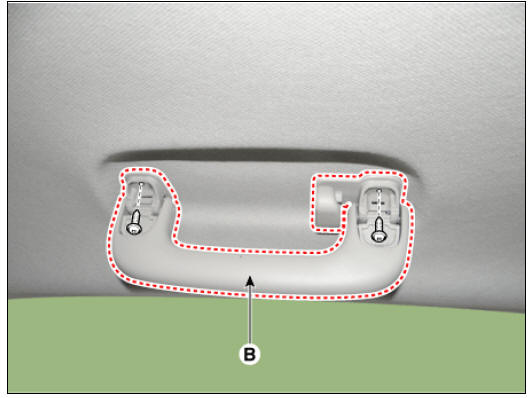
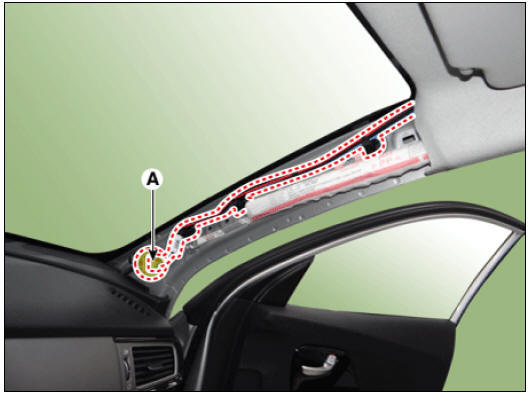
- Sun visor
- Retainer
Replacement
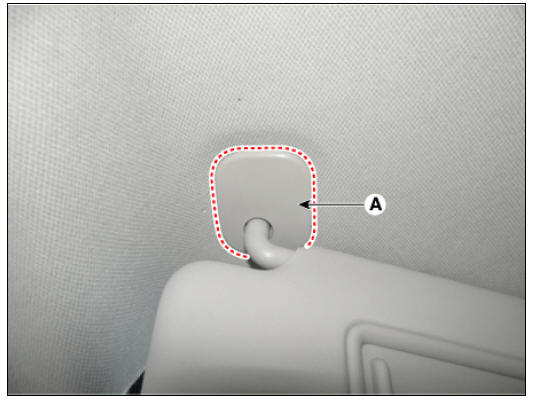
- Remove the cap (A) by using a remover.
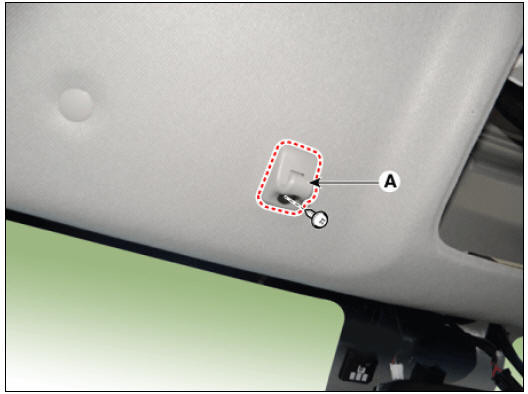
- Remove the retainer (A) after loosening the screw.
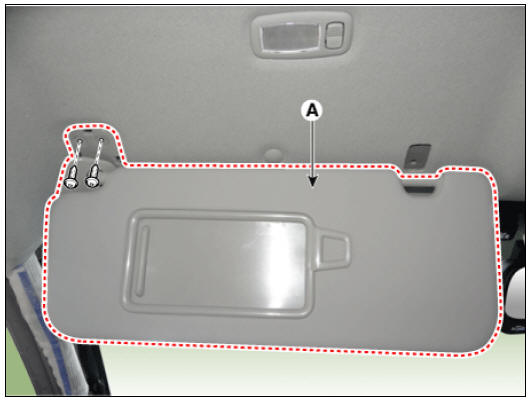
- Remove the sun visor (A) after loosening the screws.
- Install in the reverse order of removal.
Warning
Replace any damaged clips.
Assist handle
- Assist handle
Replacement
- Remove the caps (A) and screws, then remove the assist handle (B).
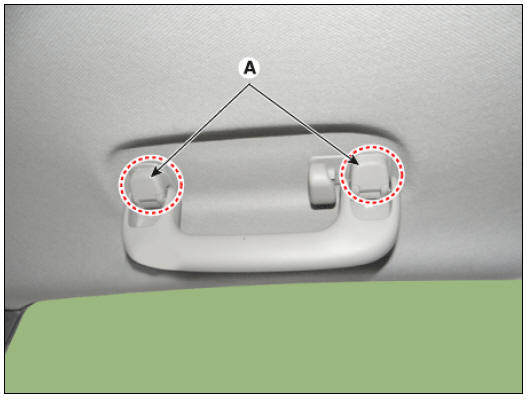
- Install in the reverse order of removal.
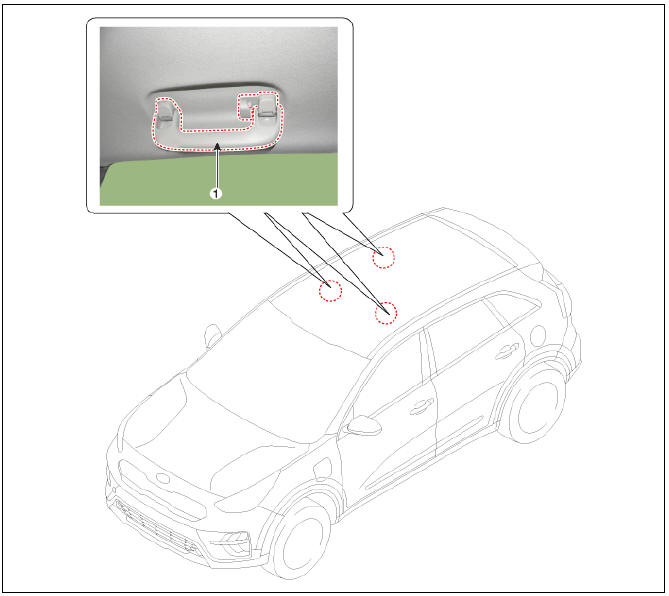
Roof Trim Assembly
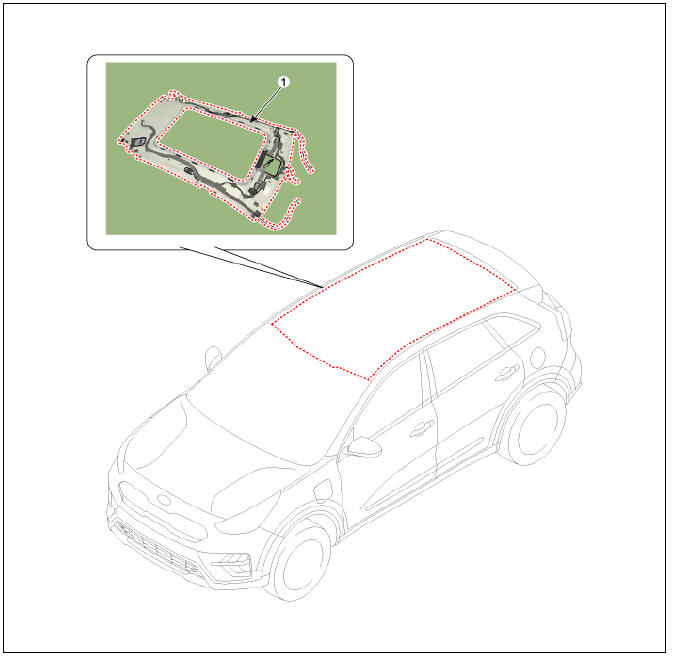
- Roof Trim Assembly
Replacement
- Remove the front seat.
(Rear to Front Seat - "Front Seat Assembly")
- Remove the rear seat cushion.
(Rear to Rear Seat - "Rear Seat Assembly")
- Remove the front pillar trim.
(Rear to Interior Trim - "Front Pillar Trim")
- Remove the center pillar upper trim.
(Rear to Interior Trim - "Center Pillar Trim")
- Remove the rear pillar trim.
(Rear to Interior Trim - "Rear Pillar Trim")
- Remove the sun visor and retainer.
(Rear to Roof Trim - "Sun visor")
- Remove the assist handle.
(Rear to Roof Trim - "Assist Handle")
- Remove the overhead console lamp.
(Rear to Body Electrical System - "Overhead Console Lamp")
- Remove the room lamp.
(Rear to Body Electrical System - "Room Lamp")
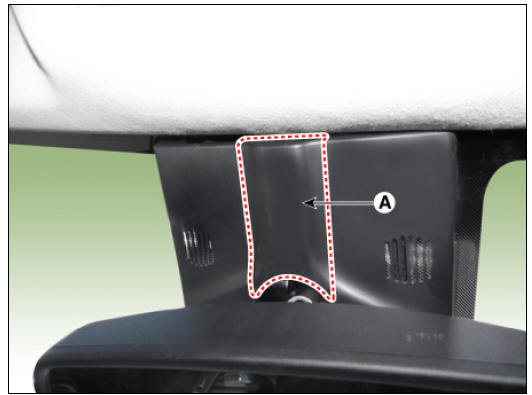
- Remove the ECM mirror cover (A).
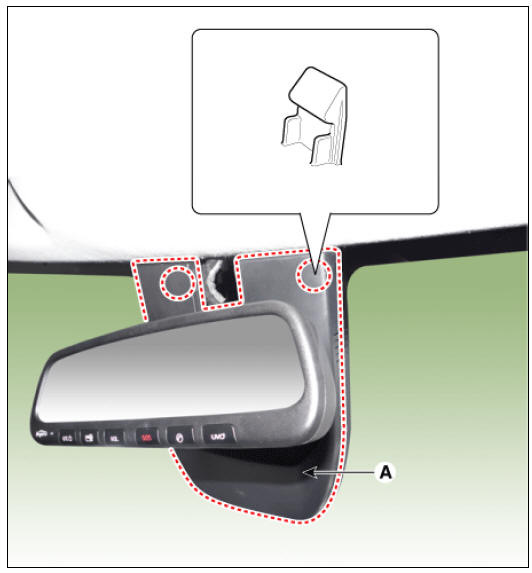
- Remove the rain sensor cover (A).
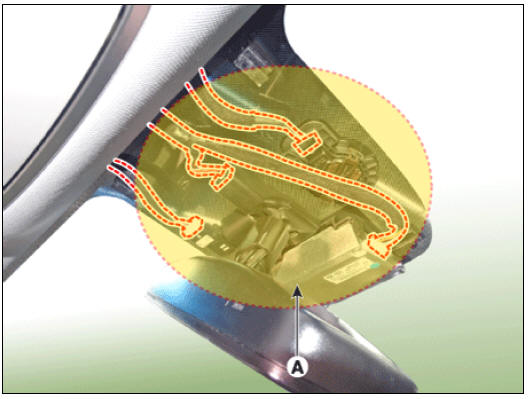
- Disconnect the connector (A).
- Disconnect the roof trim main connector (A) and the mounting clips in the front pillar.
Driver side
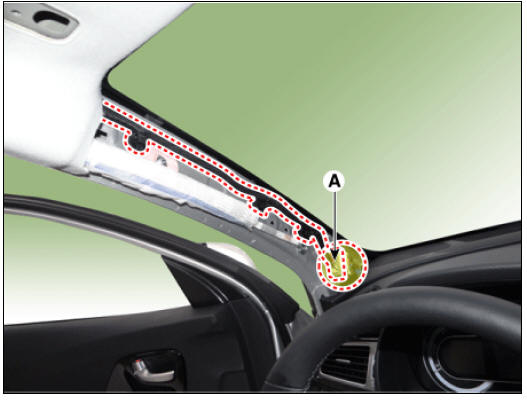
Passenger side
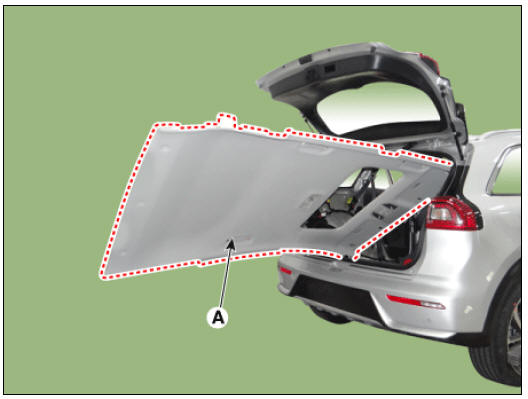
- Remove the roof trim assembly (A) from the vehicle through the tailgate.
Warning
Be careful not to damage the roof trim during removal.
- Remove the vanity lamp.
(Refer to Body Electrical - "Vanity Lamp')
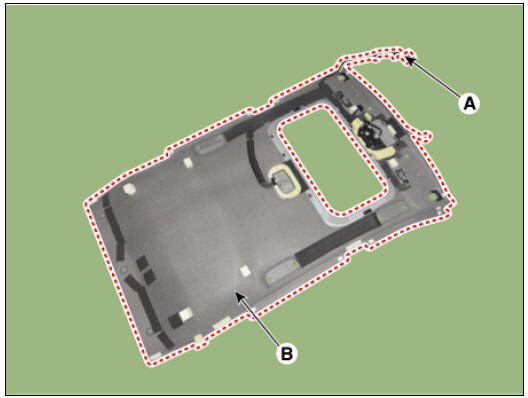
- Remove roof trim wiring harness (A) from the roof trim (B).
Warning
Be careful not to damage the roof trim wiring harness (A) during removal.
Warning
1) Apply the hot melt continuously when installing the roof trim wiring harness (A) on the roof trim (B) using the hot melt gun tool.
2) Put anti-noise pad on roof trim (B) to prevent the noise.
- Install in the reverse order of removal.
Warning
- Make sure the connector is plugged in properly.
- Replace any damaged clips.
READ NEXT:
 Tailgate Assembly
Tailgate / Repair Procedures
Adjustment
After loosening the tailgate hinge (A) mounting
bolts, adjust the tailgate by moving it up and down, or right and left.
Adjust the tailgate height by turning the tailgate
overslam bumpers (B).
Af
SEE MORE:
Warning and indicator lights (Kia Niro EV)
Once you set the vehicle to the ON position, the symbols shown below will
light up. If these symbols remain on or malfunction, we
recommend having the vehicle inspected by an authorized Kia dealer/service
partner.
The information provided may
Battery capacity label (Kia Niro EV / Hybrid)
Battery capacity label
Example
* The actual battery label in the vehicle
may differ from the illustration.
The Kia model name of battery
The nominal capacity (in Ampere
hours)
The nominal reserve capacity (in min.)
The nominal voltag
Categories
- Home
- KIA Niro EV, Hybrid - Second generation - (SG2) (2021-2024) - Owner's manual
- Kia Niro - First generation - (DE) (2017-2022) - Service and Repair Manual
- Contact Us