KIA Niro: Sunroof Guide
Replacement
- Remove the sunroof assembly.
(Refer to Sunroof - "Sunroof Assembly")
- Remove the sunroof sunshade.
(Refer to Sunroof - "Sunroof Sunshade")
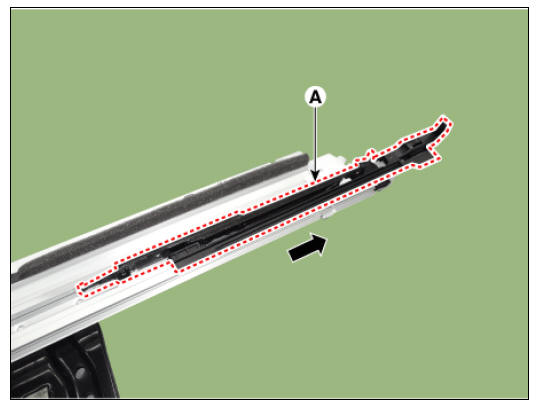
- Push down the slide and remove the drip link assembly (A).
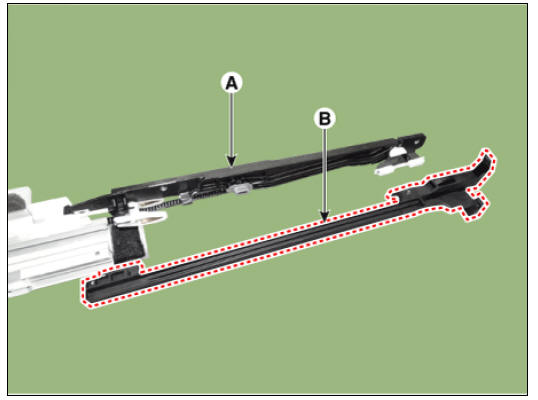
- Separate the drip link (B) and guide (A).
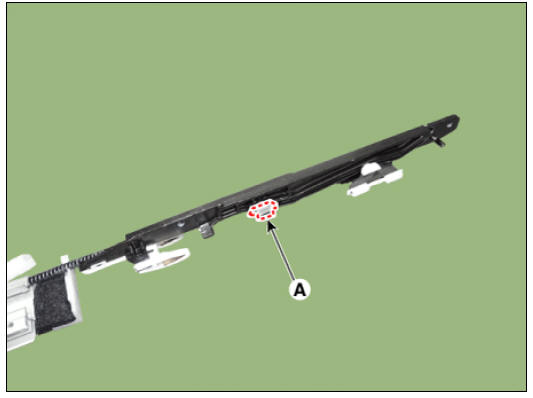
- Remove the shoe (A).
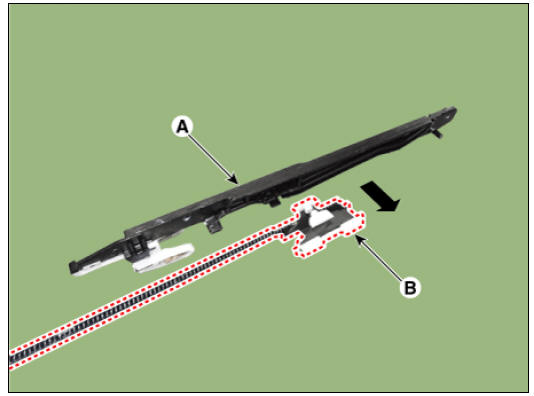
- Separate the guide assembly (A) and the cable (B) by pushing them in the direction of the arrow.
- Install in the reverse order of removal.
Warning
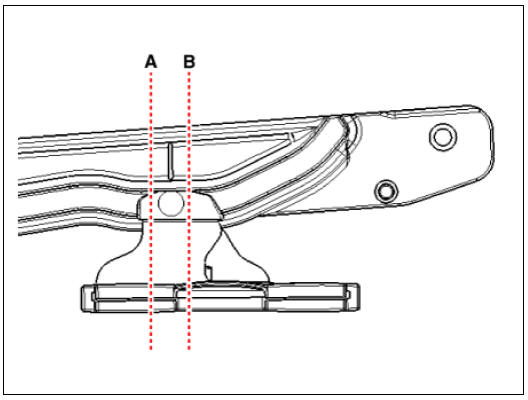
- Place the position of slide between (A) and (B) as shown.
- Make sure to initialize the motor.
READ NEXT:
 Quarter Fixed Glass
Quarter fixed glass
Replacement
Remove the rear pillar trim.
(Refer to Interior Trim - "Rear Pillar Trim")
Loosen the quarter fixed glass (A) mounting nuts.
Tightening torque :
3.9 - 4.4 N*m (0.4 - 0.45 kgf*m, 2.9 - 3.
Rear Bumper
Rear bumper cover assembly
Rear bumper beam assembly
Rear bumper side under cover (RH)
Rear bumper side bracket (RH)
Rear bumper side under cover (LH)
Rear bumper side bracket (LH)
Rear Bumper Assembly
Rear bumper assembly
Replacement
Warning
Put on gloves to protect your hands.
Warning
Use a plastic panel removal tool to remove interior trim pieces
without marring the surface.
Be careful not to bend or scratch the trim and pa
SEE MORE:
Rear Corner Radar System
Rear corner radar
BCW & RCCW Indicator
Blind-Spot Collision Warning (BCW) ON/OFF switch
Description
System Interface
System Function
Blind-Spot Collision Warning (BCW)
Sends an audible warning and signal on the mirror wh
Cowl Top Cover
Cowl Top Cover / Components And Components Location
Cowl top cover
Cowl Top Cover / Repair Procedures
Replacement
Warning
Put on gloves to protect your hands.
Warning
Use a plastic panel removal tool to remove interior trim pieces
Categories
- Home
- KIA Niro EV, Hybrid - Second generation - (SG2) (2021-2024) - Owner's manual
- Kia Niro - First generation - (DE) (2017-2022) - Service and Repair Manual
- Contact Us