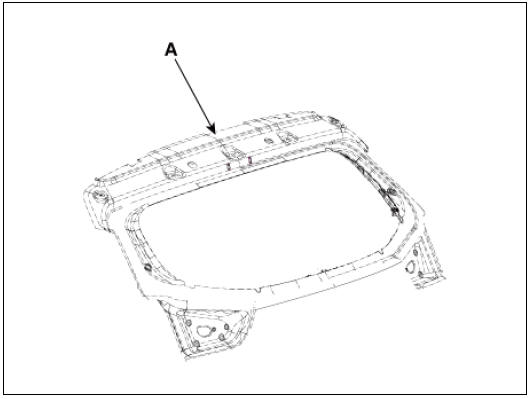
KIA Niro: Tailgate Window Glass
Kia Niro - First generation - (DE) (2017-2022) - Service and Repair Manual / Body (Interior And Exterior) / Tailgate Window Glass
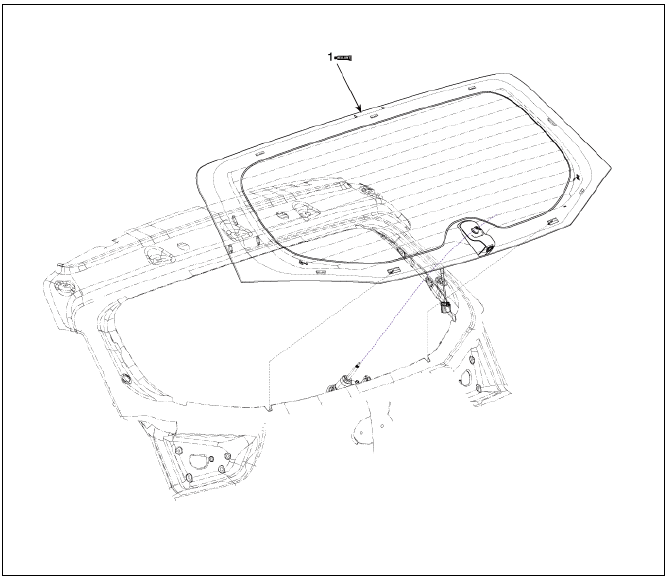
- Tailgate window glass
Removal
Warning
Put on gloves to prevent hand injuries.
Warning
Use seat covers to avoid damaging any surfaces.
- Remove the tailgate Trim.
(Refer to Tailgate - "Tailgate Trim")
- Remove the rear view monitor.
(Refer to Advancde Driver Assistance System (ADAS) - "Rear View Monitor")
- Remove the rear wiper motor.
(Refer to Body Electrical System - "Wiper Motor")
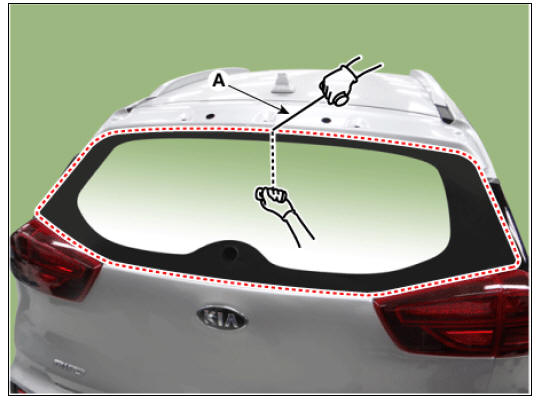
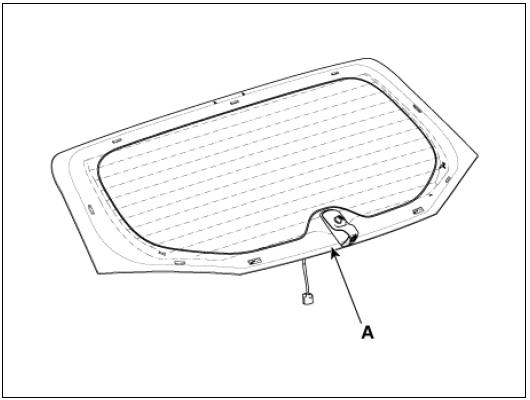
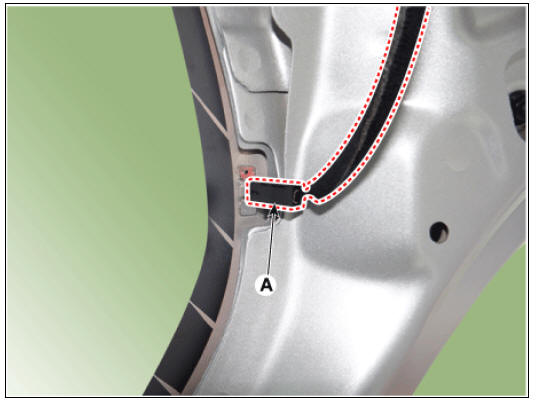
- Disconnect the hot wire connector (A).
LH
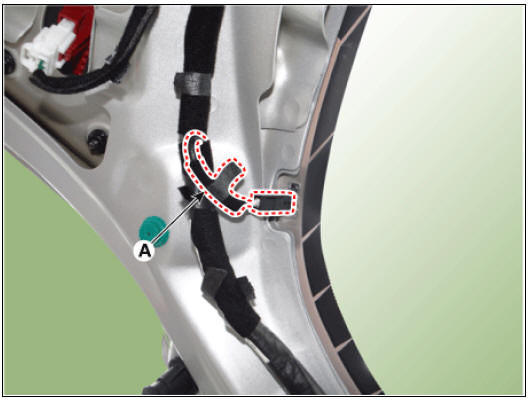
RH
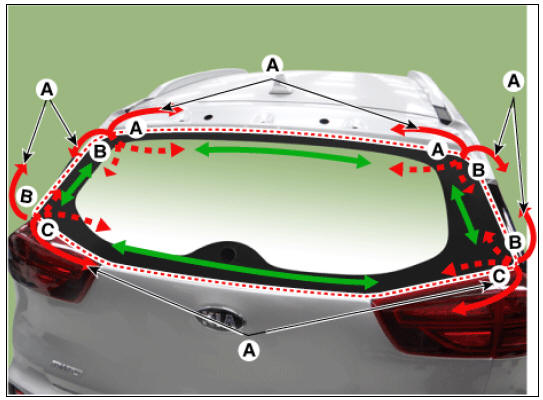
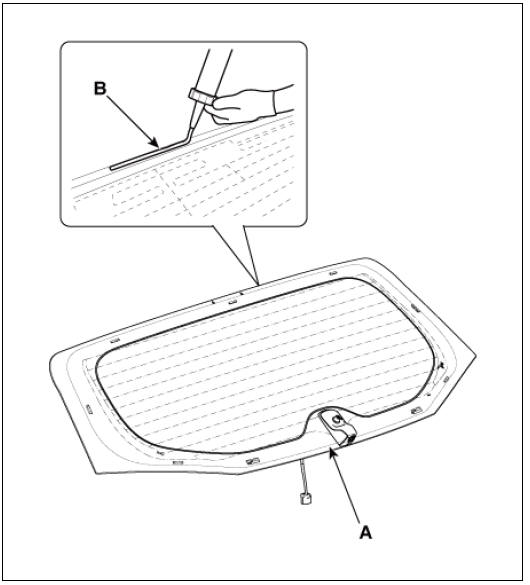
- Cut off the sealant on the edge (B) while pulling the piano wire (A) to the left and right.
Warning
- Put on gloves to protect your hands.
- Heat may occur when working on the wires. Be careful not to burn your hands.
- Be careful not to disconnect the piano wire.
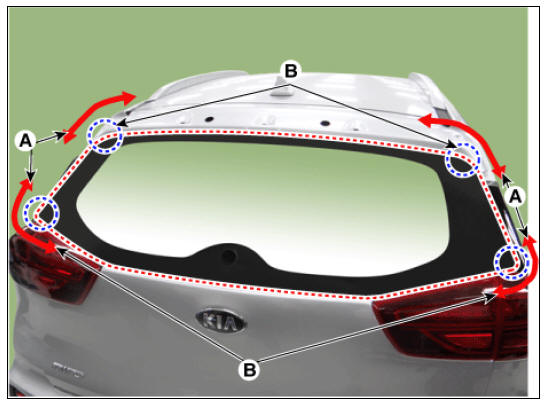
- Put in a piano wire (A) through the corner of the tailgate window glass and insert wire grips into both ends of the wire.
- Cut off the sealant on (A-A), (B-B), (C-C), while pulling a piano wire (A) to the left and right.
Warning
- Put on gloves to protect your hands.
- Heat may occur when working on the wires. Be careful not to burn your hands.
- Be careful not to disconnect the piano wire.
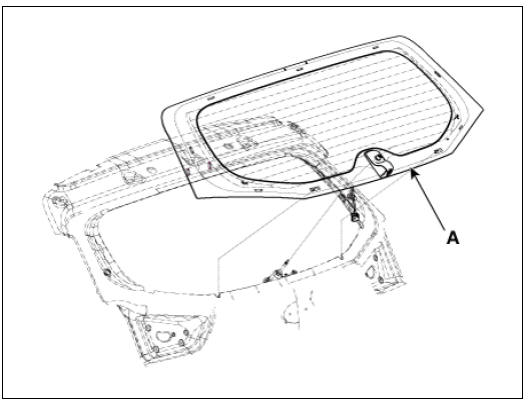
- Remove the tailgate window glass (A).
Installtion
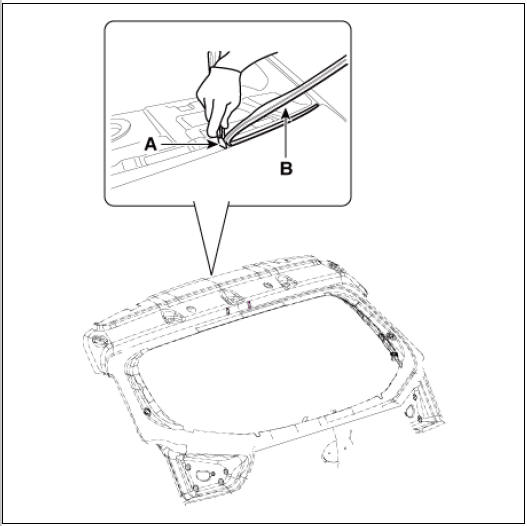
- Using a cutting knife (A), remove the remaining sealant (B) on the body panel.
Warning
Put on gloves to protect your hands.
- Apply the body primer to the bonding surface of body panel.
Warning
- Be careful not to touch the surface covered with the primer because touching it may lead to water leaks after installing the tailgate window glass.
- Do not apply the body primer to the glass.
- Remove any foreign materials from the
primer-covered surface.
- Apply the glass primer to the outer edge of tailgate window glass (A).
Warning
- Be careful not to touch the surface covered with the primer because touching it may lead to water leaks after installing the tailgate window glass.
- Remove any foreign materials from the
primer-covered surface.
- Using a sealant gun, apply the sealant (B) to the edge of rear tailgate window glass (A).
- Using the glass holder, adjust the tailgate window glass (A) to fit the alignment marks (B) on the body and lightly push the tailgate window glass to make the edges fully seated on the bonding surface of body
Warning
When installing the tailgate window glass (A), be sure to fit the protruding part (C) on the reverse side of the glass into the groove on the body frame.

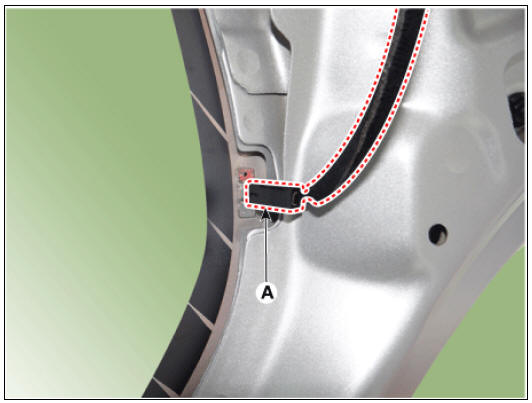
- Insert the hot wire connector (A).
LH
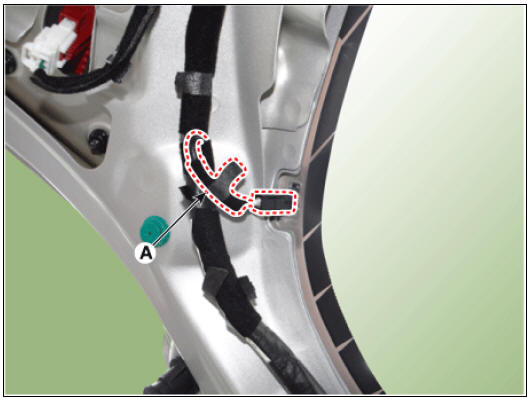
RH
- To make sure that the applied sealant is completely hardened, leave the car on a flat surface for at least 3 to 4 hours after installing the tailgate window glass.
Warning
- If driving the car is inevitable, drive at a low speed for at least 8 hours.
- Advise the driver to avoid aggressive driving or driving on rough roads for 2-3 days after installing the tailgate window glass.
- Conduct a leak testing.
Warning
- The leak testing shall be conducted at least 4 hours after the tailgate window glass installation is completed.
- Do not directly spray the high-pressure water to the joint area.
- Install the rear wiper motor.
(Refer to Body Electrical System - "Wiper Motor")
- Install the rear view monitor.
(Refer to Advancde Driver Assistance System (ADAS) - "Rear View
- Install the tailgate Trim.
(Refer to Tailgate - "Tailgate Trim")
READ NEXT:
 Before Troubleshooting
Check applicable fuses in the appropriate fuse/relay box.
Check the battery for damage, state of charge, cleanliness and tight
connections.
(Refer to Engine Electrical System - "Battery")
Warning
Do not quick-charge a batte
SEE MORE:
Crankshaft
Check the crankshaft bearing oil clearance.
(1) To check main bearing-to-journal oil clearance, remove the lower
crankcase and lower bearings.
(2) Clean each main journal and bearing with a clean shop towel.
(3) Place one strip of plastigag
Before Troubleshooting
Check applicable fuses in the appropriate fuse/relay box.
Check the battery for damage, state of charge, cleanliness and tight
connections.
(Refer to Engine Electrical System - "Battery")
Warning
Do not quick-charge a batte
Categories
- Home
- KIA Niro EV, Hybrid - Second generation - (SG2) (2021-2024) - Owner's manual
- Kia Niro - First generation - (DE) (2017-2022) - Service and Repair Manual
- Contact Us