KIA Niro: Virtual Engine Sound System (VESS)
Kia Niro - First generation - (DE) (2017-2022) - Service and Repair Manual / Body Electrical System / Virtual Engine Sound System (VESS)
Virtual Engine Sound System (VESS) / Components And Components
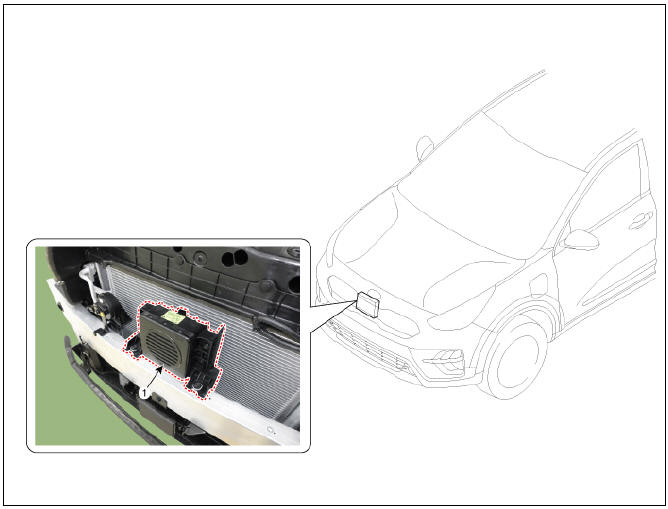
- Virtual engine sound unit & speaker assembly
Description
The VESS (Virtual engine sound system) generates engine sound when you start the EV system.
This sound is for pedestrians to hear vehicle sound because there is no engine sound in EV driving.
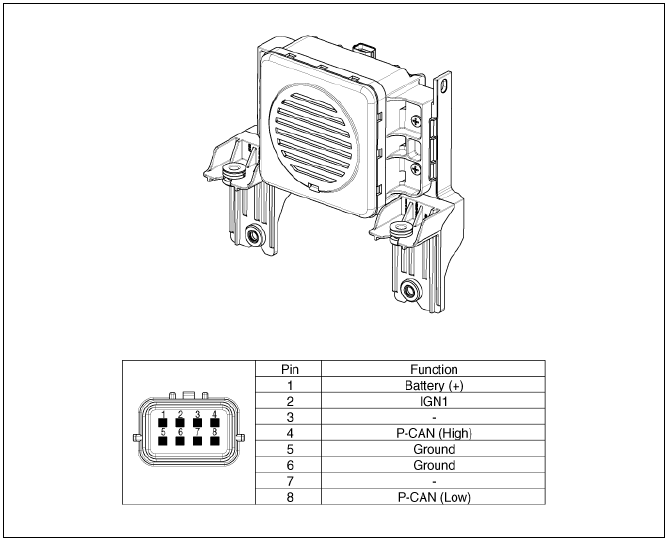
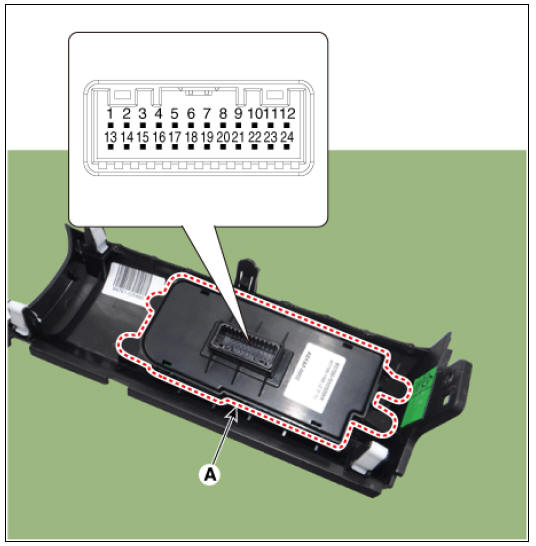
Connector and Terminal Function
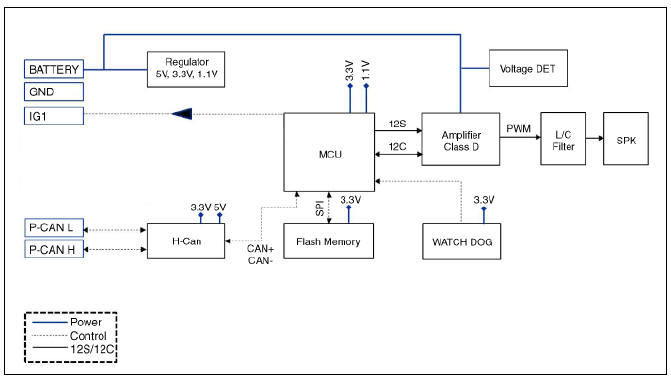
Block Diagram
Virtual Engine Sound System Unit Repair procedures
Removal
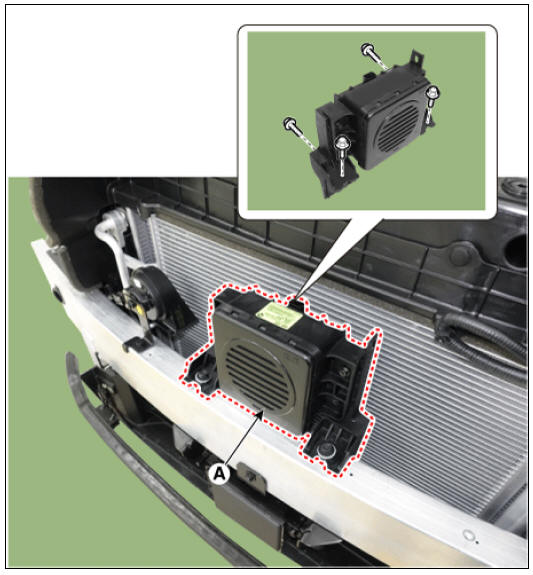
- Remove the front bumper assembly.
(Refer to Body - "Front Bumper Assembly")
- Disconnect the VESS unit & speaker assembly connector (A).
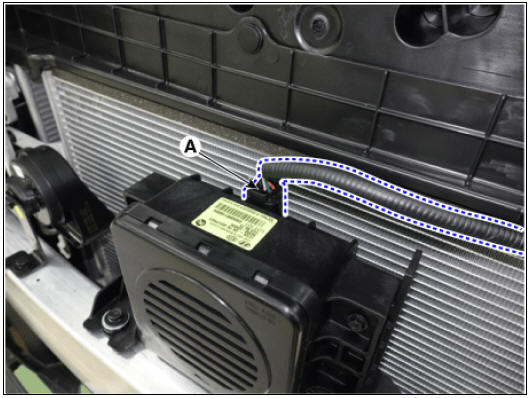
- Remove the VESS unit & speaker assembly (A) by loosening the bolts.
Installation
- Install in the reverse order of removal.
Virtual Engine Sound Speaker Repair procedures
Removal
- Disconnect the negative battery terminal.
- Remove the crash pad lower panel.
(Refer to Body - "Crash Pad Lower Panel")
- Remove the side crash pad switch panel (A) after loosening the screws.
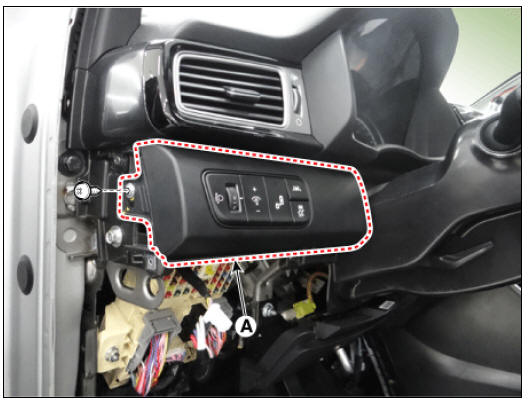
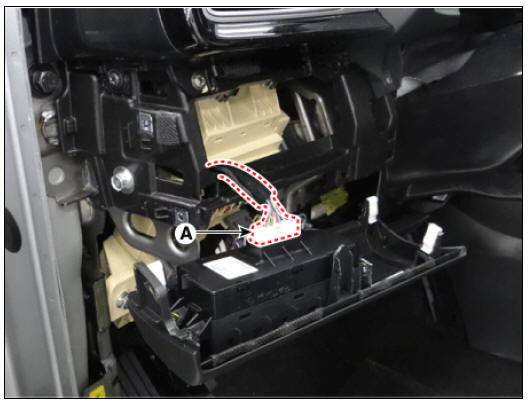
- Disconnect the side crash pad switch connector (A).
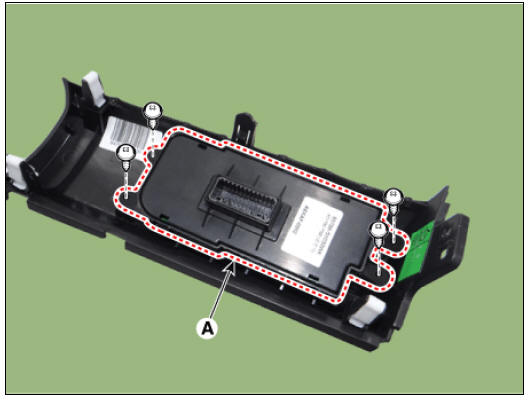
- Remove the side crash pad switch (A) by loosening the screws.
Installation
- Install in the reverse order of the removal.
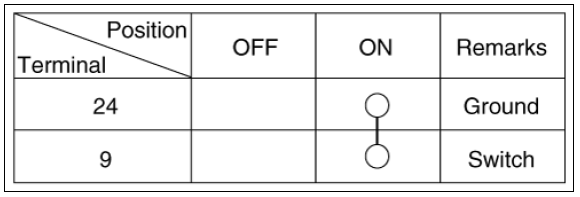
Inspection
- Operate the switch, then check for continuity between terminals.
READ NEXT:
 Windshield Wiper-Washer Switch Repair procedures
Windshield Wiper/Washer / Components And Components Location
Front wiper arm & blade
Wiper & washer switch
Front washer hose & nozzle
Front wiper motor & linkage assembly
Washer motor
Washer reservoir
Wiper/Was
Front Wiper Motor
Front wiper motor
Rear wiper motor
Front Wiper Motor Repair procedures
Removal
Front Wiper Motor
Remove the cowl top cover.
(Refer to Body - "Cowl Top Cover")
Disconnect the wiper motor connector (A).
Remove th
SEE MORE:
Auto reverse function (if equipped)
The outside rear view mirror will move
downwards when the vehicle is in R
(Reverse) position to assist reverse parking.
Operation
The outside rear view mirror switch (1)
position determines the mirror movement:
L/R: Outside rear view mir
Input speed sensor | Inhibitor Switch
Component Location
Input speed sensor
Specification
Input Speed Sensor Description and operation
Description
The input shaft speed sensor is important in that it detects the input shaft RPM and sends this information to the
Categories
- Home
- KIA Niro EV, Hybrid - Second generation - (SG2) (2021-2024) - Owner's manual
- Kia Niro - First generation - (DE) (2017-2022) - Service and Repair Manual
- Contact Us