KIA Niro: Brake Line
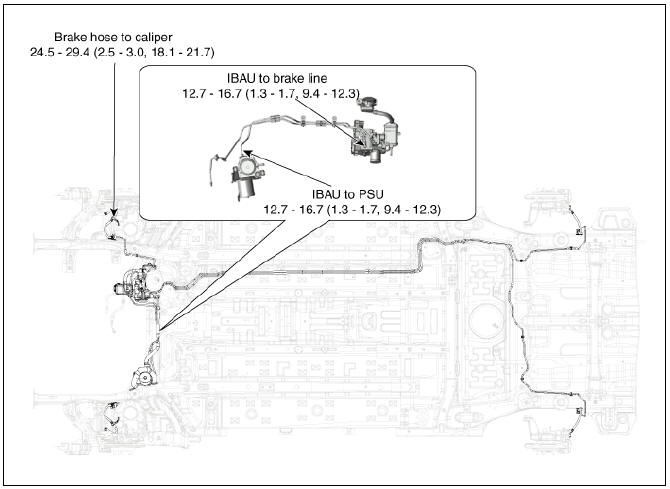
Brake Line Components and components location
Removal
- Disconnect the brake fluid level switch connector, and remove the reservoir cap.
- Remove the brake fluid from the master cylinder reservoir with a syringe.
Warning
Do not spill brake fluid on the vehicle, it may damage the paint; if brake fluid does contact the paint, wash it off immediately with water.
- Remove the wheel & tire.
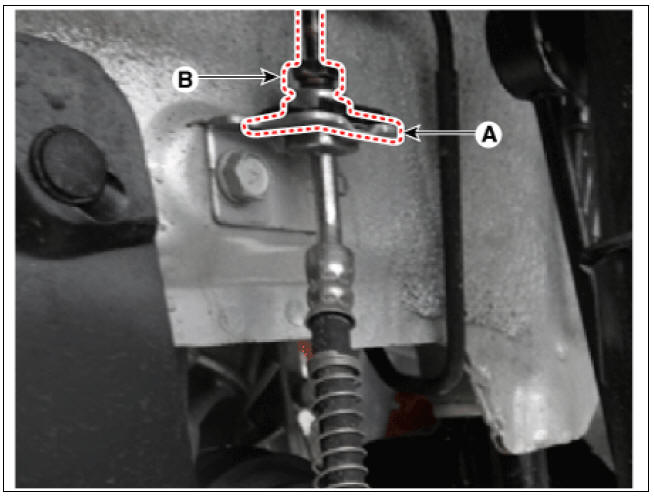
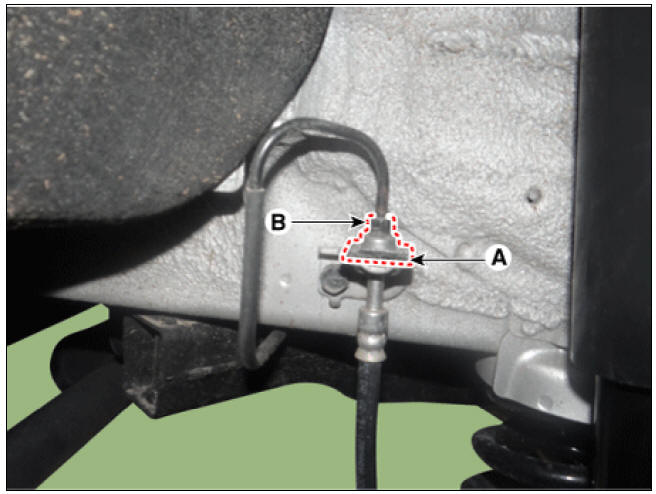
- Remove the brake hose clip (A).
- Loosen the tube flare nut (B) and then remove the tube.
Tightening torque: 12.7 - 16.7 N*m (1.3 - 1.7 kgf*m, 9.4 - 12.3 lb*ft)
Front
Rear
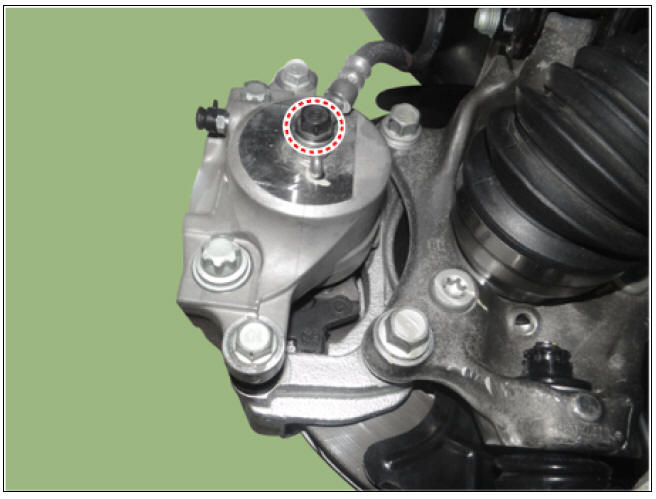
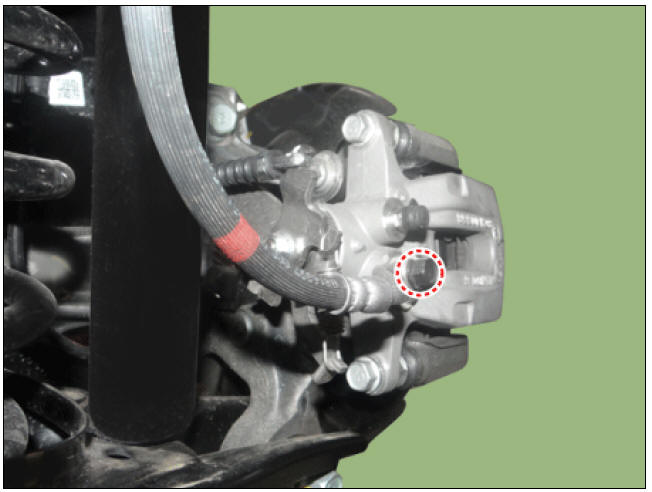
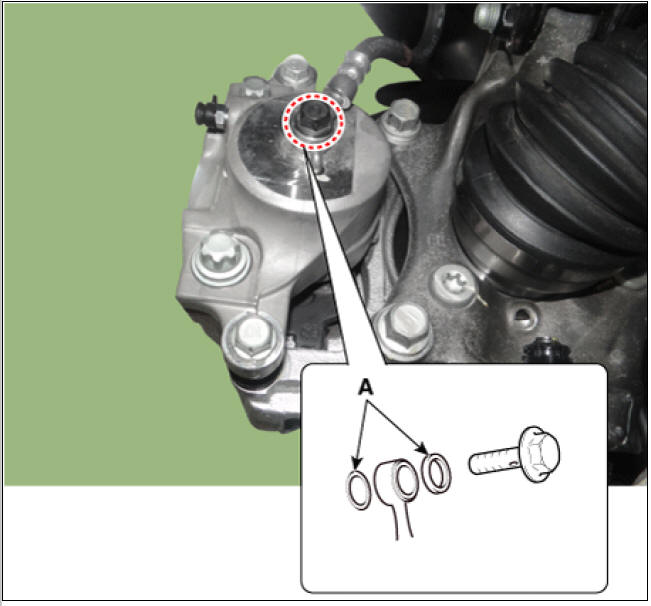
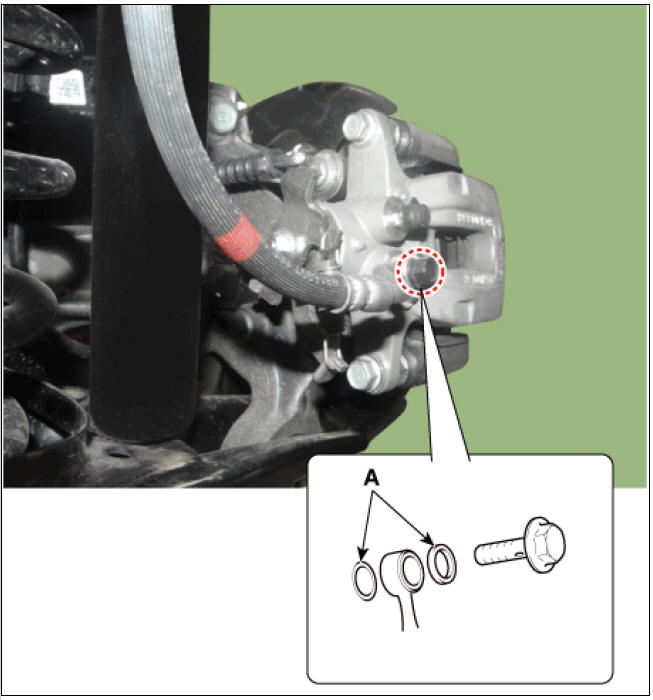
- Disconnect the brake hose from the brake caliper by loosening the bolt.
Tightening torque : 24.5 - 29.4 N*m (2.5 - 3.0 kgf*m, 18.1 - 21.7 lb*ft)
Front
Rear
Inspection
- Check the brake tubes for cracks, crimps and corrosion.
- Check the brake hoses for cracks, damage and fluid leakage.
- Check the brake tube flare nuts for damage and fluid leakage
- Check brake hose mounting bracket for crack or deformation.
Installation
- Installation is the reverse of removal.
Warning
Use a new washers (A) whenever installing.
- After filling the brake fluid in the reservoir, perform the air bleed.
(Refer to the Brake system - "Brake Bleeding Procedure")
- Check the spilled brake oil.
READ NEXT:
 Brake Pedal
Brake pedal member assembly
Stop lamp switch
Brake pedal arm
Brake pedal pad
Brake pedal stroke sensor
Removal
Turn ignition switch OFF and disconnect the negative (-) battery
terminal.
Remove the crash pad lower panel.
(
 Front Disc Brake
Front Disc Brake Components and components location
Bleed screw
Caliper body
Pad inner shim
Brake pad
Pad return spring
Caliper carrier
Pad retainer
Removal
Remove the wheel & tire.
Remove the caliper hose bracket bol
 Rear Disc Brake
With EPB
Brake pad
Pad return spring
Caliper carrier
Pad retainer
Caliper body
Lever return spring
Stopper
Operating lever
Bleed screw
EPB actuator
Bleed screw
Caliper body
Caliper carrier
Pad retainer
Brake
SEE MORE:
 Hood lower latch assembly
Hood lower latch assembly
Replacement
Remove the front bumper cover.
(Refer to Front Bumper - "Front Bumper Cover")
Disconnect the hood lower latch connector (A).
Remove the engine clutch reservoir (A) after loos
 Trickle charger (portable charging
cable)
Trickle charger can be used if AC Charger
is unavailable.
Plug and cable
Control box (ICCB)
Charging connector/cable
How to connect portable charger (ICCB: In-Cable
Control Box)
Connect the plug to a household electric
outlet.
Categories
- Home
- KIA Niro EV, Hybrid - Second generation - (SG2) (2021-2024) - Owner's manual
- Kia Niro - First generation - (DE) (2017-2022) - Service and Repair Manual
- Contact Us
