KIA Niro: Engine Clutch Actuator
Components
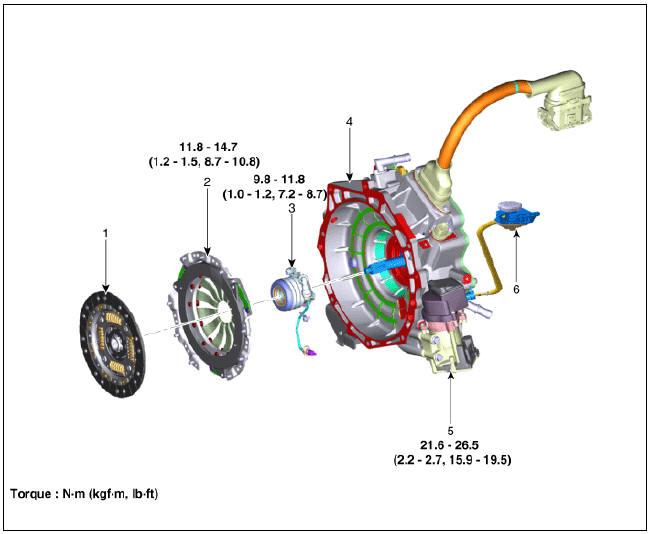
- Clutch disc
- Clutch cover
- Concentric slave cylinder
- Hybrid motor assembly
- Engine clutch actuator
- Reservoir
Specifications

Schematic Diagrams
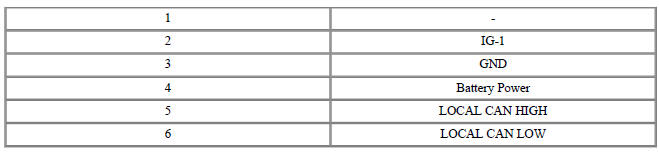
Harness Connector

Engine Clutch Actuator Repair procedures
Removal
Warning
Initialization and air bleeding procedure by using KDS can not be performed if the high voltage battery SOC is charged lower than 35%.
- Additional function which related to engine clutch can not be
operated if high voltage battery SOC is charged too low(lower
than 10%) or too high(higher than 90%), because of system limitation.
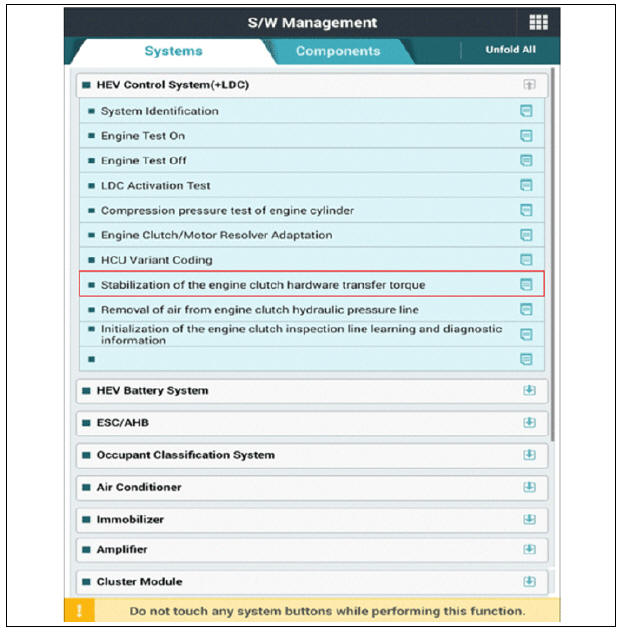
(Additional function which related to engine clutch : learning engine clutch/motor resolver, removing air in engine clutch oil pressure line, stabilizing engine clutch oil pressure line, stabilizing engine clutch hardware delivery torque, lerning engine clutch inspection of a vehicle and initialization of inspection information)
- Turn the ignition switch OFF and disconnect the battery (-) terminal.
- Remove the under cover.
(Refer to Engine Mechanical System - "Engine Room Under Cover")
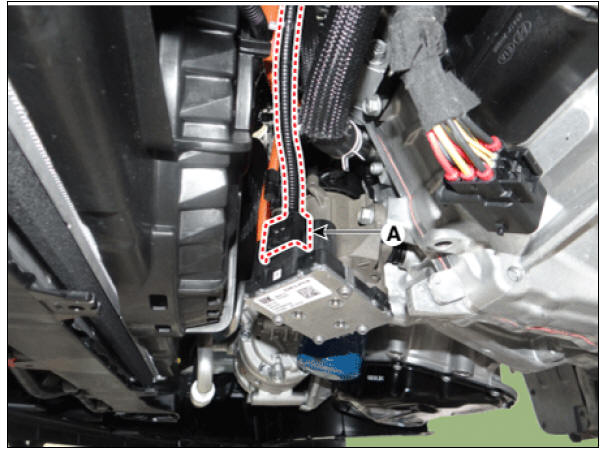
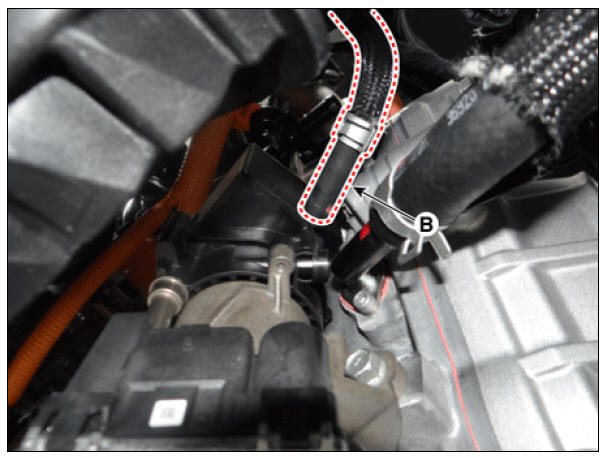
- Disconnect the engine clutch actuator connector (A) and hose (B).
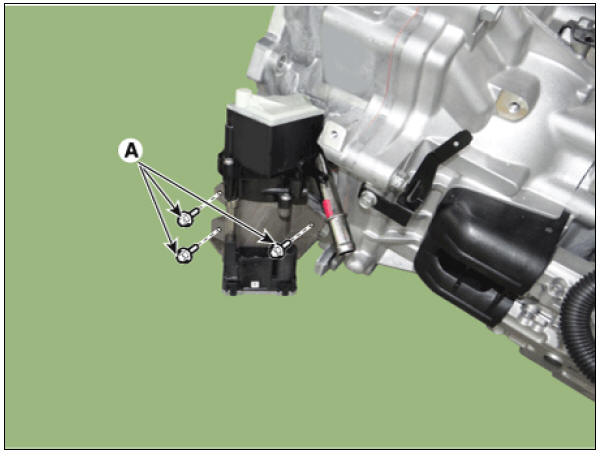
- Loosen the engine clutch actuator bolts (A) and then remove the engine clutch actuator.
Tightening torque : 21.6 - 26.5 N.m (2.2 - 2.7 kgf.m, 15.9 - 19.5 lb-ft)
Warning
Make sure that the hydraulic fluid or foreign substance does not enter the connector assembly of the actuator.
Installation
- Install in the reverse order of removal.
Warning
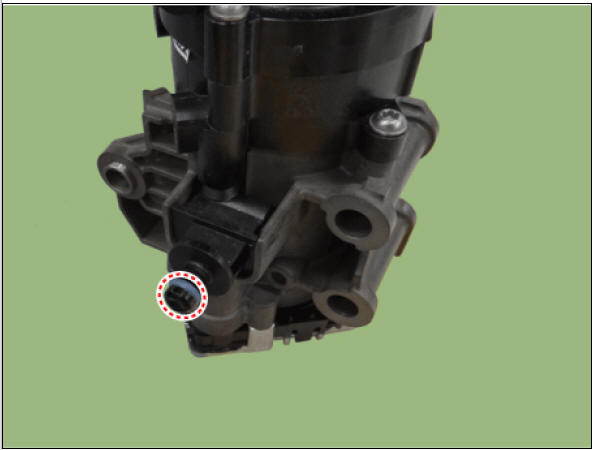
Before installing the engine clutch actuator, check the assembled state of the O-rings (A).
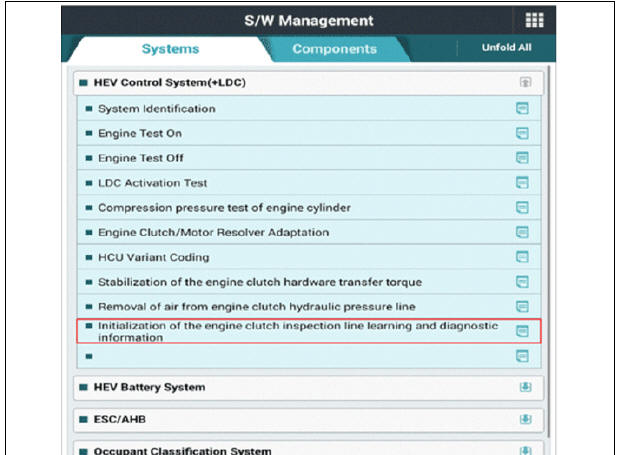
- After replacing the engine clutch actuator, operate the followings in order using KDS.
(1) Perform initialization of the engine clutch inspection line learning and diagnostic information.
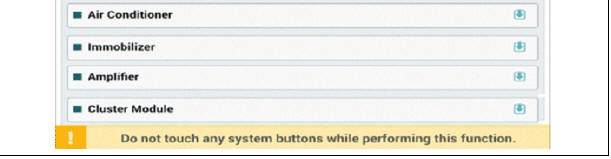
(2) Bleed the air from engine clutch hydraulic pressure line
Warning
Be sure to bleed air from the engine clutch hydraulic pressure line at outside temperature between 0 - 40ºC (32 - 104ºF). If not, the air bleeding would be not done well.

Warning
Refil the hydraulic fluid to MAX-MIN level, if the fluid is lower than MIN level while performing the air bleeding.
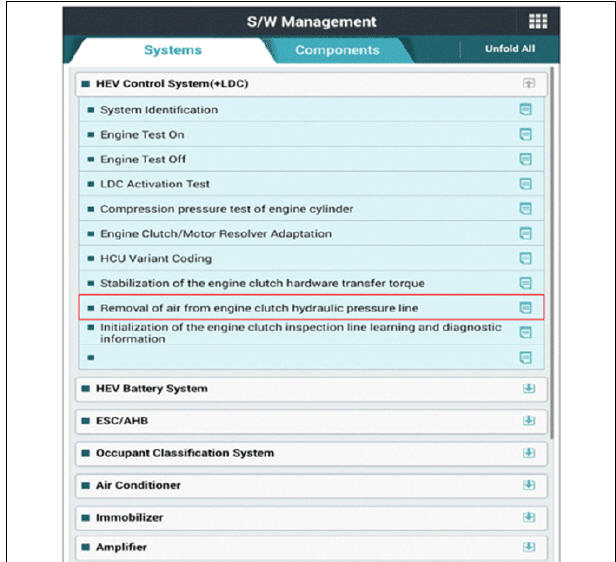
(3) Perform engine clutch/motor resolver adaptation.
(4) Perform stabilization of the engine clutch hardware transfer torque.
READ NEXT:
 Concentric Slave Cylinder Assembly Repair procedures
Removal
Remove the hybrid motor assembly.
(Refer to Hybrid Motor System - "Hybrid Motor Assembly")
Remove the engine clutch actuator.
(Refer to Engine Clutch System - "Engine Clutch Actuator")
Remove the adapter (A
Clutch Cover And Disc Repair procedures
Removal
Remove the hybrid motor assembly.
(Refer to Hybrid Motor System - "Hybrid Motor Assembly")
Remove the clutch cover assembly and clutch disc after loosening the
bolts.
Warning
Be careful not to be bent or twist b
Reservoir Repair procedures
Removal
Turn the ignition switch OFF and disconnect the battery (-) terminal.
Drain the hydraulic oil from the reservoir using a syringe.
Loosen the reservoir hose (A) and bolts (B) and then remove the
reservoir.
Tightening torque :
3.
SEE MORE:
Map lamp
Type A
Type B
Operation
Press or touch the lamp (1) to turn the
map lamp ON.
(2): DOOR mode
(3): Front and rear room lamps on
and off.
INFORMATION- (Kia Niro Hybrid only)
DOOR mode
The map lamp and room lamp come
on
Headlamp and front fog lamp aiming (for Europe)
Headlamp aiming
Type A
Type B
Operation
Inflate the tires to the specified pressure
and remove any loads from the
vehicle except the driver, spare tire,
and tools.
The vehicle should be placed on a flat
floor.
Draw vertical lin
Categories
- Home
- KIA Niro EV, Hybrid - Second generation - (SG2) (2021-2024) - Owner's manual
- Kia Niro - First generation - (DE) (2017-2022) - Service and Repair Manual
- Contact Us