KIA Niro: Fuel Filler Door Release Actuator Repair procedures | Fuel Filler Door Open Switch
Kia Niro - First generation - (DE) (2017-2022) - Service and Repair Manual / Body Electrical System / Fuel Filler Door / Fuel Filler Door Release Actuator Repair procedures | Fuel Filler Door Open Switch
Fuel Filler Door / Components And Components Location
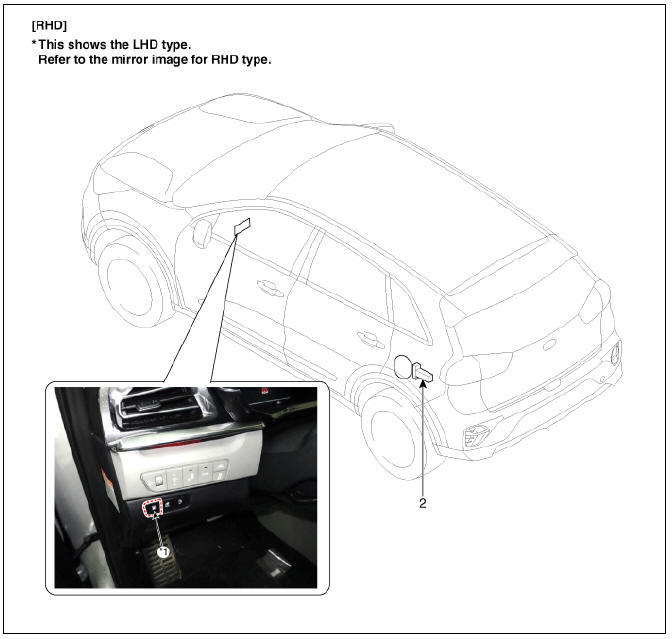
- Fuel filler door open switch
- Fuel filler door release actuator
Fuel Filler Door Release Actuator Repair procedures
Removal
- Disconnect the negative (-) battery terminal.
- Remove the left luggage side trim.
(Refer to Body - "Luggage Side Trim")
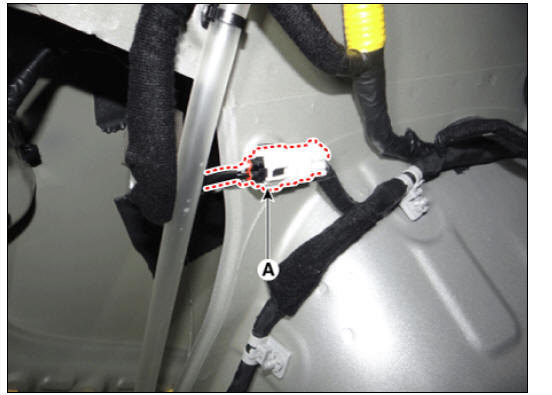
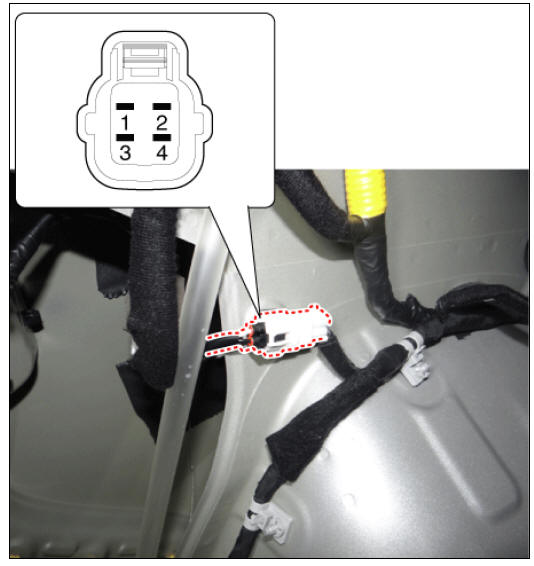
- Disconnect the fuel filler door release actuator connector (A).
- Remove the fuel filler door housing.
(Refer to Body - "Fuel Filler Door")
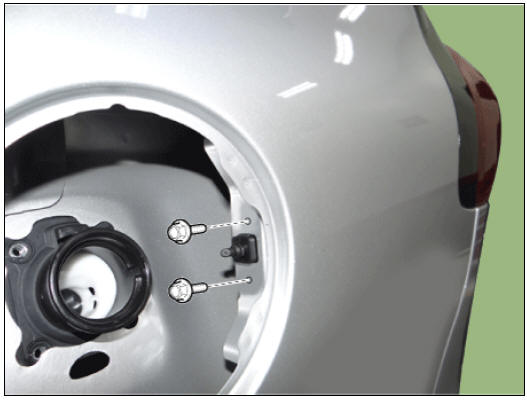
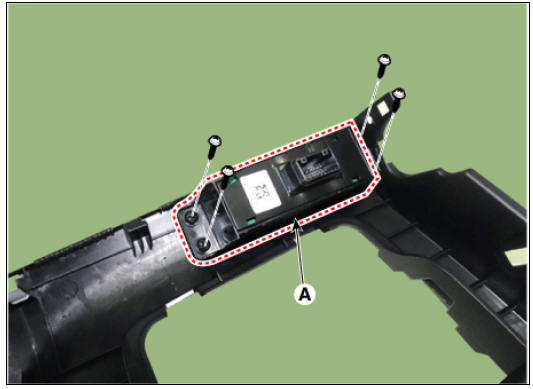
- Remove the fuel filler door release actuator (A) after loosening the mounting bolts.
Installation
- Install in the reverse order of removal.
Inspection
- Check for continuity between terminals No. 2 and No. 4. If there is no continuity, replace the fuel filler door release actuator.
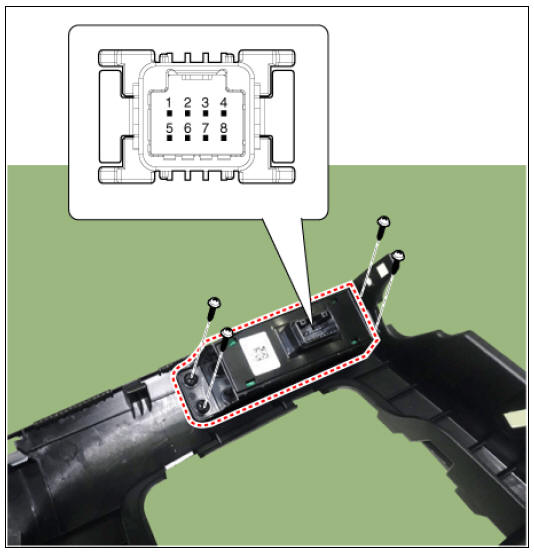
Fuel Filler Door Open Switch
Fuel Filler Door Open Switch Repair procedures
Removal
- Disconnect the negative (-) battery terminal.
- Remove the crash pad lower panel.
(Refer to Body - "Crash Pad Lower Panel")
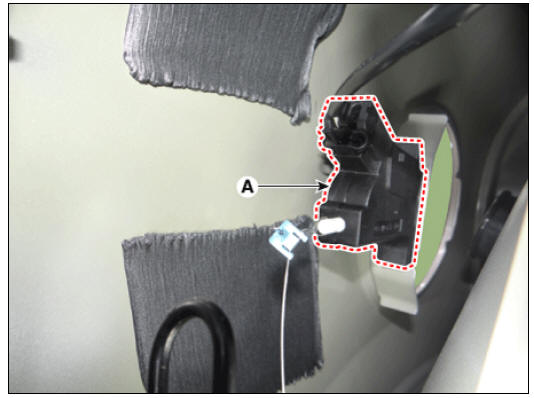
- Remove the crash pad lower switch (A) after loosening the mounting screws.
Installation
- Install in the reverse order of removal.
Inspection
- Check for continuity between the terminals. If there is an abnormality, replace the switch.
READ NEXT:
 Fuses And Relays
Engine room relay block
Engine Room
Engine room relay block
Interior Relay
Integrated Gateway & Power control Module (IGPM)
ICM relay block
Relay Box (Engine Compartment) Repair procedures
Inspection
Disconnect the negative (-) battery terminal.
Pull out the relay from the engine compartment relay block.
Power Relay (Type A)
Check for continuity between the terminals.
After supplying power to between No. 85 and 86 power r
SEE MORE:
High Voltage System
Vehicle components
12V auxiliary battery
The 12V auxiliary battery is located in the right side of the luggage room,
and powers all of the vehicle's standard electronics like
radio, air conditioner, etc. Also, it powers the HPCU (Hybrid
Fuel Pump Repair procedures
Fuel sender
Turn the ignition switch OFF, and then remove battery (-) terminal.
Remove the fuel pump assembly.
Using an ohmmeter, measure the resistance between terminals 1 and 6 of
sender connector (A) at
each float level.
Categories
- Home
- KIA Niro EV, Hybrid - Second generation - (SG2) (2021-2024) - Owner's manual
- Kia Niro - First generation - (DE) (2017-2022) - Service and Repair Manual
- Contact Us