KIA Niro: Fuel Pump Repair procedures
Kia Niro - First generation - (DE) (2017-2022) - Service and Repair Manual / Engine Control / Fuel System / Fuel Delivery System / Fuel Pump Repair procedures
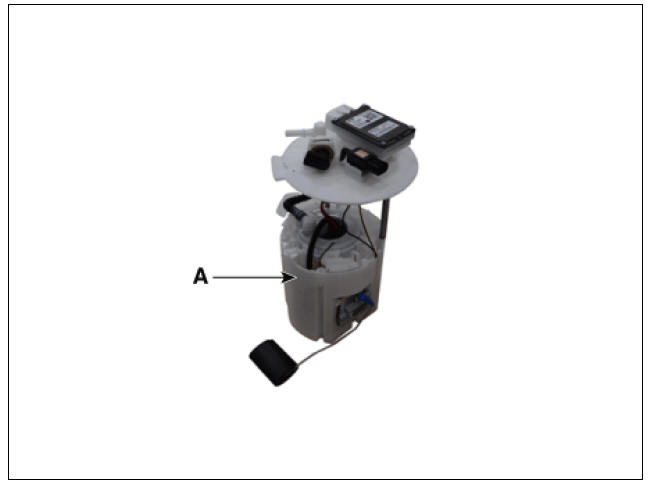
Fuel sender
- Turn the ignition switch OFF, and then remove battery (-) terminal.
- Remove the fuel pump assembly.
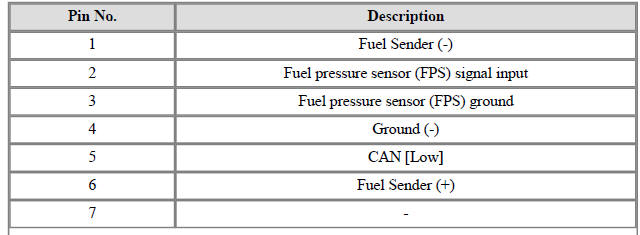
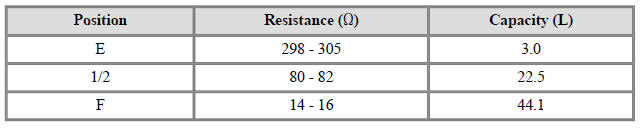
- Using an ohmmeter, measure the resistance between terminals 1 and 6 of sender connector (A) at each float level.
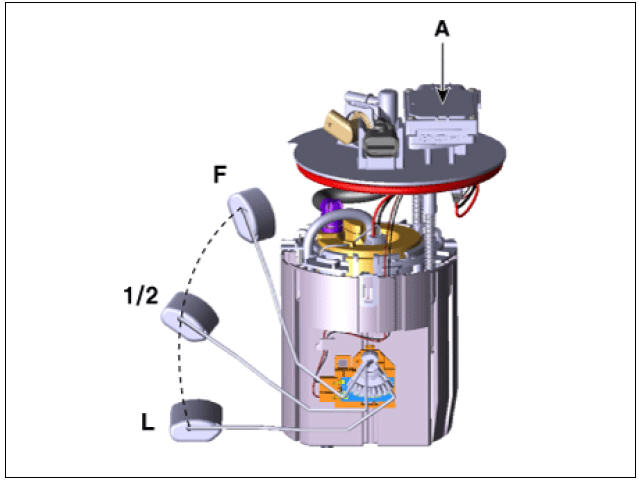

- Also check that the resistance changes smoothly when the float moves from "E" to "F".
Removal
- Release the residual pressure in fuel line.
(Refer to the Fuel Delivery System - "Release Residual Pressure in Fuel Line")
- Switch "OFF" the ignition and disconnect the negative (-) battery terminal.
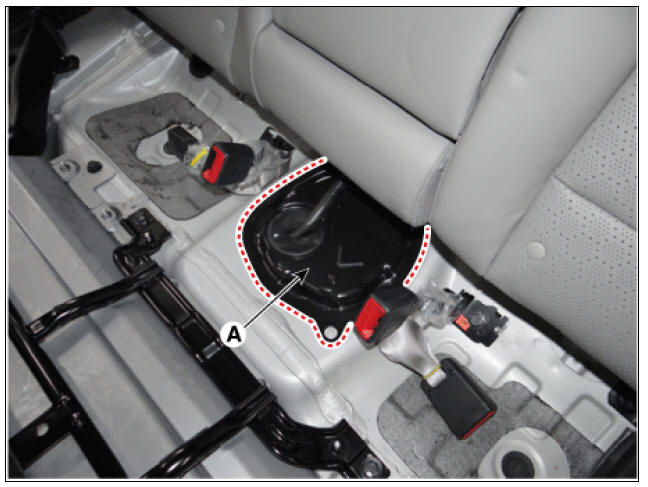
- Remove the rear seat cushion.
(Refer to Body - "Rear Seat Assembly")
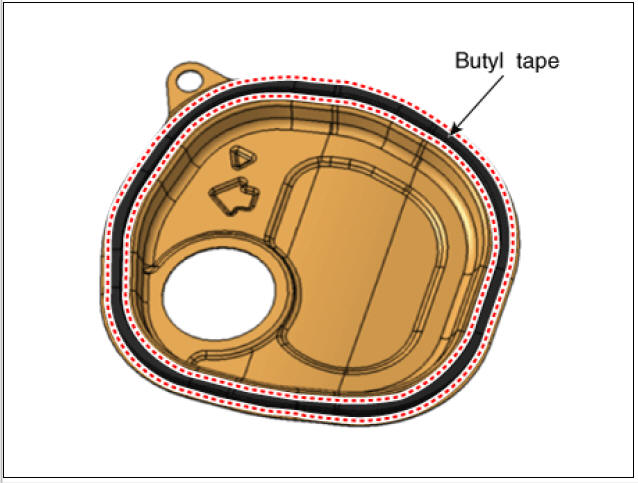
- Fuel pump service cover (A).
Warning
- When reinstalling a protective cover for a fuel pump, remove the existing butyl tape and apply a new one.
- Before assembling the protective cover, ensure that the
temperature of the butyl is about 30º
C using a hair dryer or a heat gun.
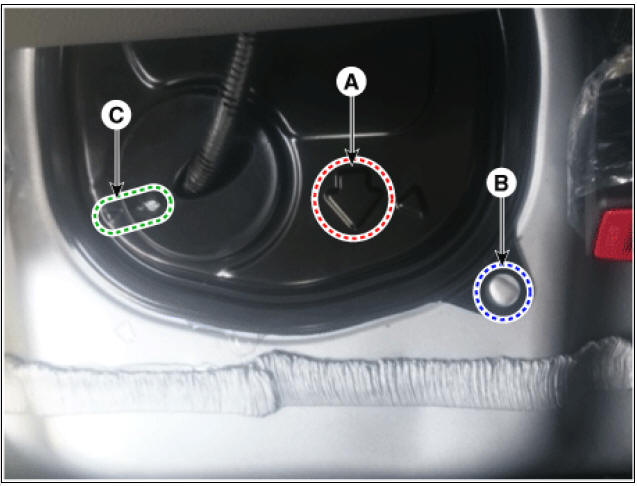
Warning
When installing the protective cover for the fuel pump, pay attention to the installation direction of the grommet and the protective cover.
- The arrow (A) should be in the forward direction of the car.
- Align the bulging part of the vehicle body (B) with the hole of the protective cover.
- Align the bulging part of the grommet (C) with the bulging part
of the protective cover
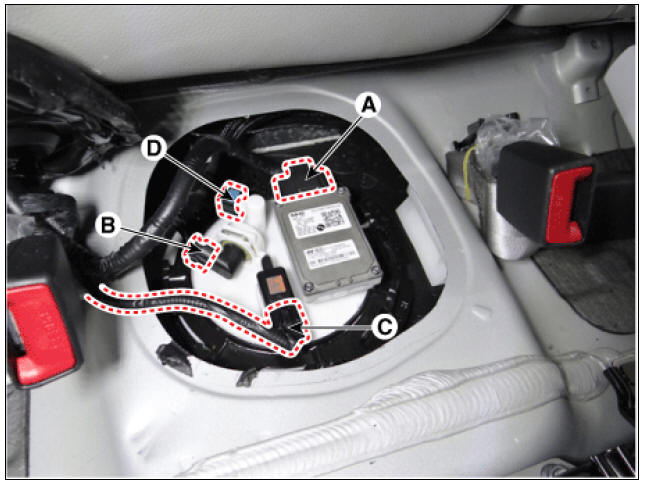
- Remove the fuel pump control module connector (A).
- Disconnect the fuel pressure sensor connector (B).
- Disconnect the fuel tank pressure sensor (C).
- Disconnect the fuel feed tube quick-connector (D).
- Remove the fuel pump plate cover (B) by using the special service tool
(A) (SST NO.:09310-
B8100).
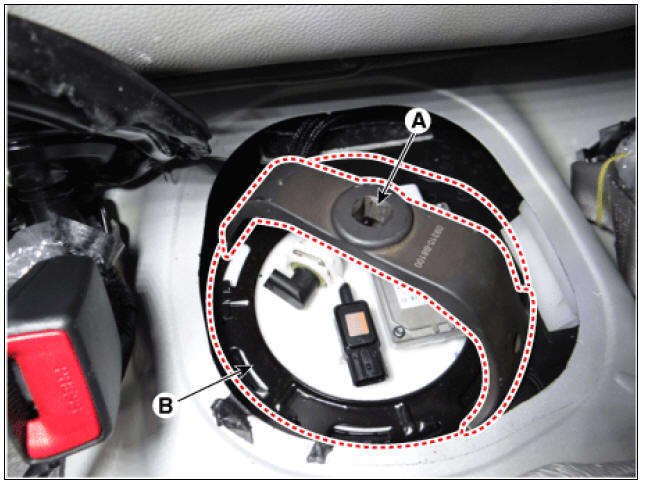
- Remove the fuel pump (A).
Installation
- Install in the reverse order of removal.
Warning
Carefully note the fuel pump direction during installation.
READ NEXT:
 Fuel Filter Repair procedures
Removal
Remove the fuel pump.
(Refer to Fuel Delivery System - "Fuel Pump")
Disconnect the fuel pump motor connector (A) and fuel sender connector
(B).
Lift the fixing hook (A) by using a common driver, and then remov
Fuel Pump Motor Repair procedures
Removal
Remove the fuel pump.
(Refer to Fuel Delivery System - "Fuel Pump")
Disconnect the fuel pump motor connector (A) and fuel sender connector
(B).
Lift the fixing hook (A) by using a common driver, and then remov
Fuel Sender Repair procedures
Removal
Remove the fuel pump.
(Refer to Fuel Delivery System - "Fuel Pump")
Disconnect the fuel sender connector (A).
Lift the fixing hook (A) by using a common driver, and then remove the
fuel sender (B).
SEE MORE:
Rear Cross-traffic Collision Warning (RCCW)
BCW activation condition
(1) BCW on/off switch : On (indicated by the switch LED)
(2) Vehicle Speed : 30 - 255 km/h (20 - 158 mph)
(3) Relative vehicle speed : -10 to 255 km/h (-6 to 158 mph)
(Negative value refers to the distance of the veh
Blower Motor Repair procedures | Climate Control Air Filter Repair procedures
Inspection
Operate the heater controls at IGN2 to ensure that the motor is running.
Battery (+)
Input signal
Ë—
Ground
If the blower motor does not operate well, substitute with a known-good blower m
Categories
- Home
- KIA Niro EV, Hybrid - Second generation - (SG2) (2021-2024) - Owner's manual
- Kia Niro - First generation - (DE) (2017-2022) - Service and Repair Manual
- Contact Us