KIA Niro: Fuel Pump Motor Repair procedures
Kia Niro - First generation - (DE) (2017-2022) - Service and Repair Manual / Engine Control / Fuel System / Fuel Delivery System / Fuel Pump Motor Repair procedures
Removal
- Remove the fuel pump.
(Refer to Fuel Delivery System - "Fuel Pump")
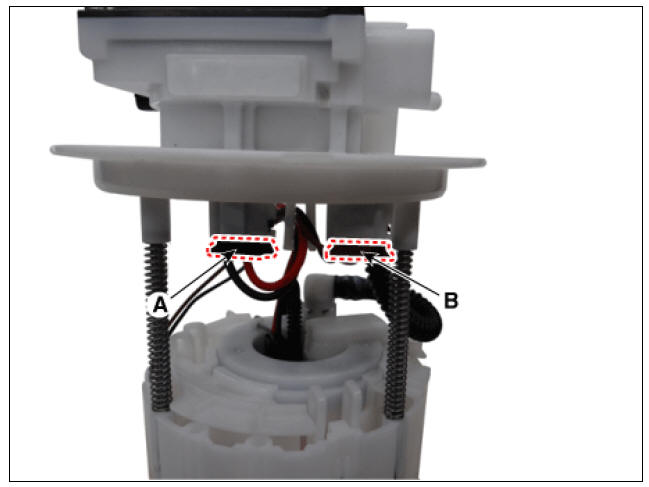
- Disconnect the fuel pump motor connector (A) and fuel sender connector (B).
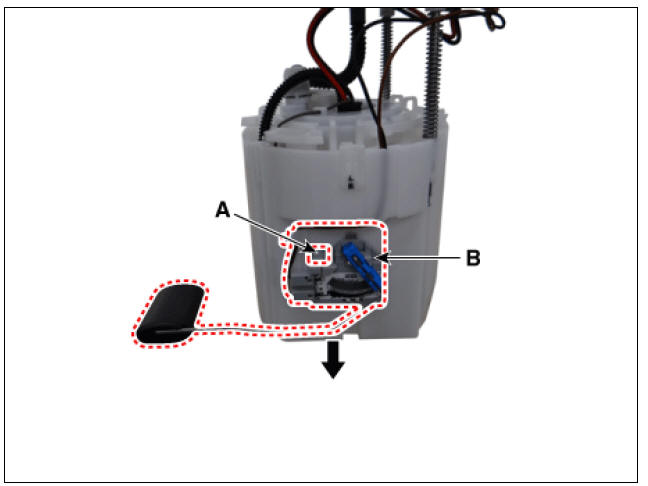
- Lift the fixing hook (A) by using a common driver, and then remove the fuel sender (B).
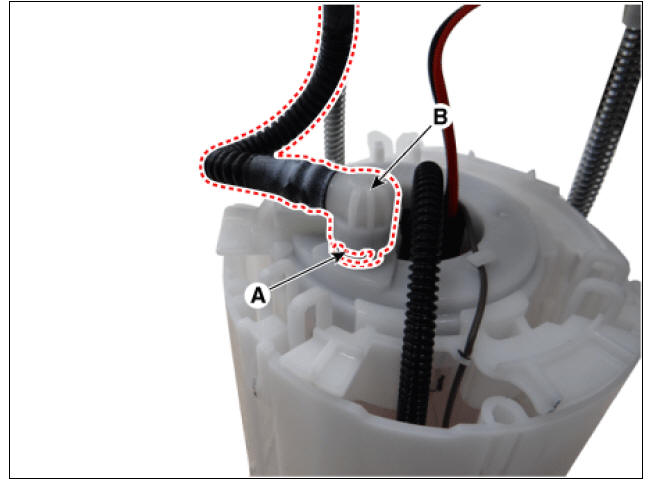
- Remove the fixing clip (A), and then disconnect the feed tube (B).
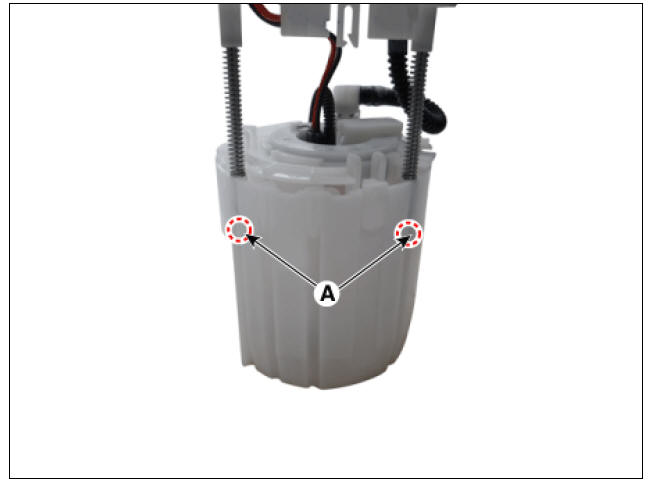
- Remove the head assembly after releasing the cushion fixing clip (A).
- Remove the reservoir-cup (B) after releasing the fixing hook (A).
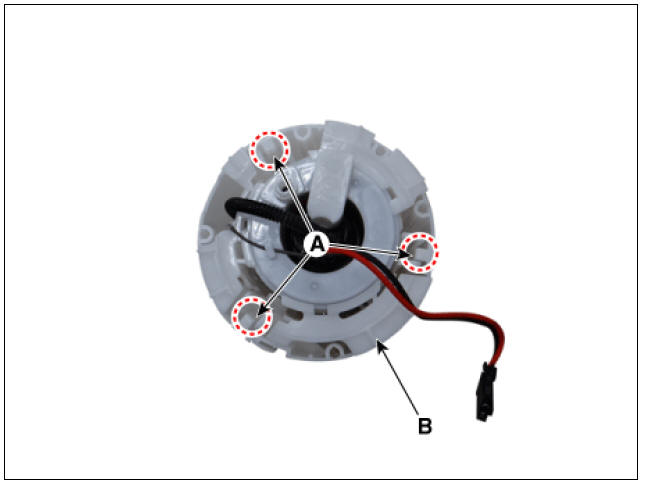
- Disconnect the ground line (A).
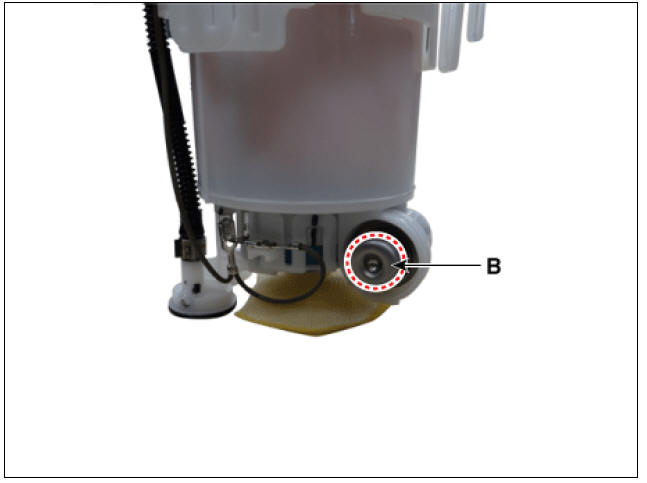
- Disconnect the fuel pump motor connector (A).
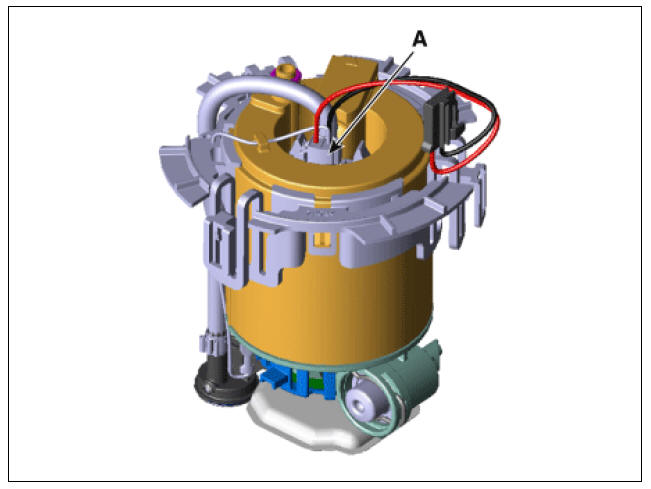
- Remove the fuel pressure regulator (B) after releasing the fixing hook (A).
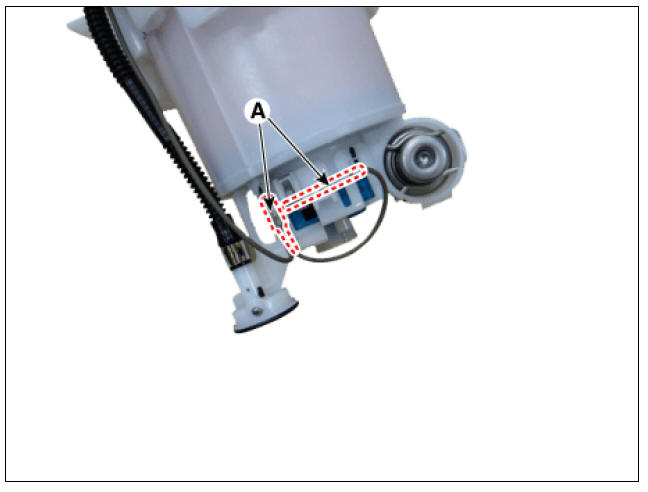
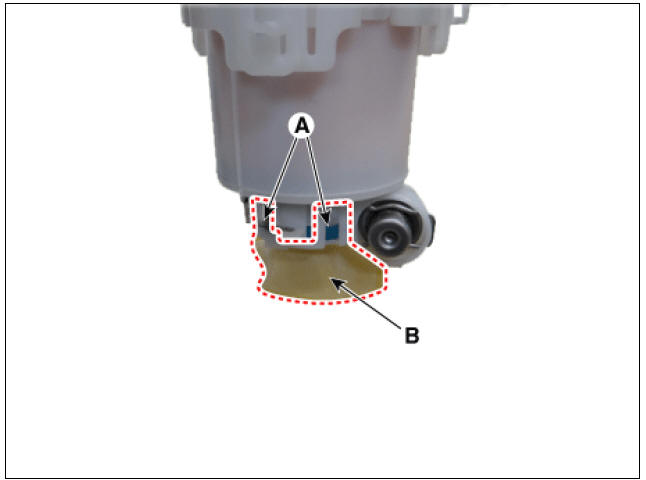
- Remove the pre-filter (B) after releasing the fixing hooks (A).
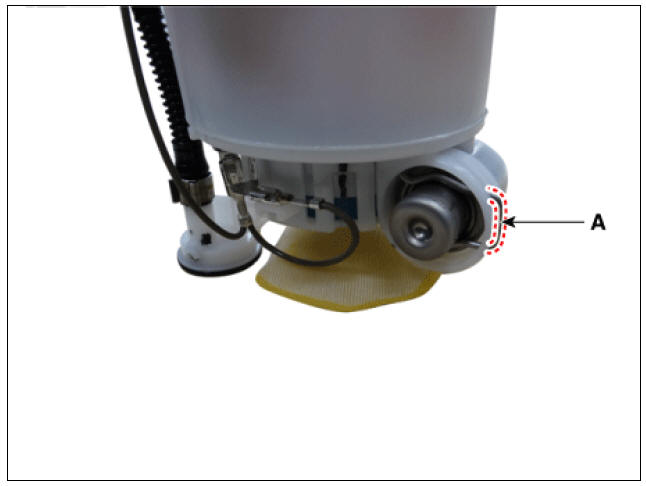
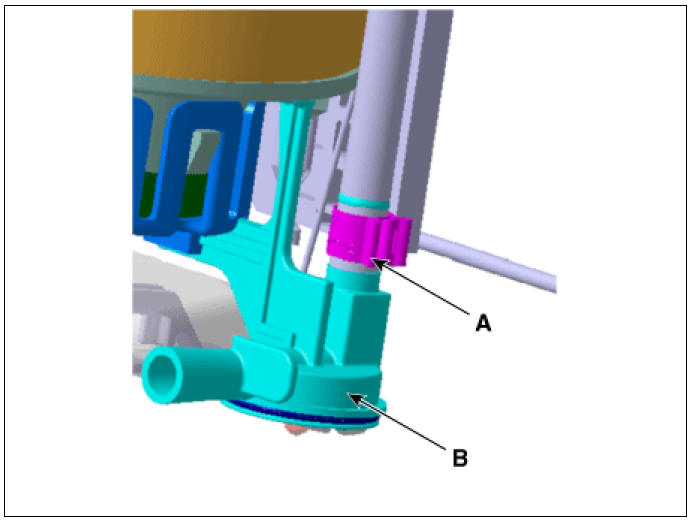
- Remove the fixing clip (A), and then assist pump assembly (B).
Warning
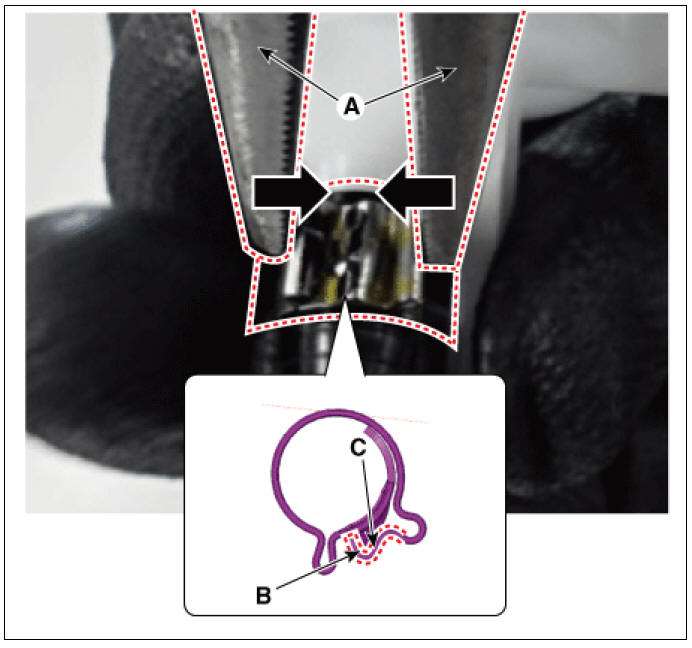
1) Unhook the clip (A,B) by using an awl (C).
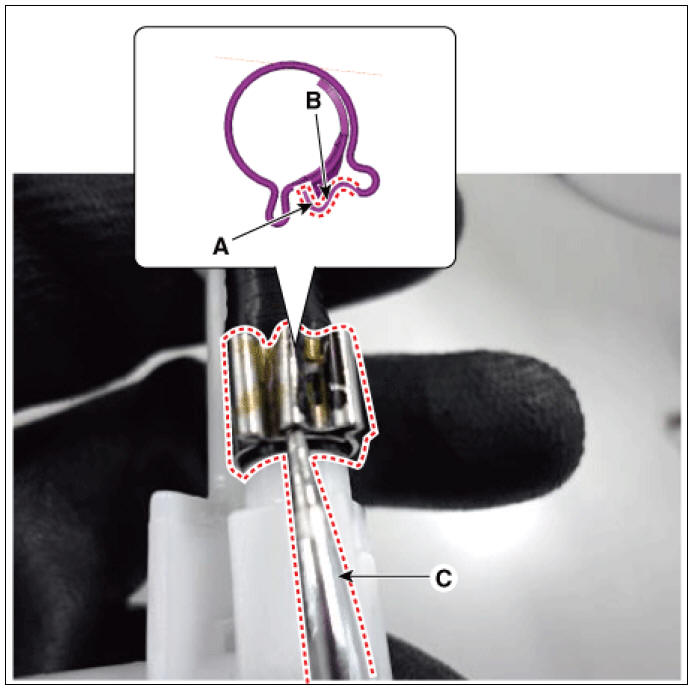
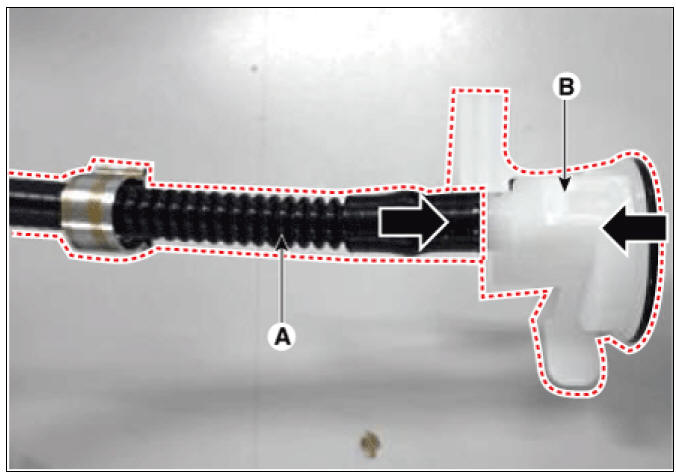
2) Separate the tube (A) with the assist pump (B) by pulling it

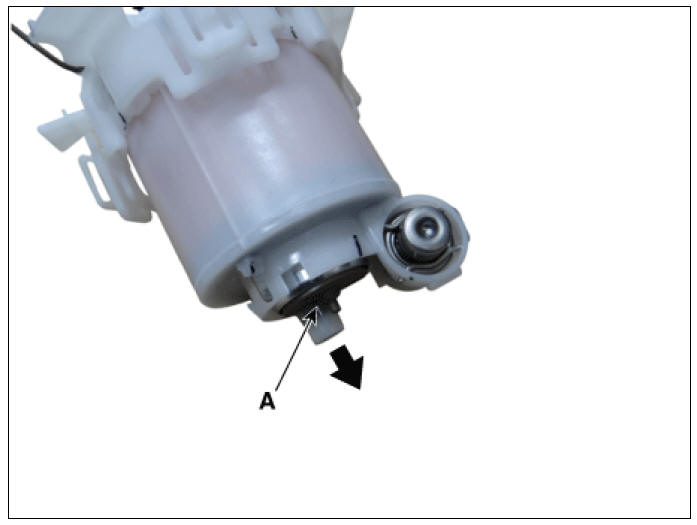
- Remove the fuel pump motor (A) from the fuel filter by pulling it downward.
Installtion
Warning
1) Put the tube (A) into the assist pump (B).
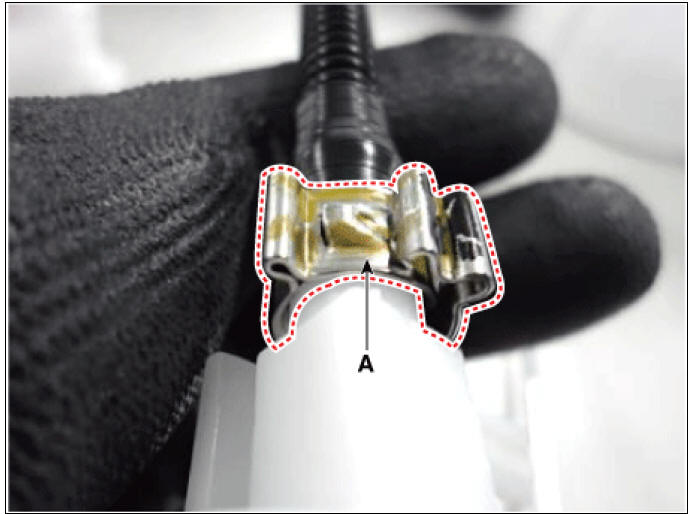
2) Put the clip (A) on the joint.
3) Hook the clip (B,C) by using plier (A).
4) Fix the clip (A). 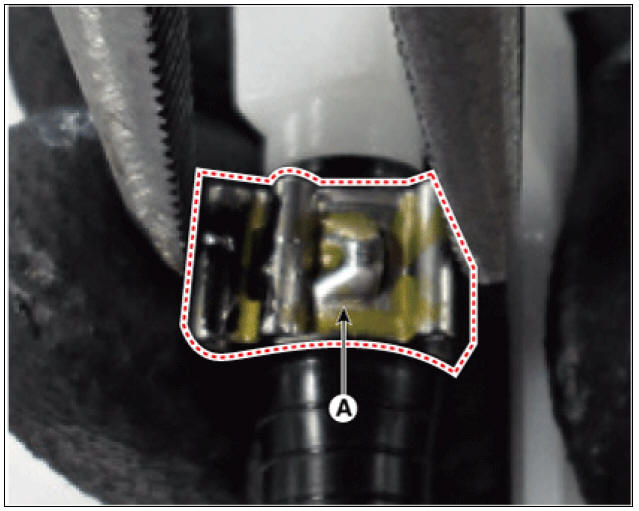
READ NEXT:
 Fuel Sender Repair procedures
Removal
Remove the fuel pump.
(Refer to Fuel Delivery System - "Fuel Pump")
Disconnect the fuel sender connector (A).
Lift the fixing hook (A) by using a common driver, and then remove the
fuel sender (B).
Fuel Pressure Regulator Repair procedures | Fuel Line Repair procedures
Removal
Remove the fuel pump.
(Refer to Fuel Delivery System - "Fuel Pump")
Disconnect the fuel pump motor connector (A) and fuel sender connector (B).
Lift the fixing hook (A) by using a comm
SEE MORE:
Rear Seat Cushion Cover | Rear Back Armrest
Rear seat cushion cover
Replacement
Remove the seat assembly.
(Refer to Rear Seat - "Rear Seat Assembly")
Remove the rear seat cushion cover (A) after removing the hog-ring clips on the rear of seat cushi
Our recommendation: Children always in the rear
Infants and younger children must be
restrained in an appropriate rearwardfacing
or forward-facing CRS that has
first been properly secured to the seat of
the vehicle. Read and comply with the
instructions for installation and use provided
by t
Categories
- Home
- KIA Niro EV, Hybrid - Second generation - (SG2) (2021-2024) - Owner's manual
- Kia Niro - First generation - (DE) (2017-2022) - Service and Repair Manual
- Contact Us