KIA Niro: Hybrid system gauge
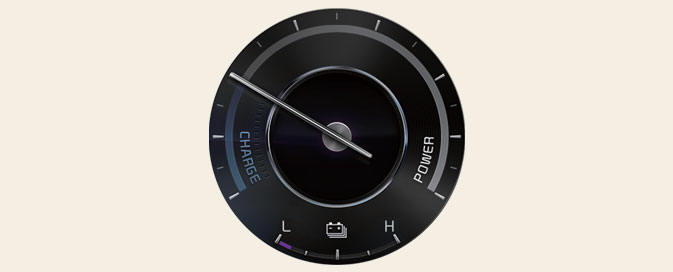
Power gauge

Type A
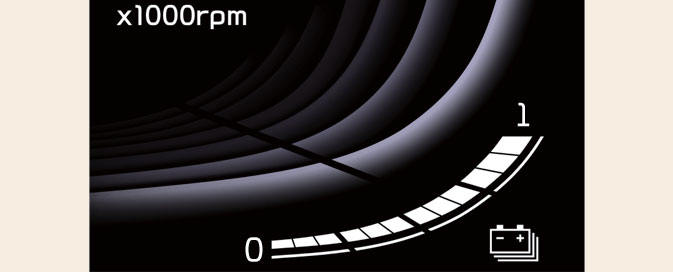
Type B
The hybrid system gauge indicates whether the current driving condition is fuel efficient or not.
- CHARGE: Shows that the energy made by the vehicle is being converted to electrical energy. (Regenerated energy)
- ECO: Shows that the vehicle is being driven in an Eco-friendly manner.
- POWER: Shows that the vehicle is exceeding the Eco-friendly range.
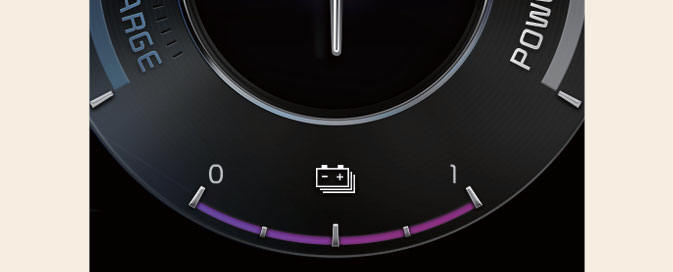
Hybrid battery SOC (State of Charge) gauge
Type A
Type B
This gauge indicates the remaining hybrid battery power. If the SOC is near the "0 (Low)" level, the vehicle automatically operates the engine to charge the battery.
However, if the Service Indicator ( )
and Malfunction Indicator Lamp (MIL)
(
)
and Malfunction Indicator Lamp (MIL)
( ) turn on when the SOC gauge is
near the "0 (Low)" level, we recommend
the vehicle to be checked by an authorized
Kia dealer/service partner.
) turn on when the SOC gauge is
near the "0 (Low)" level, we recommend
the vehicle to be checked by an authorized
Kia dealer/service partner.
READ NEXT:
 Warning and indicator
lights
Warning and indicator
lights
Ready indicator READY
This indicator appears:
When the vehicle is ready to be driven.
ON: Normal driving is possible.
OFF: Normal driving is not possible, or
a problem has occurred.
Blinking: Emergency driving.
When the ready indicator
LCD display
messages
Ready to drive
A: Ready to start driving
This message is displayed when the
vehicle is ready to be driven.
Check regenerative brakes
A: Check regenerative brakes
This message is displayed when the
brake performance is low or the regene
AUTO (Automatic) mode (Plug-in hybrid vehicle)
A: Automatic mode
The drive mode will be automatically
selected from either Electric (CD) mode
or Hybrid (CS) mode by the system
according to the driving condition.
CS (Charge Sustaining, Hybrid) mode (Plug-in
hybrid vehicle)
A: Hybri
SEE MORE:
Front View Camera Unit - Removal
Inspection
In the body electrical system, failure can be quickly diagnosed by using
the vehicle diagnostic system (KDS).
The diagnostic system (KDS) provides the following information.
(1) Self diagnosis : Checking failure and code number
Engine And Transaxle Assembly Repair procedures
Removal
Warning
Be sure to read and follow the "General Safety Information and
Caution" before doing any work related with
the high voltage system. Failure to follow the safety instructions may
result in serious electrical injuries.
Be
Categories
- Home
- KIA Niro EV, Hybrid - Second generation - (SG2) (2021-2024) - Owner's manual
- Kia Niro - First generation - (DE) (2017-2022) - Service and Repair Manual
- Contact Us