KIA Niro: Muffler Repair procedures
Muffler Components and components location
Components
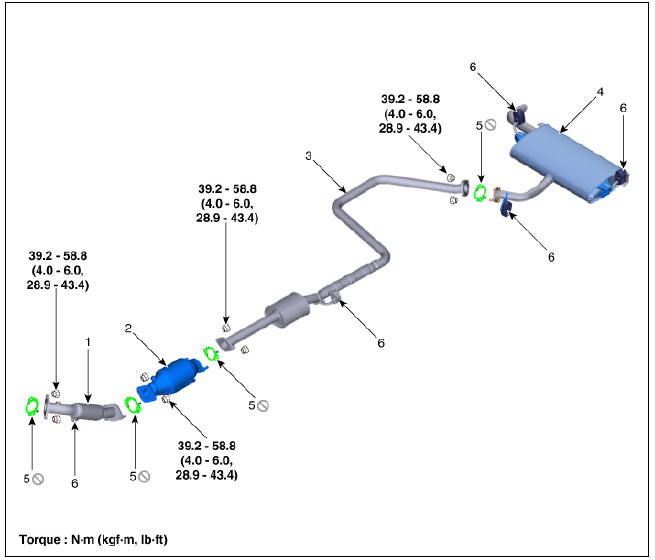
- Front muffler
- GPF
- Center muffler
- Rear muffler
- Gasket
- Rubber hanger
Muffler Repair procedures
Removal and
Installation
Front Muffler
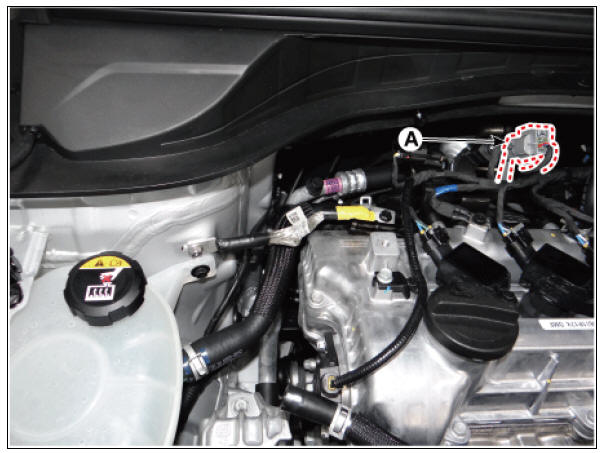
- Disconnect the heated oxygen sensor connector (A) and then remove it from the bracket.
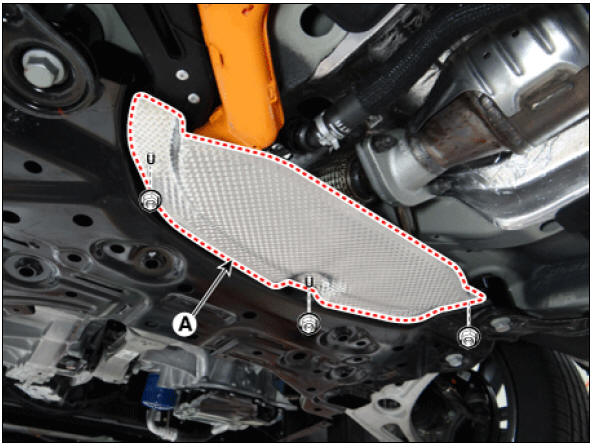
- Remove the under cover (A).
Tightening torque : 7.8 - 9.8 N*m (0.8 - 1.0 kgf*m, 5.8 - 7.2 lb*ft)
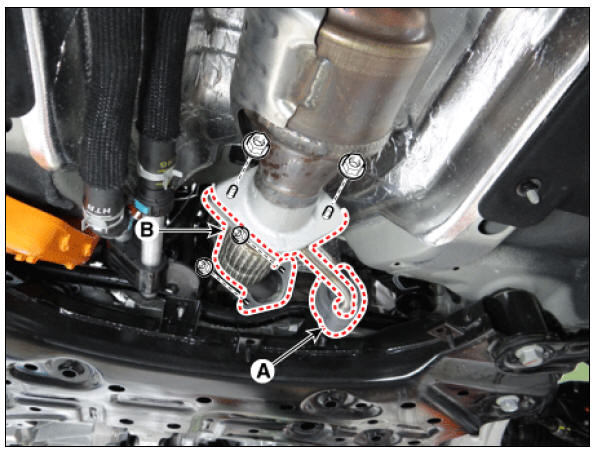
- Detach the rubber hanger (A) from the front muffler.
- Remove the front muffler (B).
Tightening torque : 39.2 - 58.8 N*m (4.0 - 6.0 kgf*m, 28.9 - 43.4 lb*ft)
- Install in the revere order of removal.
Warning
When installing, replace with new gaskets.
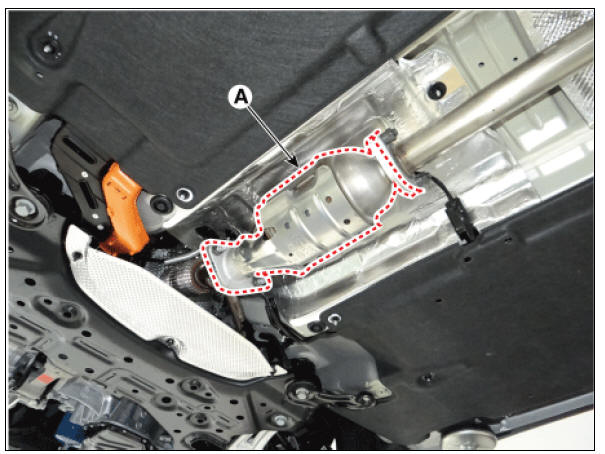
GPF
- Disconnect the battery negative terminal.
2. Remove the exhaust gas temperature sensor (EGTS) #1,#2.
(Refer to Engine Control / Fuel System - "Exhaust Gas Temperature Sensor (EGTS)") 3. Remove the GPF (A).
Tightening torque : 39.2 - 58.8 N*m (4.0 - 6.0 kgf*m, 28.9 - 43.4 lb*ft)
- Install in the revere order of removal.
Warning
When installing, replace with new gaskets.
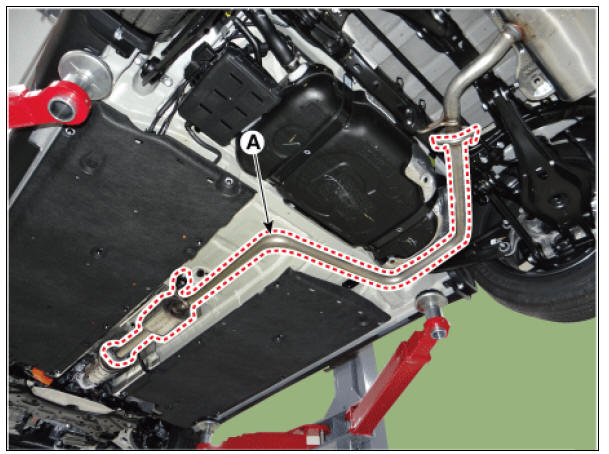
Center Muffler
- Remove the center muffler (A).
Tightening torque : 39.2 - 58.8 N*m (4.0 - 6.0 kgf*m, 28.9 - 43.4 lb*ft)
- Install in the reverse order of removal.
Warning
When installing, replace with new gaskets.
Rear Muffler
- Detach the rubber hanger (A) from rear muffler.
- Remove the rear muffler (B).
Tightening torque : 39.2 - 58.8 N*m (4.0 - 6.0 kgf*m, 28.9 - 43.4 lb*ft)

- Install in the reverse order of removal.
Warning
When installing, replace with new gaskets.
READ NEXT:
 Engine Oil Repair procedures
Warning
Prolonged and repeated contact with mineral oil will result in
the removal of natural fats from the skin, leading to
dryness, irritation and dermatitis. In addition, used engine oil contains
potentially harmful contaminants which
Oil Pan Repair procedures
Oil Pan Components and components location
Components
Oil pan
Drain plug gasket
Drain plug
Oil screen
Oil screen gasket
Oil Pan Repair procedures
Removal
Remove the engine room under cover.
(Refer to Engine and Transaxle
SEE MORE:
Heat button (Kia Niro EV)
Operation
Electric vehicle uses a PTC heater to
control the heating of the vehicle.
If you press the button manually to
turn off the function, only the ventilation
function works.
To turn on the PTC heater when the
HEAT button ind
Temporarily canceling Smart Cruise Control
A: SCC (Smart Cruise Control) cancelled
Smart Cruise Control will be temporarily
canceled automatically when:
Your driving speed is above 200 km/h
(120 mph)
The vehicle is stopped for a certain
period of time
The accelerator pedal i
Categories
- Home
- KIA Niro EV, Hybrid - Second generation - (SG2) (2021-2024) - Owner's manual
- Kia Niro - First generation - (DE) (2017-2022) - Service and Repair Manual
- Contact Us