KIA Niro: Rear Door Trim
Rear Door Trim Components and components location
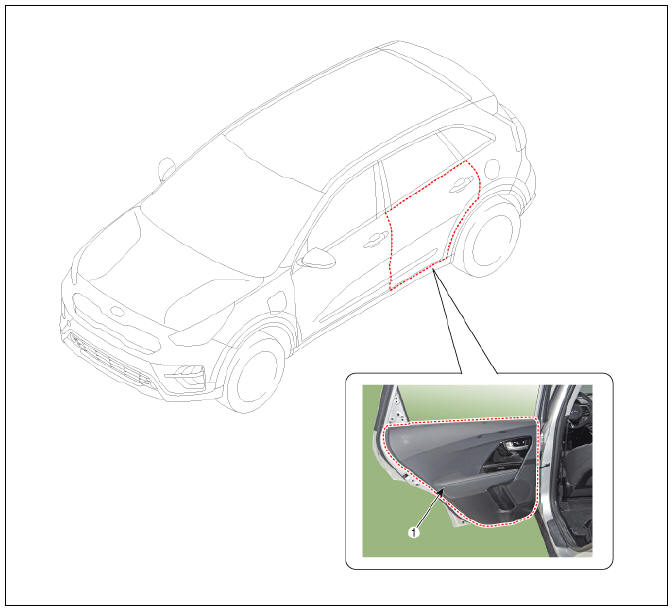
- Rear door trim
Rear Door Trim Repair procedures
Replacement
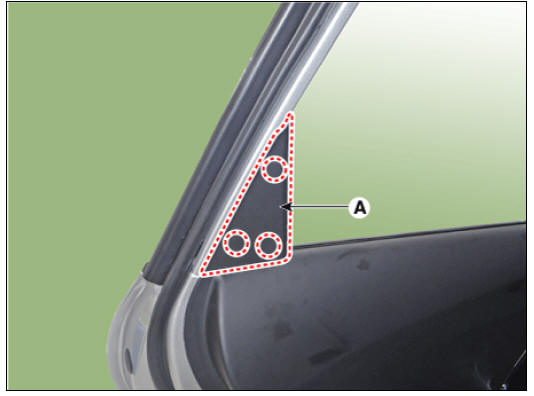
- Remove the rear door delta inner cover (A) using a remover.
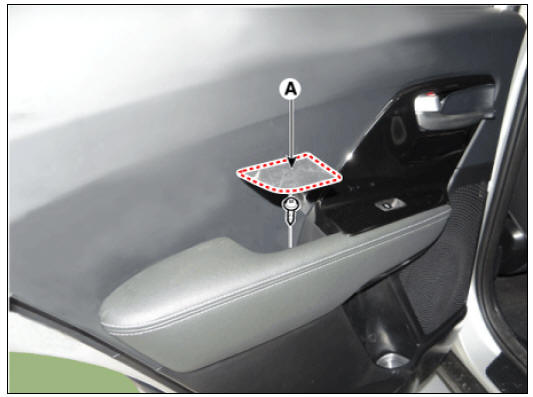
- Remove the rear door inside cap (A) and then loosen the screws.
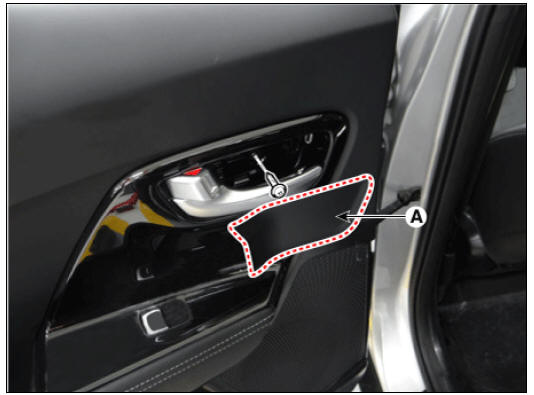
- Remove the rear door pull cap (A) and then loosen the screws.
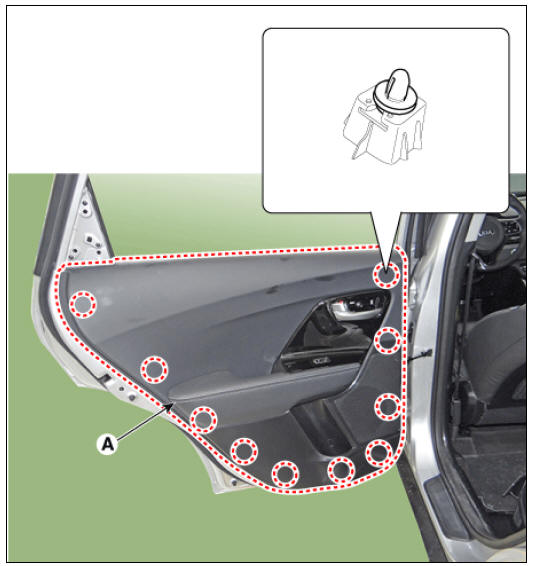
- Remove the rear door trim (A).
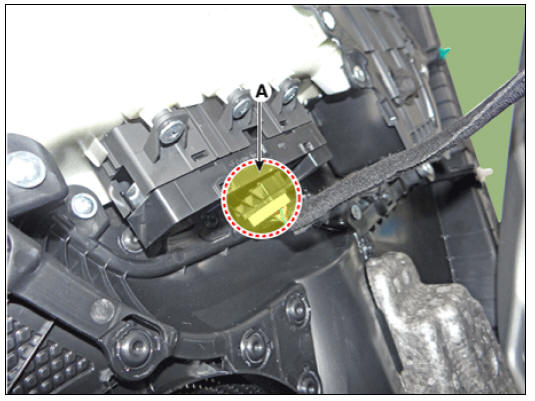
- Remove the rear door inside handle cage (A).
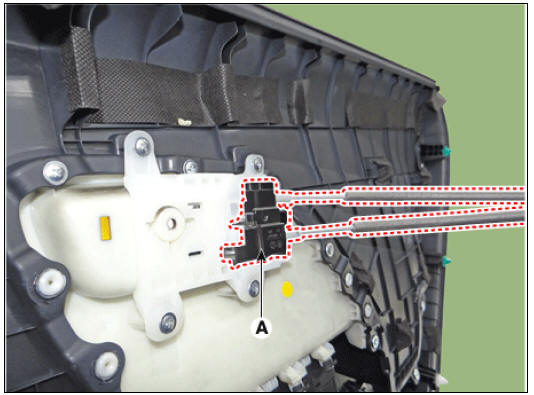
- Disconnect the power window switch connector (A).
- Install in the reverse order of removal.
Warning
- Make sure the connector is connected properly.
- Make sure the door locks/unlocks and opens/closes properly.
- Replace any damaged clips.
Rear Door Inside Handle Repair procedures
Replacement
- Remove the rear door trim.
(Refer to Rear Door - "Rear Door Trim")
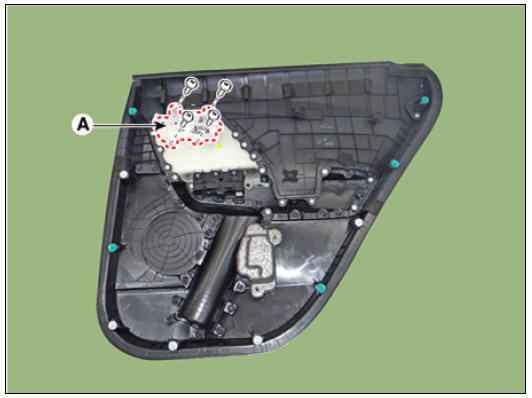
- Remove the rear door inside handle (A) after loosening the mounting screws.
- Install in the reverse order of removal.
Warning
- Make sure the connector is connected properly.
- Make sure the door locks/unlocks and opens/closes properly.
- Replace any damaged clips.
READ NEXT:
 Rear Door Window Glass
Rear Door Window Glass Components and components location
Rear door window glass
Rear Door Window Glass Repair procedures
Replacement
Remove the rear door trim.
(Refer to Rear Door - "Rear Door Trim")
Remove the rear doo
 Rear Door Module
Rear door module
Replacement
Remove the rear door window glass.
(Refer to Rear Door - "Rear Door Window Glass")
Remove the rear door channel (A) after loosening the mounting bolts and
nut.
Tightening torque :
Bolt :
 Rear Door Outside Handle | Rear Door Latch
Rear door outside handle
Replacement
Remove the rear door trim.
(Refer to Rear Door - "Rear Door Trim")
Remove the rear door outside handle cover (A) after loosening the mounting bolt.
Tightening torqu
SEE MORE:
 Cylinder Head Cover Components and components location | Cylinder Head Cover Repair procedures
Components
Camshaft bearing cap
Camshaft front bearing cap
Exhaust camshaft
Intake camshaft
Exhaust CVVT assembly
Intake CVVT assembly
Cylinder head
Cylinder head gasket
Retainer lock
Retainer
 Heater Core Repair procedures | Positive Temperature Coefficient (The PTC)
Replacement
Disconnect the negative (-) battery terminal.
Remove the heater and blower assembly.
(Refer to Heater -"Heater Unit")
Loosen the mounting screws and remove heater core cover (A).
Pull out t
Categories
- Home
- KIA Niro EV, Hybrid - Second generation - (SG2) (2021-2024) - Owner's manual
- Kia Niro - First generation - (DE) (2017-2022) - Service and Repair Manual
- Contact Us
