KIA Niro: Start/Stop Button | ESCL (Electronic Steering Column Lock)
Kia Niro - First generation - (DE) (2017-2022) - Service and Repair Manual / Body Electrical System / Button Engine Start System / Start/Stop Button | ESCL (Electronic Steering Column Lock)
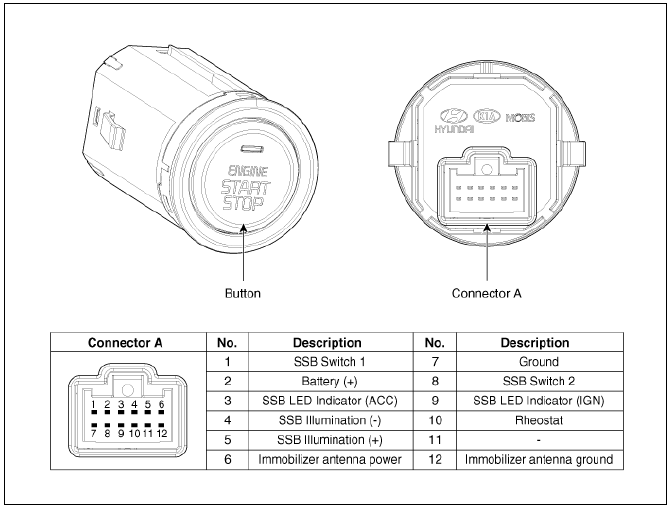
Start/Stop Button Repair procedures
Removal
- Disconnect the negative (-) battery terminal.
- Remove the crash pad garnish assembly (RH). (Refer to Body - "Crash Pad Garnish (RH)")
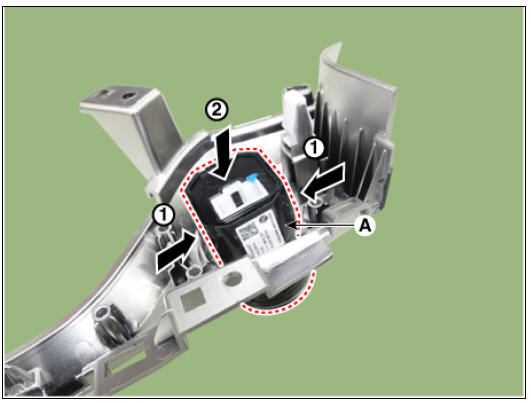
- Remove the start/stop button.
(1) Push the fixed hooks.
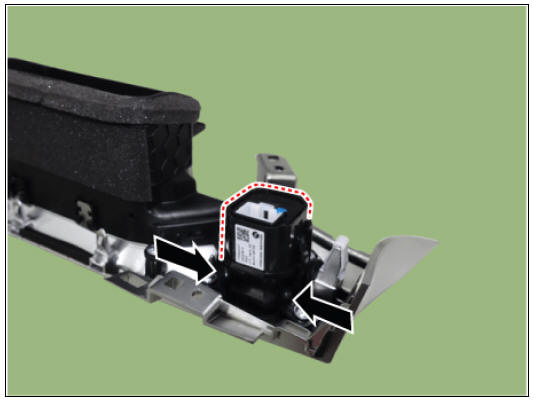
(2) Remove the start/stop button bracket (A) after loosening the mounting screws.

3) Remove the start/stop button (A) by pressing it in the direction of arrow after pushing the fixed hooks.
Installation
- Install in the reverse order of removal.
ESCL (Electronic Steering Column Lock)
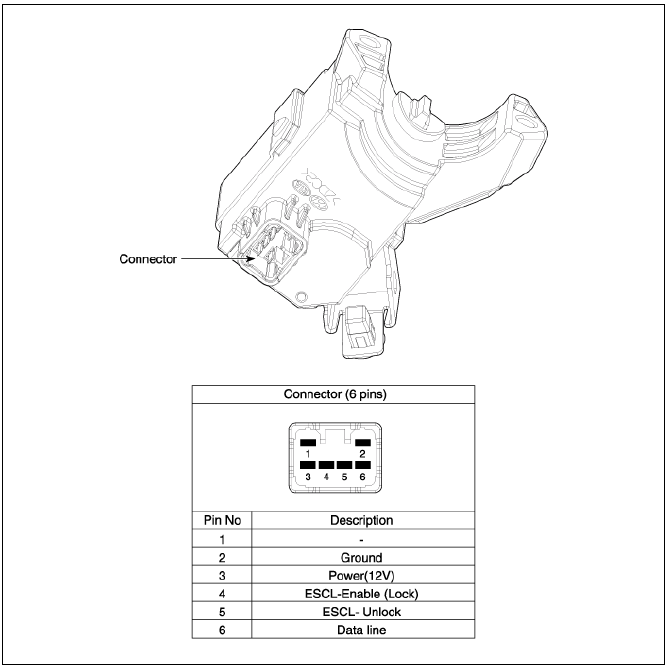
Removal
- Disconnect the negative(-) battery terminal.
- Remove the crash pad lower panel. (Refer to Body - "Crash Pad Lower Panel")
- Remove the steering column upper and lower shrouds. (Refer to Body - "Steering Column Shroud Panel")
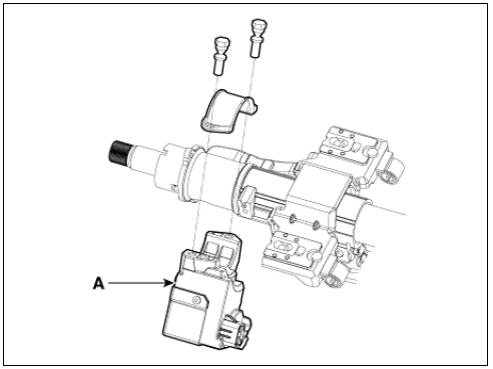
- Disconnect the electronic steering column lock connector (A).
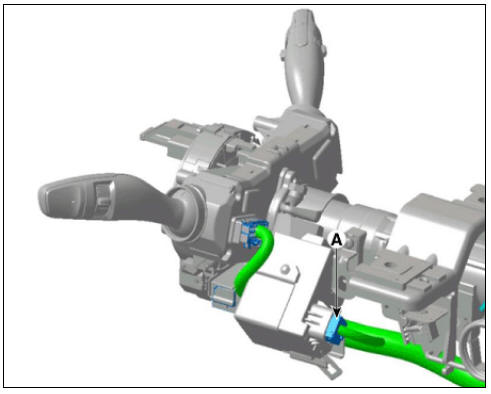
- Remove the electronic steering column lock (A). (Refer to Steering System - "Steering Column and Shaft")
Installation
- Install the electronic steering column lock.
Warning
- Do not reuse the shear bolts.
- When installing the new shear bolts to the electronic steering column lock, tighten the shear bolts until its head is cut off.
Tightening torque : 7.0 - 13.0 N*m (0.7 - 1.3 kgf*m, 5.0 - 9.4 lb*ft)
- Install the steering column.
- Install the crash pad lower panel.
READ NEXT:
 Electro Chromic Inside Rear View Mirror
Schematic Diagrams
Description
The ECM (Electro Chromatic inside rear view Mirror) is one that automatically
dims to protect the
driver's eyes when it senses light reflecting from the car behind. The sensor in
the mirror detects the
brigh
SEE MORE:
Adjusting regenerative braking with paddle shifter
The regenerative braking system allows
you to charge the battery when you use
the brakes to stop the vehicle.
Adjusting regenerative braking with paddle
shifter
Operation
Pull the left side ( ) of
the paddle
shifter to increase
Tire specification and pressure label
Type A
Type B
The tire label located on the center pillar
as shown gives the tire pressures recommended
for your vehicle. The tires supplied
on your new vehicle are chosen to
provide the best performance for normal
driving.
Motor number (
Categories
- Home
- KIA Niro EV, Hybrid - Second generation - (SG2) (2021-2024) - Owner's manual
- Kia Niro - First generation - (DE) (2017-2022) - Service and Repair Manual
- Contact Us