KIA Niro: AC Inverter Unit, Outlet Switch
Kia Niro - First generation - (DE) (2017-2022) - Service and Repair Manual / Body Electrical System / AC Inverter System / AC Inverter Unit, Outlet Switch
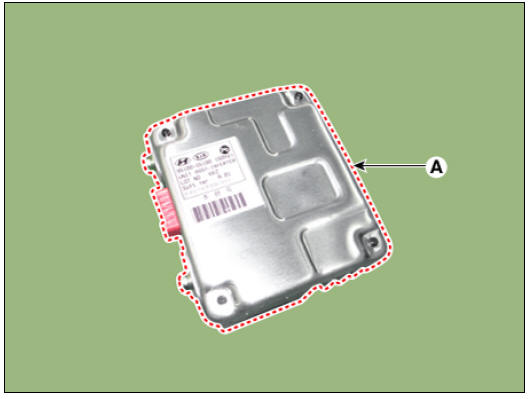
AC Inverter Unit Components and components location
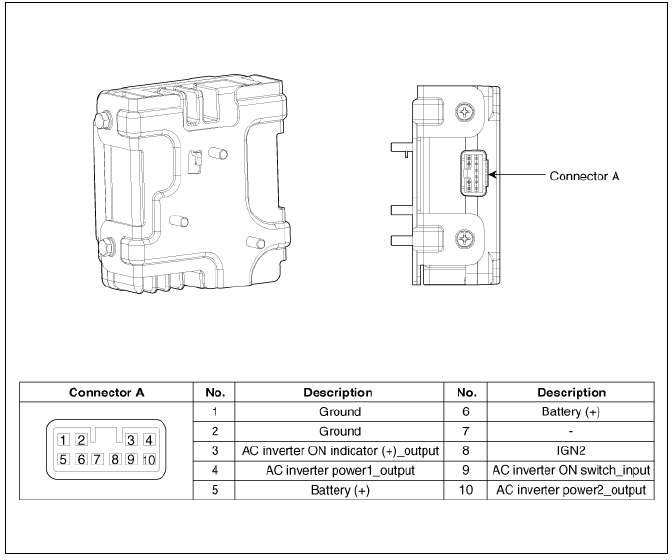
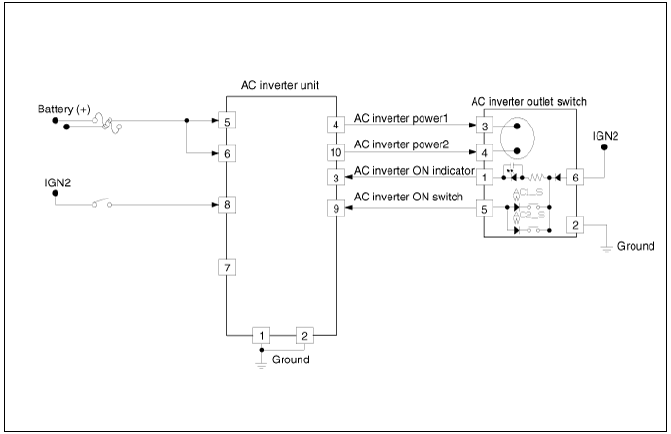
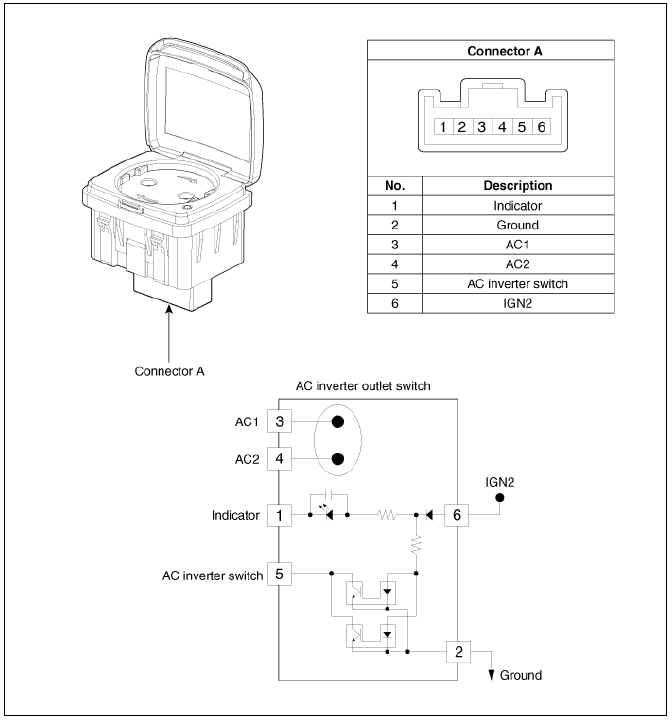
AC Inverter Unit Schematic diagrams
AC Inverter Unit Repair procedures
Removal
- Disconnect the negative (-) battery terminal.
- Remove the luggage side trim (RH).
(Refer to Body - "Luggage Side Trim")
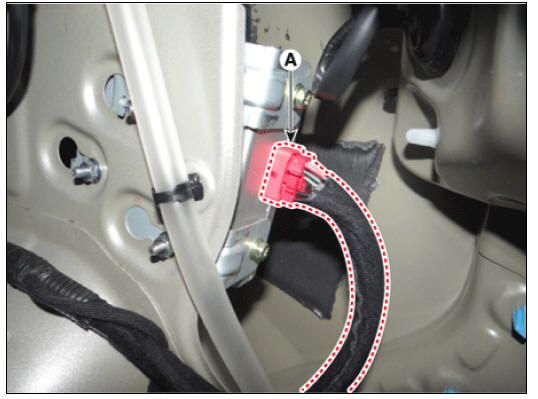
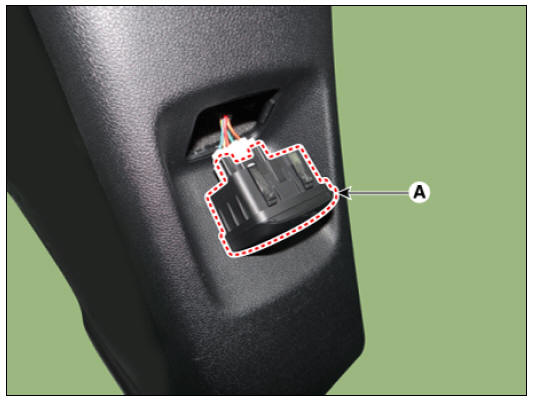
- Disconnect the AC inverter unit connector (A).
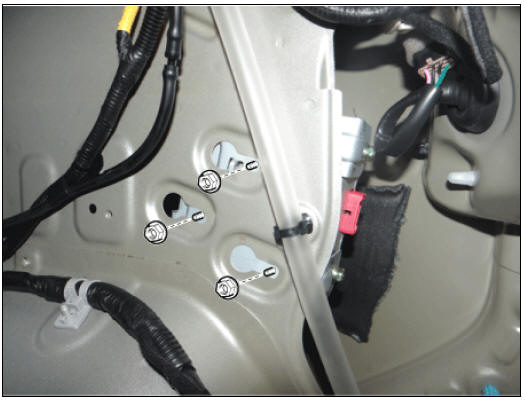
- Remove the AC inverter unit (A) after loosening the mounting nuts.
Installation
- Install in the reverse order of removal.
Warning
- Before starting repair work, turn off the engine and AC inverter.
- Working on AC inverter while it's turned on may cause electric shock.
- Working on AC inverter with wet hands may cause electric shock.
AC Inverter Outlet Switch
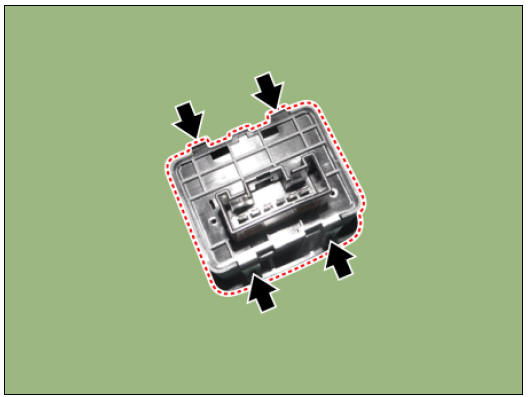
AC Inverter Outlet Switch Components and components location
AC Inverter Outlet Switch Repair procedures
Removal
- Disconnect the negative (-) battery terminal.
- Remove the rear console cover.
(Refer to Body - "Rear Console Cover")
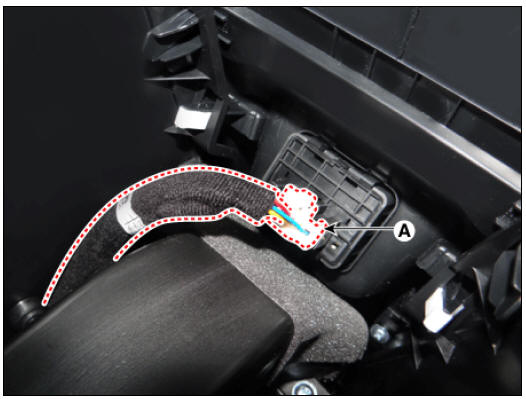
- Disconnect the AC inverter outlet switch connector (A).
- Remove the AC inverter outlet switch (A) after pushing the mounting hooks.
Installation
- Install in the reverse order of removal.
READ NEXT:
 Auto Lighting Control System
Specifications
Auto Lighting Control System / Components And Components Location
Auto light sensor
Headlamps
Lighting switch (Auto)
Rear combination lamps
BCM (Body Control Module)
Description
It's a system that uses i
SEE MORE:
Battery Sensor Repair procedures
Removal
Open the trunk.
Remove the luggage side trim (RH) side cover (A).
Turn the ignition switch OFF and disconnect the battery negative (-)
terminal (A).
Disconnect the battery sensor connector (B).
Battery (-) terminal tig
Climate control system components
A: Outside air
B: Recirculated air
C: Climate control air filter
D: Blower
E: Evaporator core
F: Heater core
The climate control air filter installed
behind the glove box filters the dust or
other pollutants that come into the v
Categories
- Home
- KIA Niro EV, Hybrid - Second generation - (SG2) (2021-2024) - Owner's manual
- Kia Niro - First generation - (DE) (2017-2022) - Service and Repair Manual
- Contact Us